Dec 13, 2024
OpenWrt on Sophos AP55C
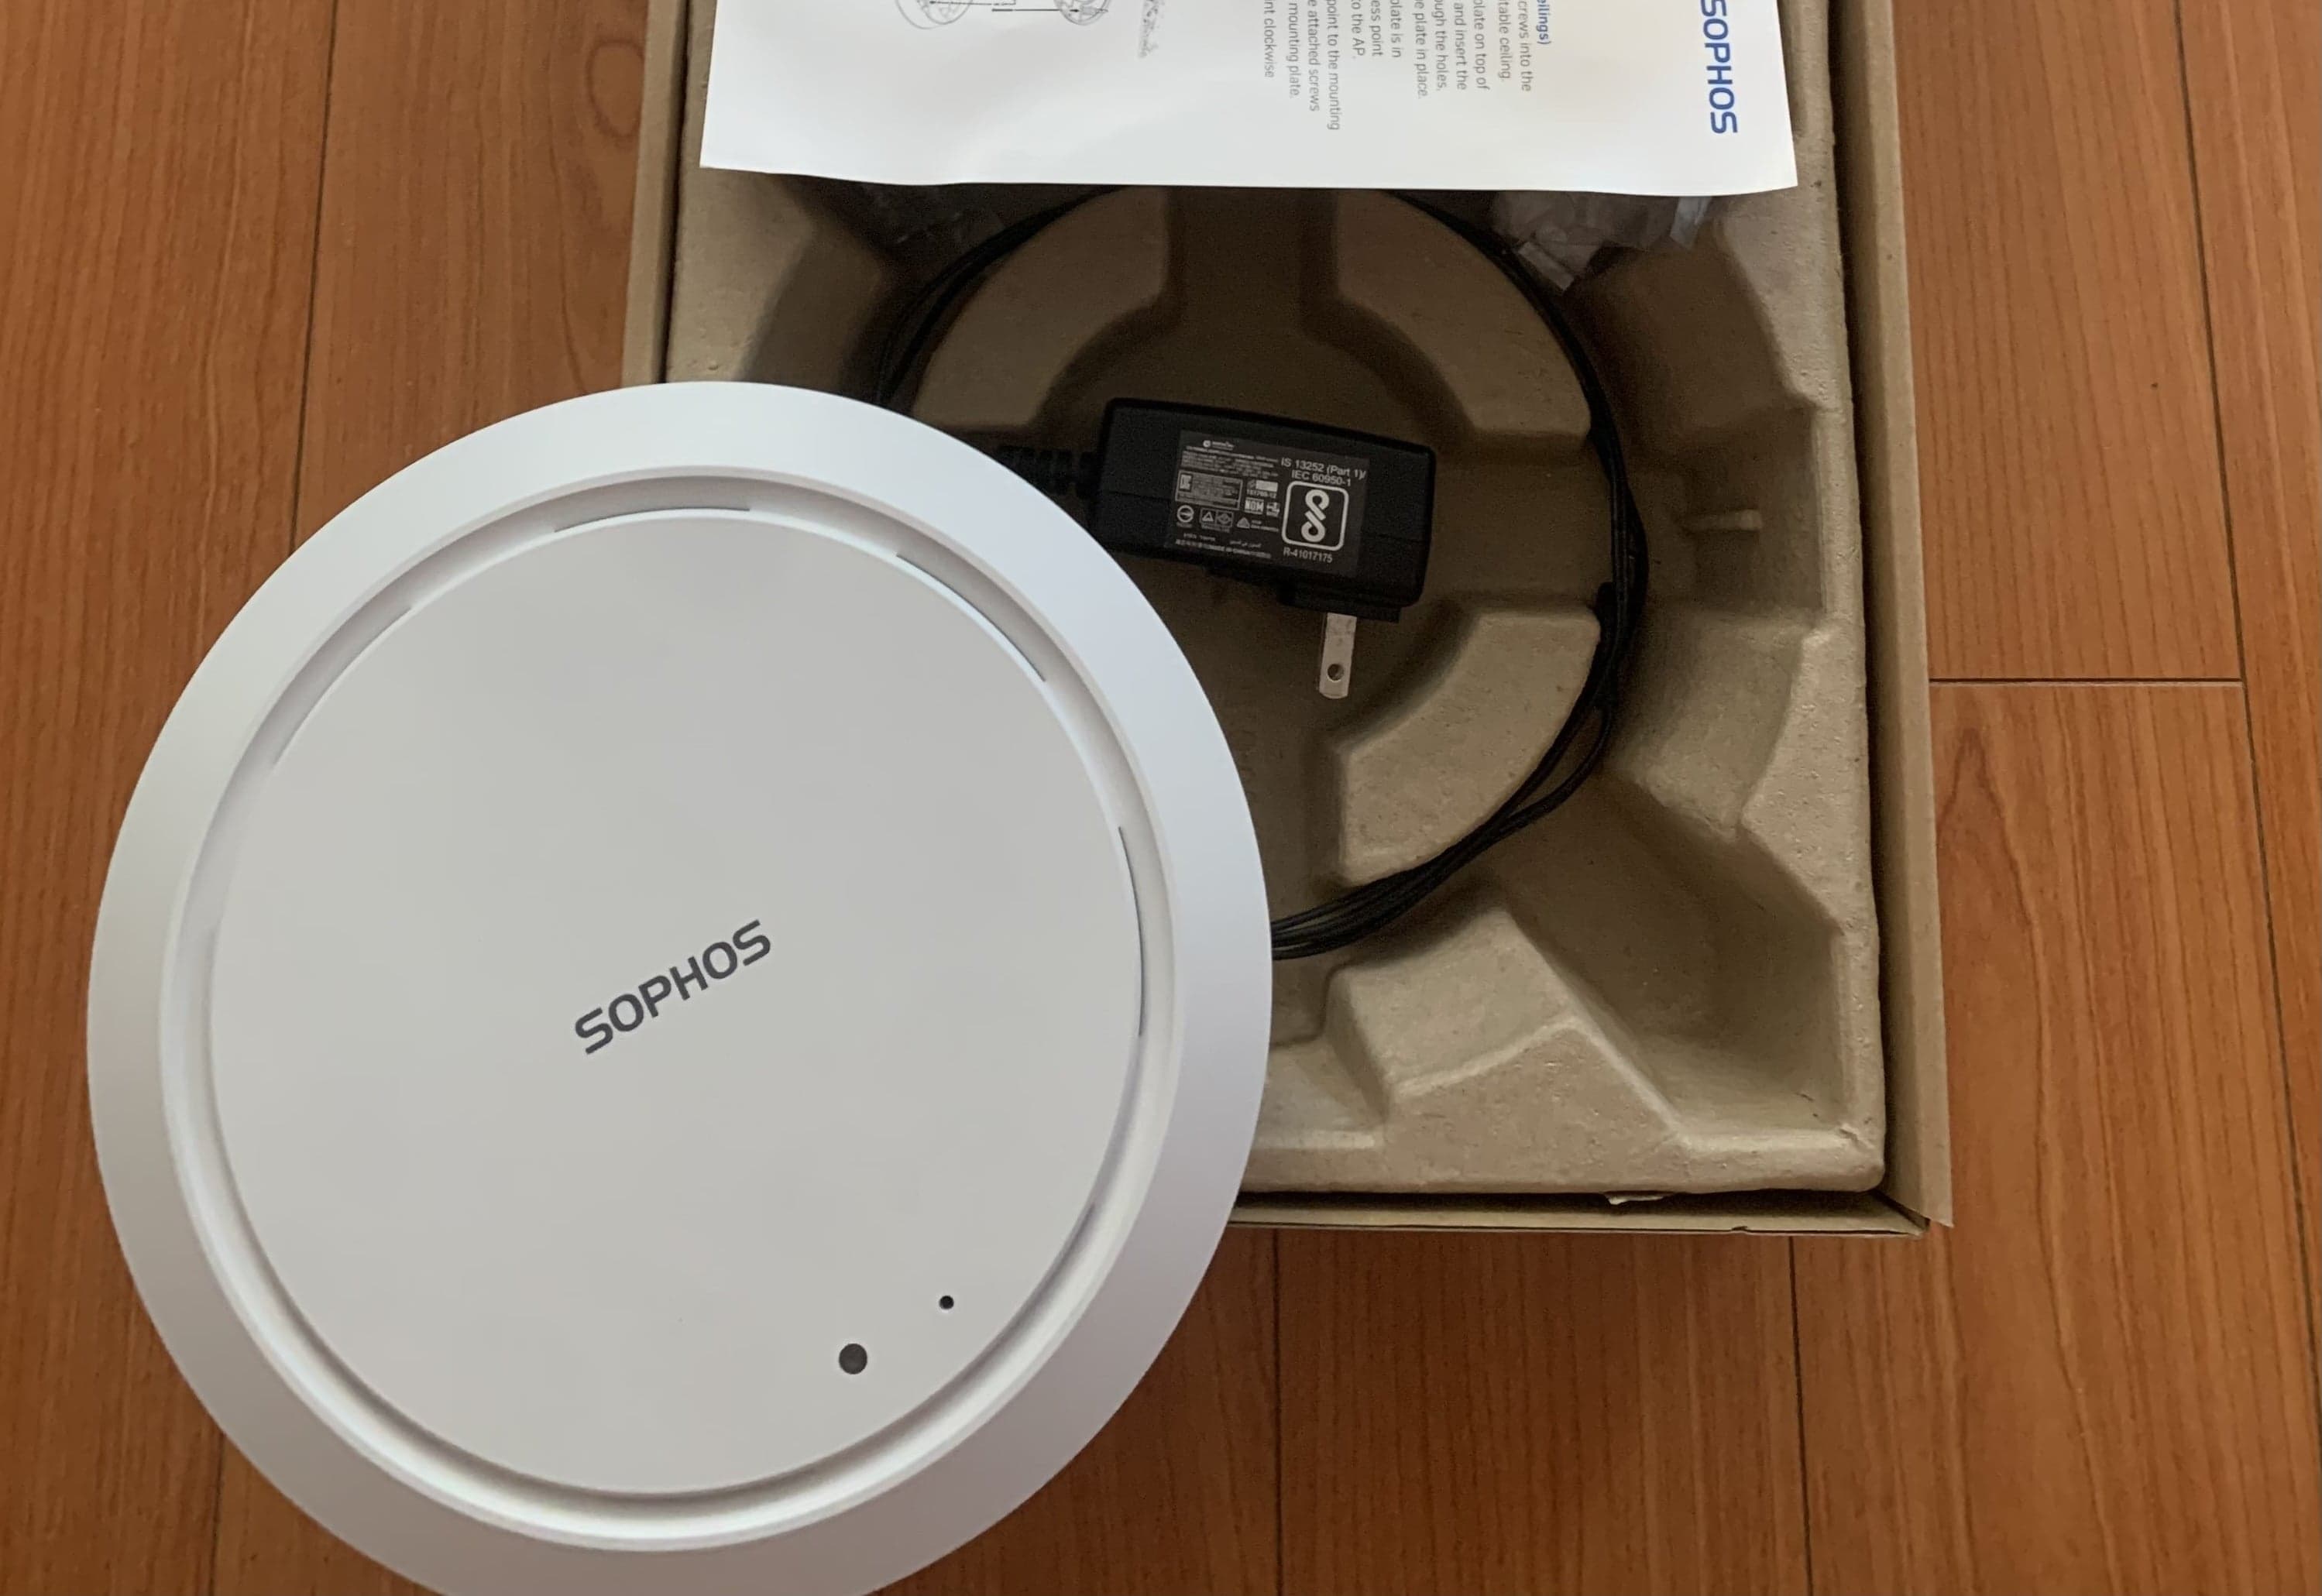
The Sophos AP55C is a capable access point that I've owned for some time. Because it typically requires Sophos Central or a Sophos UTM to operate, and I don't have access to those, I explored flashing it with OpenWrt firmware to use it independently. This tutorial outlines the process. While I didn't record every detail, I've done my best to provide clear instructions.
This tutorial is applicable to the AP100, AP100C, AP55, and AP55C access points. However, I've only successfully flashed an AP55C. As I used an iMac with MacOS, some instructions might be MacOS-specific.
What you need
You can find a USB to TTL serial adapter on AliExpress for around $3 or on Amazon for about $12.
- A computer with both USB and Ethernet ports
- An ethernet cable
- A screw driver
- A CP2102 module USB to TTL serial UART adapter
Step 1: Static IP
We will need to change the computer's network settings so that the Ethernet port has a static IP address. The AP will use that IP for communication with our TFTP server later on.
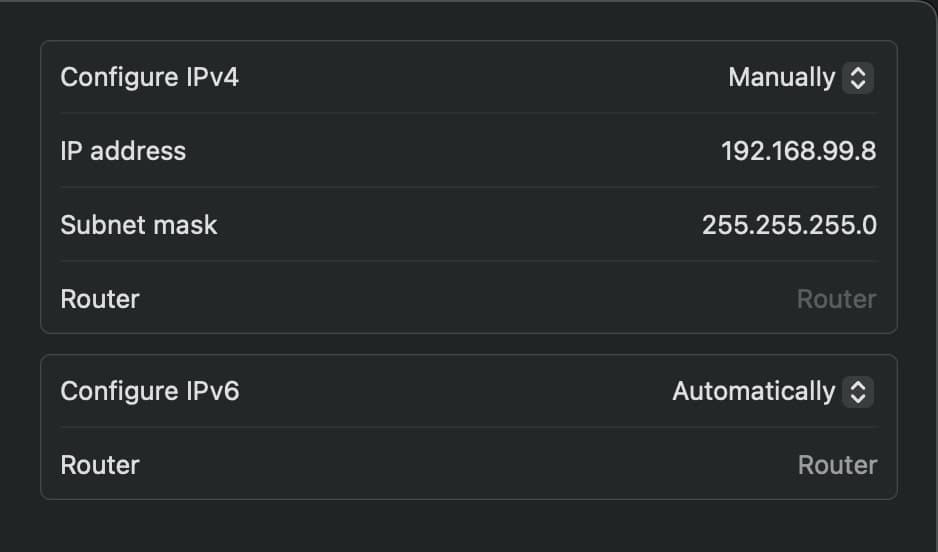
Connect the AP to your computer using an Ethernet cable, and power it on. (In case you have multiple Ethernet ports, this will highlight the used one in the settings.) In your network preferences, locate the Ethernet/LAN port connected to the AP, manually configure IPv4 settings, and assign a static IP:
192.168.99.8with subnet mask of:255.255.255.0. Router leave blank.Make sure to use the same Ethernet port for the further steps.
Step 2: UART
Power off the AP and disassemble it. Locate the UART header as shown in the image.
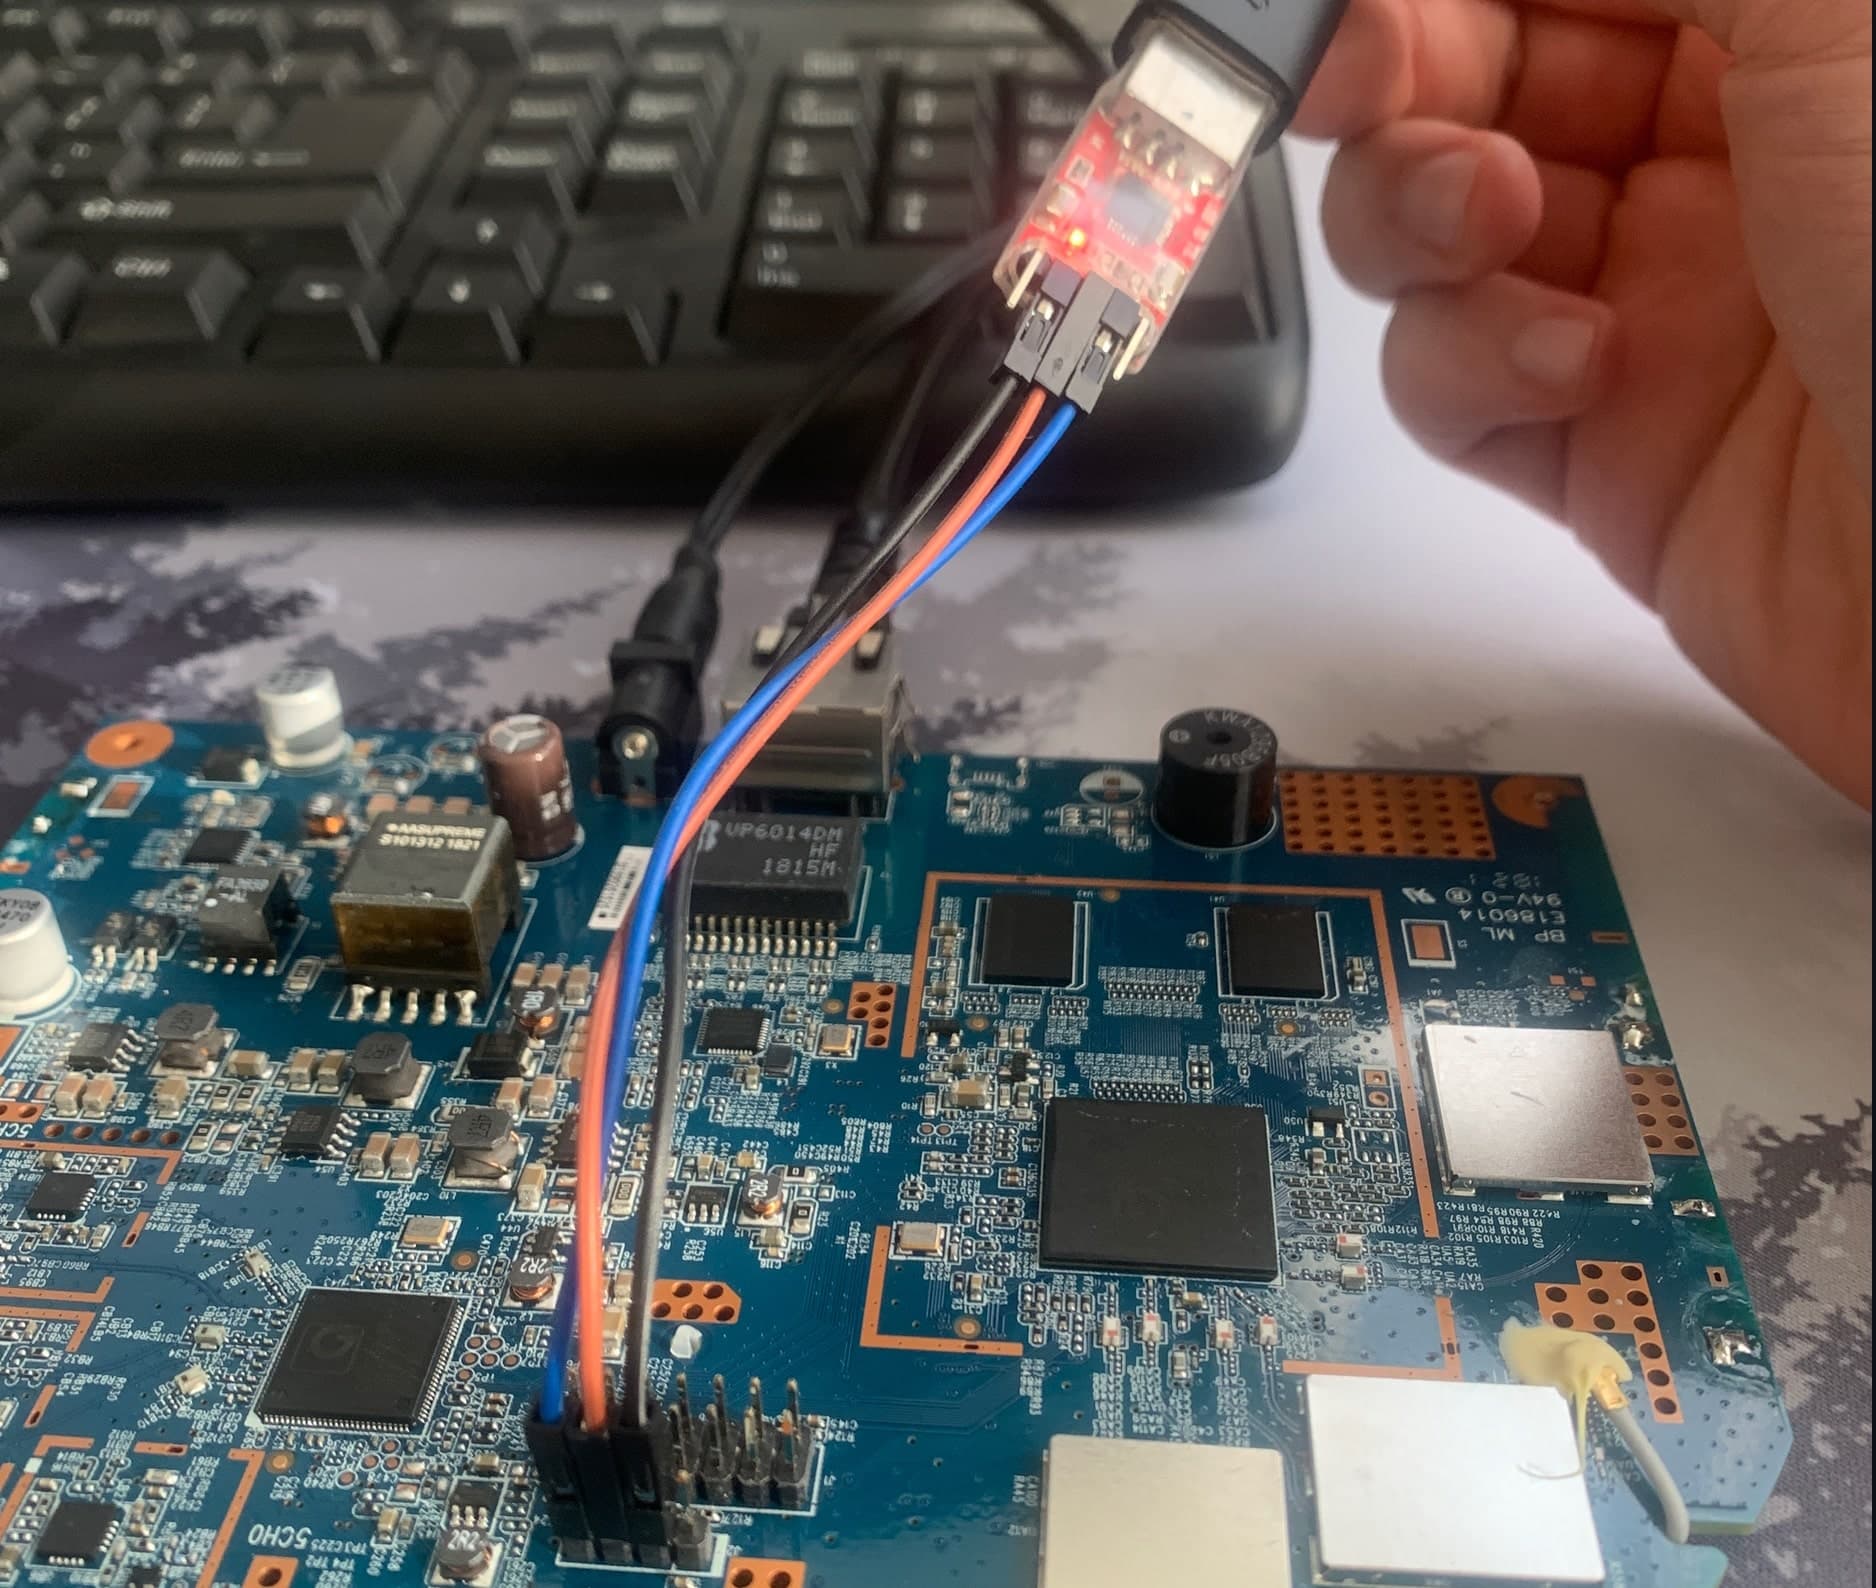
The CP2102 adapter pins from left to right:
- pin 1 - +5V
- pin 2 - GND
- pin 3 - RX
- pin 4 - TX
- pin 5 - 3.3V
Sophos UART header pins from left to right:
- pin 1 - RX
- pin 2 - TX
- pin 3 - GND
- pin 4 - 3.3v
We need to connect Adapter to UART port by the following schema:
- AdapterGND(pin 2)SophosGND(pin 3)
- AdapterRX(pin 3)SophosTX(pin 2)
- AdapterTX(pin 4) SophosRX(pin 1)
We don't need to wire the +5v and 3.3v pins.
You'll likely need to install the CP2102 driver. If you're using macOS, you can download the driver from Silicon Labs. I've included links to the driver:
- https://www.silabs.com/developer-tools/usb-to-uart-bridge-vcp-drivers?tab=downloads
- https://github.com/4ban/Sophos_AP_55C_OpenWRT/blob/main/Mac_OSX_VCP_Driver.zip
Ok, now you have the driver installed and the Sophos UART port connected to the adapter.
Make sure your AP is not yet powered up.
Next, connect the adapter to your computer via USB. This will power on the adapter, and you should see a new device appear in your terminal.
bash
ls /dev/tty.*You should see a new device with a name similar to:
/dev/tty.SLAB_USBtoUARTStep 3: Connecting to the AP console
At this point you should have your Ethernet port configured with a static IP address and the CP2102 adapter connected to the Sophos UART header and to the USB port of your computer.
Next we will try to connect to the AP console using the screen multiplexer. In your terminal type the following command and run it:
bash
screen /dev/tty.SLAB_USBtoUART 115200There might be a chance that you'll have to use sudo for it work
You might not see any output at this point, which is normal. Now, power on the AP! You should see logs appear in the terminal. Look for the following message:
Press any key to stop autoboot and press any key to interrupt the booting process. If everything is ok, you should see the console prompt: ath>Well done hacker! You're in.
Step 4: Firmware
At the time of writing, the latest stable firmware version was 23.05.5.
Let's first download the firmware that we will use to flash the AP. You can find the latest release by following this link: https://downloads.openwrt.org/releases/
Select the
ath79 target, then generic. You'll find a list of device-specific firmware images there, including those for Sophos devices.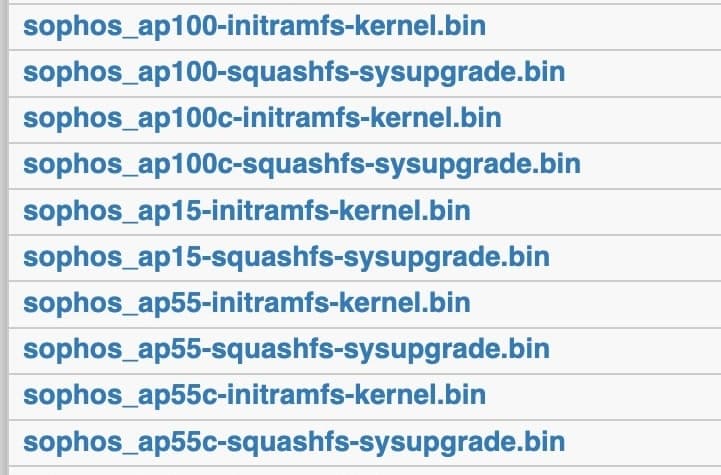
I found that the AP55C sometimes identifies as an AP100C and rejects AP55C-specific firmware, but accepts AP100C firmware. This worked for me. If you have an AP55C, you can try the AP100C firmware, but proceed with caution and at your own risk.
We need two types of firmware images: the
initramfs-kernel image for initial testing, and the squashfs-sysupgrade image for permanent installation. Download the appropriate images to your computer.- sophos_ap100c-initramfs-kernel.bin
- sophos_ap100c-squashfs-sysupgrade.bin
The initramfs firmware loads into the device's RAM, allowing you to test it without permanently flashing the device. This prevents bricking the device if something goes wrong. However, this firmware is erased each time the device restarts.
The sysupgrade firmware writes directly to the device's flash memory. This installation is permanent and persists after restarting the device.
Step 5: TFTP server
We need a way to transfer files between your computer and the AP. We'll use TFTP, which is included with macOS. The default TFTP boot directory is
/private/tftboot. To start the TFTP service, use the following command:bash
sudo launchctl load -w /System/Library/LaunchDaemons/tftp.plistCopy the firmware image to the TFTP boot directory and rename it to
uImage_AP100C.bash
cp /path/to/openwrt-23.05.5-ath79-generic-sophos_ap100c-initramfs-kernel.bin /private/tftpboot/uImage_AP100CWhen I had trouble installing the AP55C firmware, I suspected permission issues with the folders and files. I'm not certain if changing permissions is necessary, but I've included the commands I used, just in case.
bash
sudo chmod 777 /private/tftpboot
sudo chmod 777 /private/tftpboot/uImage_*
You can test the TFTP server by running the following commands:
bash
tftp 127.0.0.1
tftp > get uImage_AP100C
tftp > quit
Step 6: Uploading the firmware to the device
Now we can upload the firmware to the AP. Focus on the terminal displaying the AP console (from Step 3). First, set the TFTP server IP address and the AP's IP address.
As you remember we set the static IP address for the Ethernet port to 192.168.99.8. This one will be our server IP.
bash
ath> setenv serverip 192.168.99.8
ath> setenv ipaddr 192.168.99.9
# check if it was saved
ath> printenv
Next step is to run tftp and load firmware from computer to the AP.
bash
ath> tftpbootYou'll see the progress logs and the message that firmware is being loaded into RAM.
bash
Speed is 1000T
dup 1 speed 1000
Using eth0 device
TFTP from server 192.168.99.8; our IP address is 192.168.99.9
Filename 'uImage_AP100C'.
Load address: 0x81000000
Loading:
done
Bytes transferred = 6422825 (620129 hex)
According to other guides (see References), the firmware loads to the incorrect address
0x81000000. The AP requires it to be at 0x9f070000. Set the firmware address using:bash
ath> setenv fwaddr 0x9f070000bash
# should return 0x9f070000
echo $fwaddr
Now we need to free up some space in memory for the firmware.
bash
ath> erase $fwaddr +$filesizeAnd then copy the firmware to the memory.
bash
ath> cp.b $fileaddr $fwaddr $filesizeAfterwards, verify the firmware's integrity. The command below should return Verifying Checksum ... OK:
Verifying Checksum ... OKbash
ath> iminfo $fwaddrStep 7: First boot
If everything looks good, try booting into OpenWrt.
bash
ath> bootI don't recall if the AP console prompt changes, but you should see messages indicating that the AP is now running the OpenWrt firmware.
When the AP is booted, you should press
Enterin order to access the console again.The AP is in initramfs mode, so if you restart it, the AP will erase the firmware from RAM and load back the original Sophos firmware. We don't want that just yet.
Our AP is now connected to the computer via Ethernet (using a static IP) and via the UART adapter through USB. OpenWrt firmware is loaded in RAM. At this point, you should have access to the AP console, and you should *not* power off the device.
In order to test the firmware we have 2 options.
Option 1: With internet (Recommended)
Without powering off the device, connect the AP to your router's LAN port (not the WAN port). In the AP console, modify the default network configuration file.
bash
vi /etc/config/networkThe default file should look like this:
bash
config device
        option name 'br-lan'
        option type 'bridge'
        list ports 'eth0'

config interface 'lan'
        option device 'br-lan'
        option proto 'static'
        option ipaddr '192.168.1.1'
        option netmask '255.255.255.0'
We need to reconfigure it to use DHCP instead of static address as well as remove ipaddr and netmask lines.
bash
config device
        option name 'br-lan'
        option type 'bridge'
        list ports 'eth0'

config interface 'lan'
        option device 'br-lan'
        option proto 'dhcp'
Save the file and exit the editor. In vi, press
Esc then type :wq to save and quit. Afterwards, restart the network service.bash
service network restartTry to ping some website.
bash
ping -c 4 google.comIf successful, you should see responses from the website, indicating internet connectivity. Now you can permanently install the firmware. Locate the sysupgrade firmware image in the same directory as the initramfs-kernel image (AP100C in my case). https://downloads.openwrt.org/releases/ Copy the URL to your clipboard. It should resemble: https://downloads.openwrt.org/releases/23.05.5/targets/ath79/generic/openwrt-23.05.5-ath79-generic-sophos_ap100c-squashfs-sysupgrade.bin Run the sysupgrade command, providing the URL to the firmware image.
Make sure you're using the sysupgrade version of the firmware.
bash
sysupgrade https://downloads.openwrt.org/releases/23.05.5/targets/ath79/generic/openwrt-23.05.5-ath79-generic-sophos_ap100c-squashfs-sysupgrade.binThe AP will download and permanently install the OpenWrt firmware to flash memory, then reboot. Any settings made previously are lost because the RAM is cleared upon reboot, and the network configuration reverts to its defaults. You'll need to re-apply your configuration changes.
bash
vi /etc/config/networkThe default file should look like this:
bash
config device
        option name 'br-lan'
        option type 'bridge'
        list ports 'eth0'

config interface 'lan'
        option device 'br-lan'
        option proto 'static'
        option ipaddr '192.168.1.1'
        option netmask '255.255.255.0'
Change it to use DHCP instead of static address as well as remove ipaddr and netmask lines.
bash
config device
        option name 'br-lan'
        option type 'bridge'
        list ports 'eth0'

config interface 'lan'
        option device 'br-lan'
        option proto 'dhcp'
Save the file and exit the editor. After that restart the network service.
bash
service network restartNow, determine the AP's IP address and navigate to it using your web browser.
bash
ip aThe default credentials are
root with [no password]. You should immediately change the default password after logging in via the web interface.You're done. Congratulations! Enjoy your device!
Option 2: Without internet
Without turning off the device. The AP is still connected to the computer via Ethernet. And we still have access to the AP console.
Try navigating to 192.168.1.1
If that doesn't work and you can't reach the OpenWrt web interface, reset your Ethernet port's network settings to DHCP (automatic).
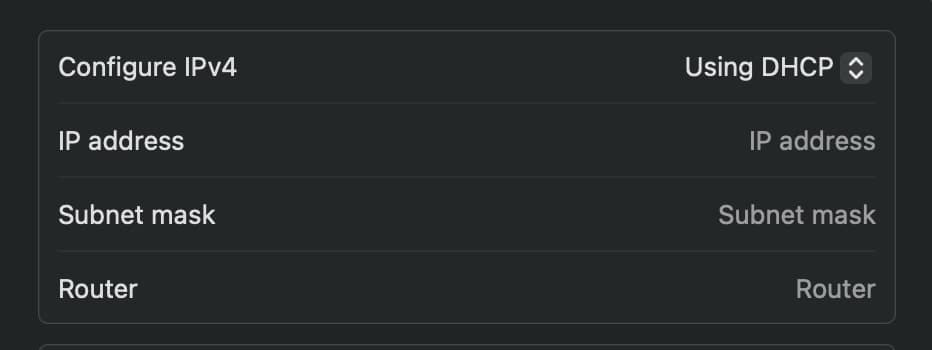
And in the AP console restart the network service
bash
service network restartNow we can try going to the 192.168.1.1 again. If everything is ok, you should see the OpenWrt web interface (login page). That means that the firmware is working and we can start flashing it to the permanent memory.
The AP doesn't have access to the internet and we need to transfer the sysupgrade firmware we downloaded in Step 4 to the AP. So we will have to configure everything back to static.

Change the IPv4 cofiguration to manual and assign a static IP:
192.168.99.8with subnet Mask:255.255.255.0. Router leave blank.And in the AP console restart the network service just in case
bash
service network restartYou could try using TFTP again to upload the firmware as in Steps 5-6, but this didn't work for me. I also attempted SSH, but I don't recall if it was successful. Ensure you verify the correct IP address if attempting SSH.
bash
scp /path/to/openwrt-23.05.5-ath79-generic-sophos_ap100c-squashfs-sysupgrade.bin root@192.168.1.1:/tmpAnother approach is to run a simple HTTP server on your computer to host the firmware file, allowing the AP to download it. Create a directory named
firmwares on your desktop, move the firmware file into it, and then start a Python HTTP server.bash
mv /path/to/openwrt-23.05.5-ath79-generic-sophos_ap100c-squashfs-sysupgrade.bin ~/Desktop/firmwares
cd ~/Desktop/firmwares
python3 -m http.server 8000
Now in the AP console we need to find a way to download the firmware to the device. I don't remember what IP I have used but it should be either the IP that your router assigned to your computer or the static one we set in the network settings.
bash
wget http://192.168.1.112:8000/openwrt-23.05.5-ath79-generic-sophos_ap100c-squashfs-sysupgrade.bin -O /tmp/sysupgrade.bin
wget http://192.168.99.8:8000/openwrt-23.05.5-ath79-generic-sophos_ap100c-squashfs-sysupgrade.bin -O /tmp/sysupgrade.bin
If you successfully uploaded the firmware to the device, it should now be in the
/tmp directory. Run the sysupgrade command, specifying the path to the firmware image.bash
sysupgrade /tmp/sysupgrade.binThe AP will permanently install the OpenWrt firmware to flash memory, then reboot. Any settings made previously are lost because the RAM is cleared upon reboot, and the network configuration reverts to its defaults. You'll need to re-apply your configuration changes.
bash
vi /etc/config/networkThe default file should look like this:
bash
config device
        option name 'br-lan'
        option type 'bridge'
        list ports 'eth0'

config interface 'lan'
        option device 'br-lan'
        option proto 'static'
        option ipaddr '192.168.1.1'
        option netmask '255.255.255.0'
Change it to use DHCP instead of static address as well as remove ipaddr and netmask lines.
bash
config device
        option name 'br-lan'
        option type 'bridge'
        list ports 'eth0'

config interface 'lan'
        option device 'br-lan'
        option proto 'dhcp'
Save the file and exit the editor. Now, disconnect the Ethernet cable from your computer and connect the AP to your router's LAN port. After that restart the network service.
bash
service network restartNow you can see the APs IP address using AP console and navigate to it in the browser. Or simply check the AP IP in your router web interface.
bash
ip aDefault credentials are still the same
root with [no password]. You will have to change the default password the first thing after login to the web interface.You're done. Congratulations! Enjoy your device!
Conclusion
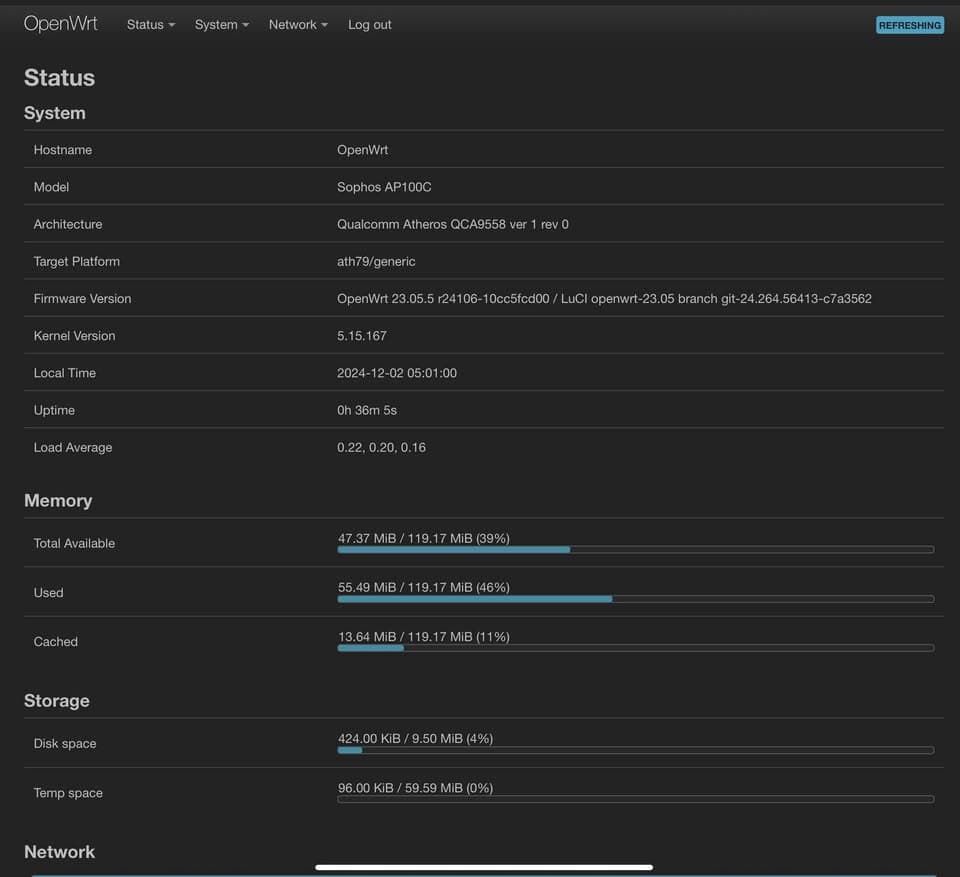
The flashing process is relatively straightforward, though I encountered some difficulties. I hope this tutorial saves you time. The core steps are fairly simple:
- Access the AP console via UART
- Upload the initramfs firmware to the AP via TFTP
- Boot into OpenWrt
- Configure the AP network settings for DHCP
- Connect the AP to your router's LAN port
- Upload sysupgrade firmware to the AP or make sure internet is available
- Flash the sysupgrade firmware to the AP (either with or without internet)
Don't forget to unload the tftp service
bash
sudo launchctl unload -w /System/Library/LaunchDaemons/tftp.plistHappy hacking!