May 03, 2025
Corne: Low-profile wireless split keyboard
10 min read
I've always loved mechanical keyboards, and recently decided it was time to try a split keyboard. Not just for the ergonomic benefits, but also because they look awesome. Since I enjoy DIY projects, I thought, why not build one from scratch?
This isn't a full assembly guide! I've skipped many steps, tips, and details here. My goal is simply to share the excitement of building something cool.
Parts
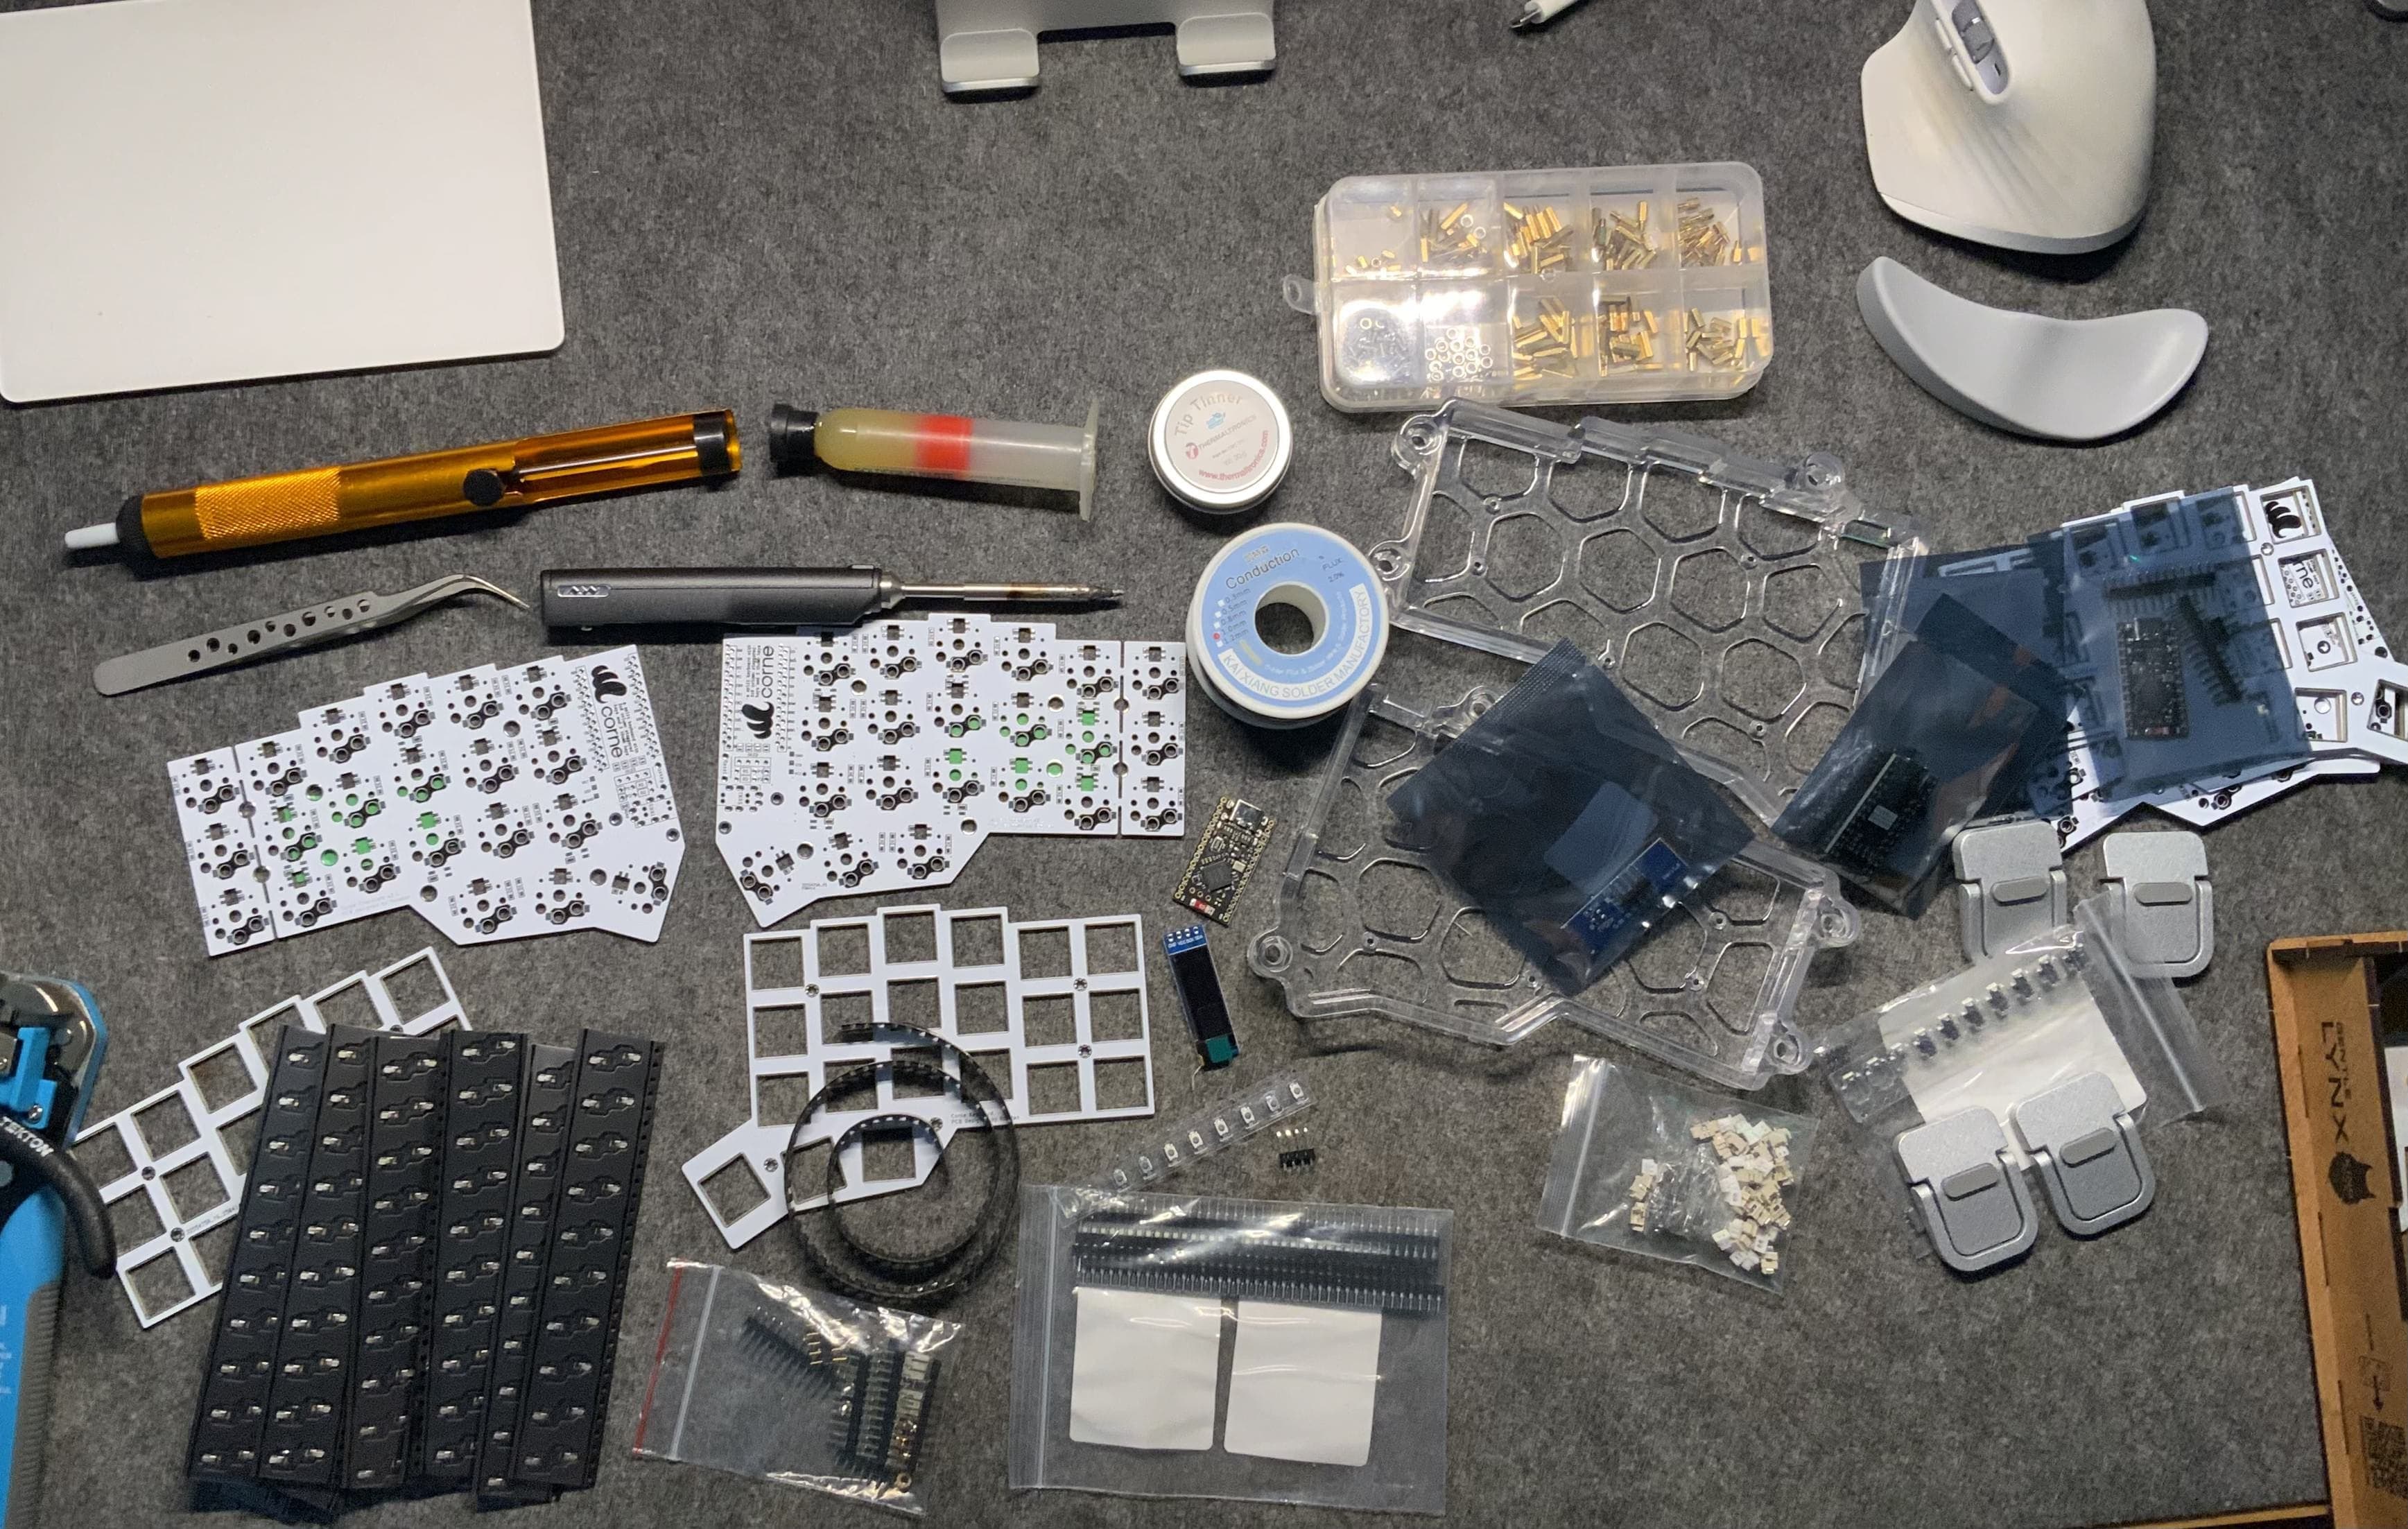
To build a keyboard, we need quite a few different components, including:
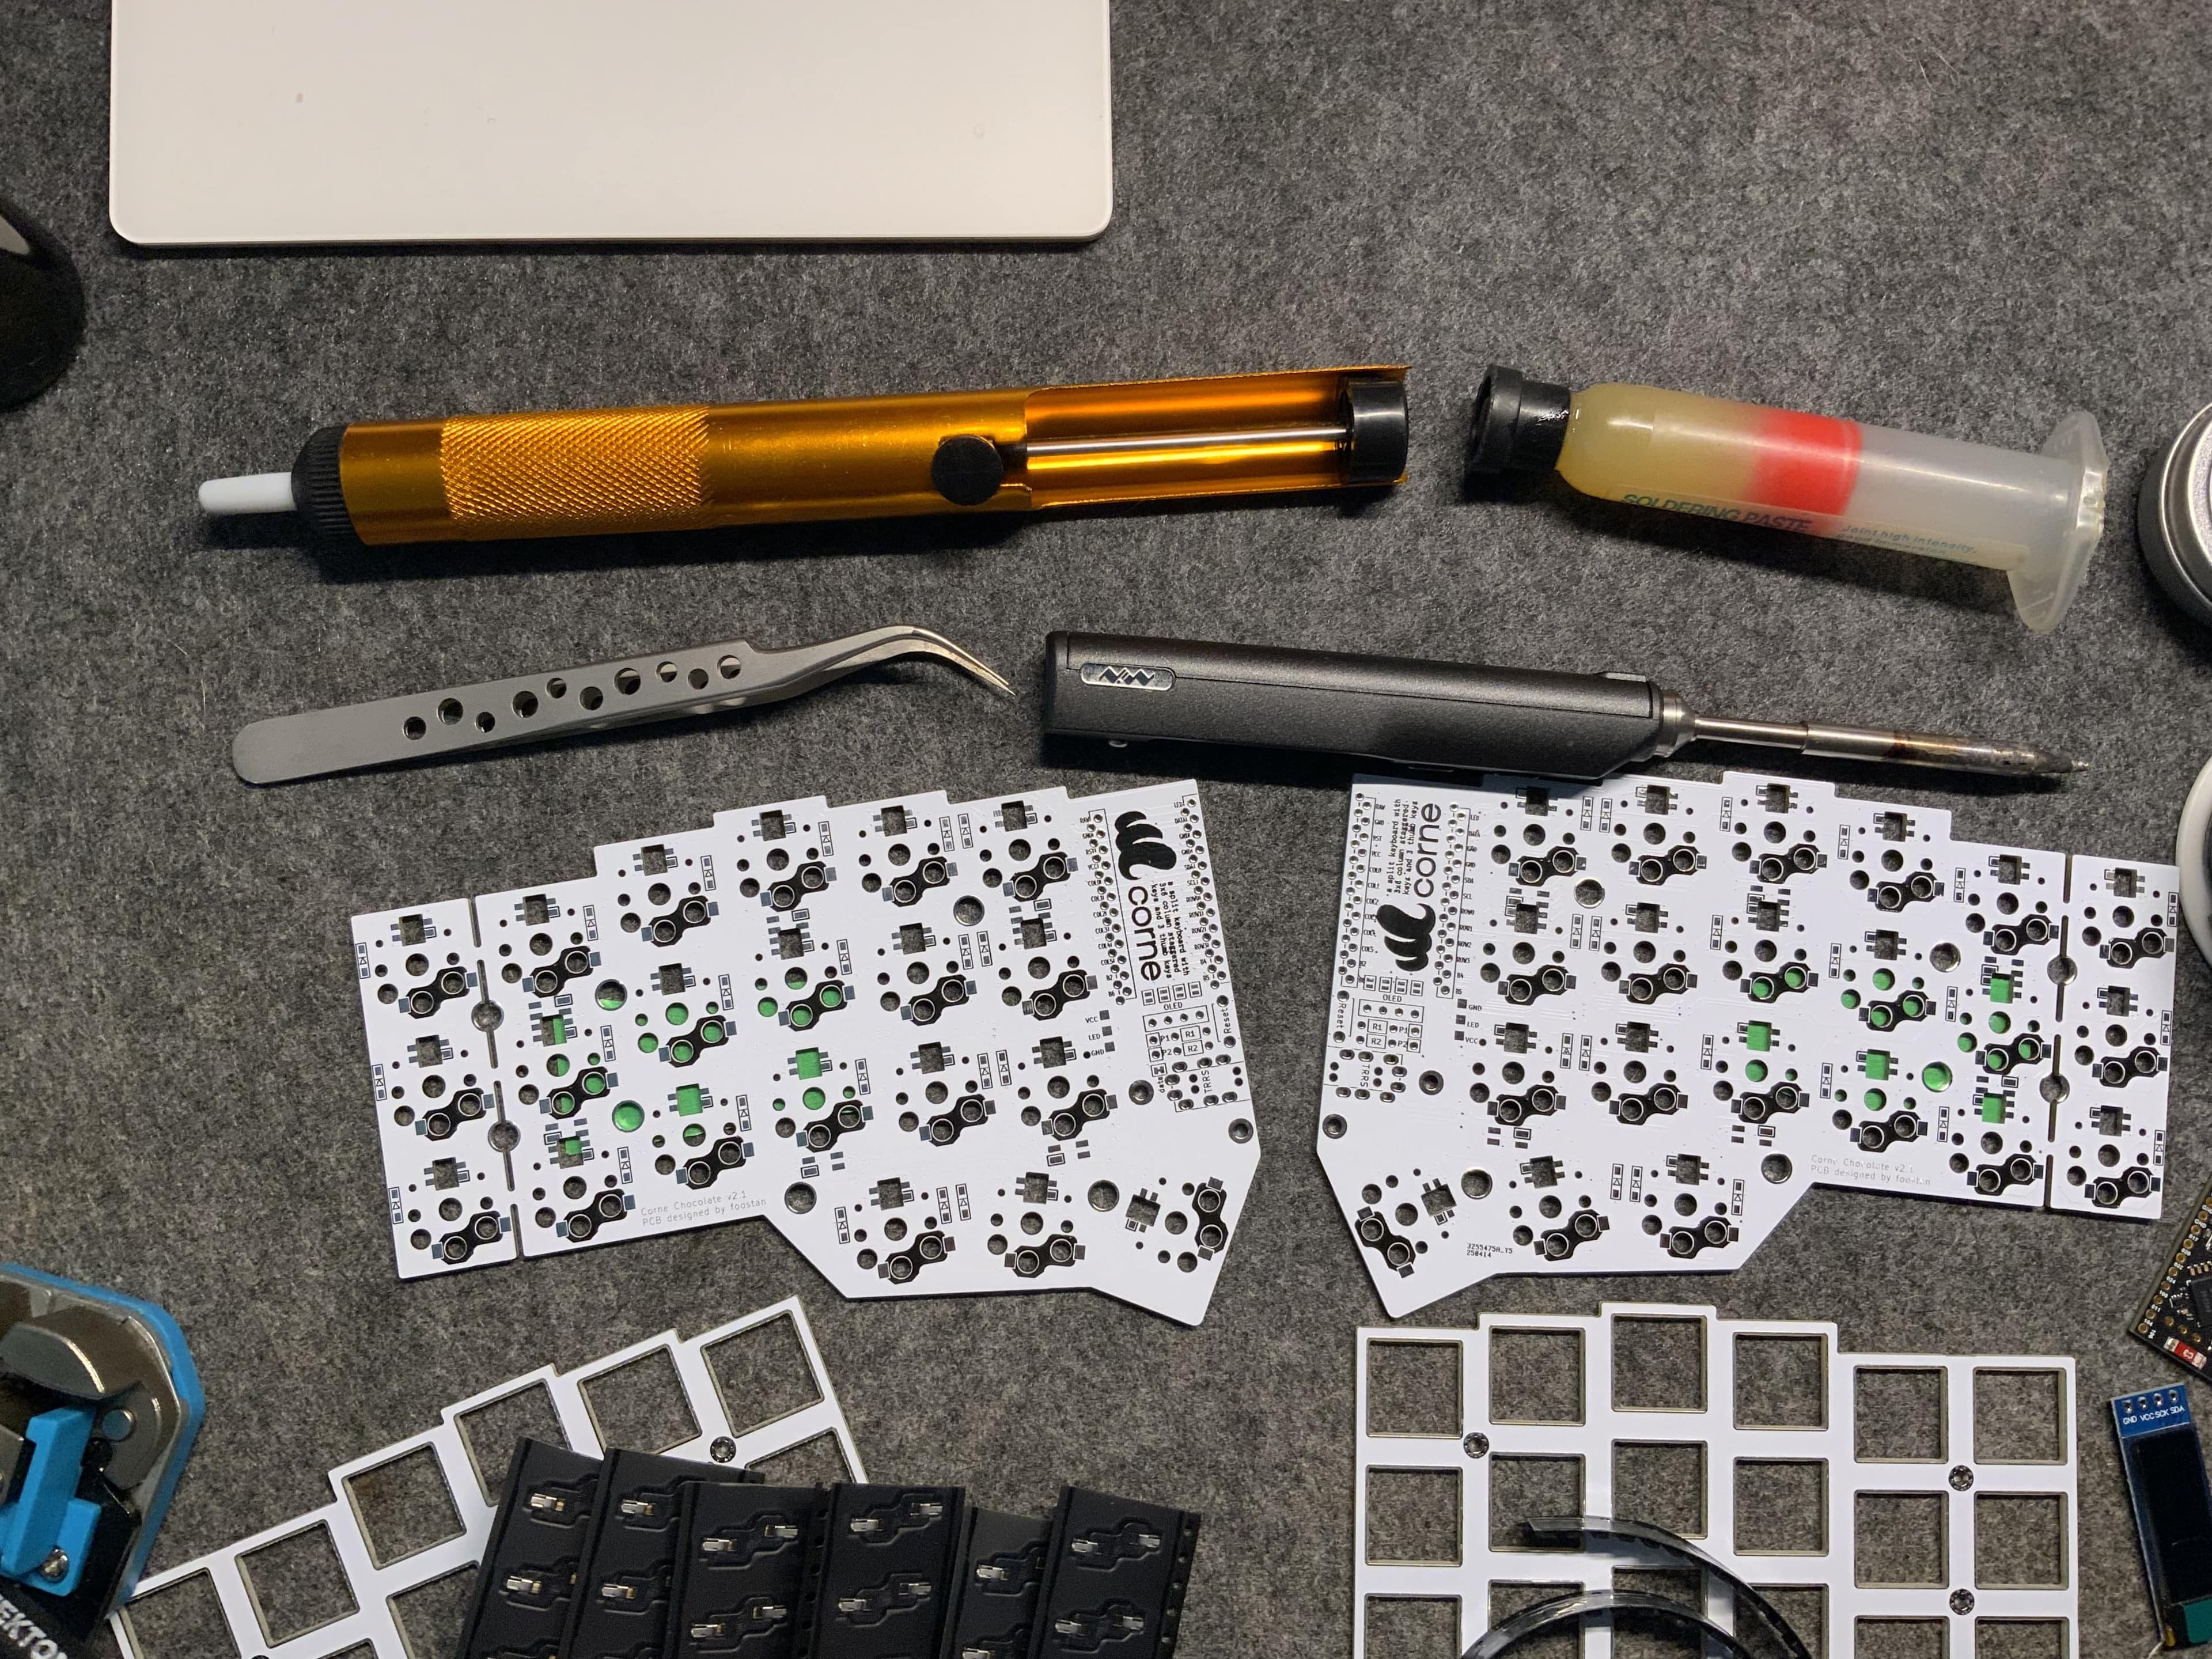
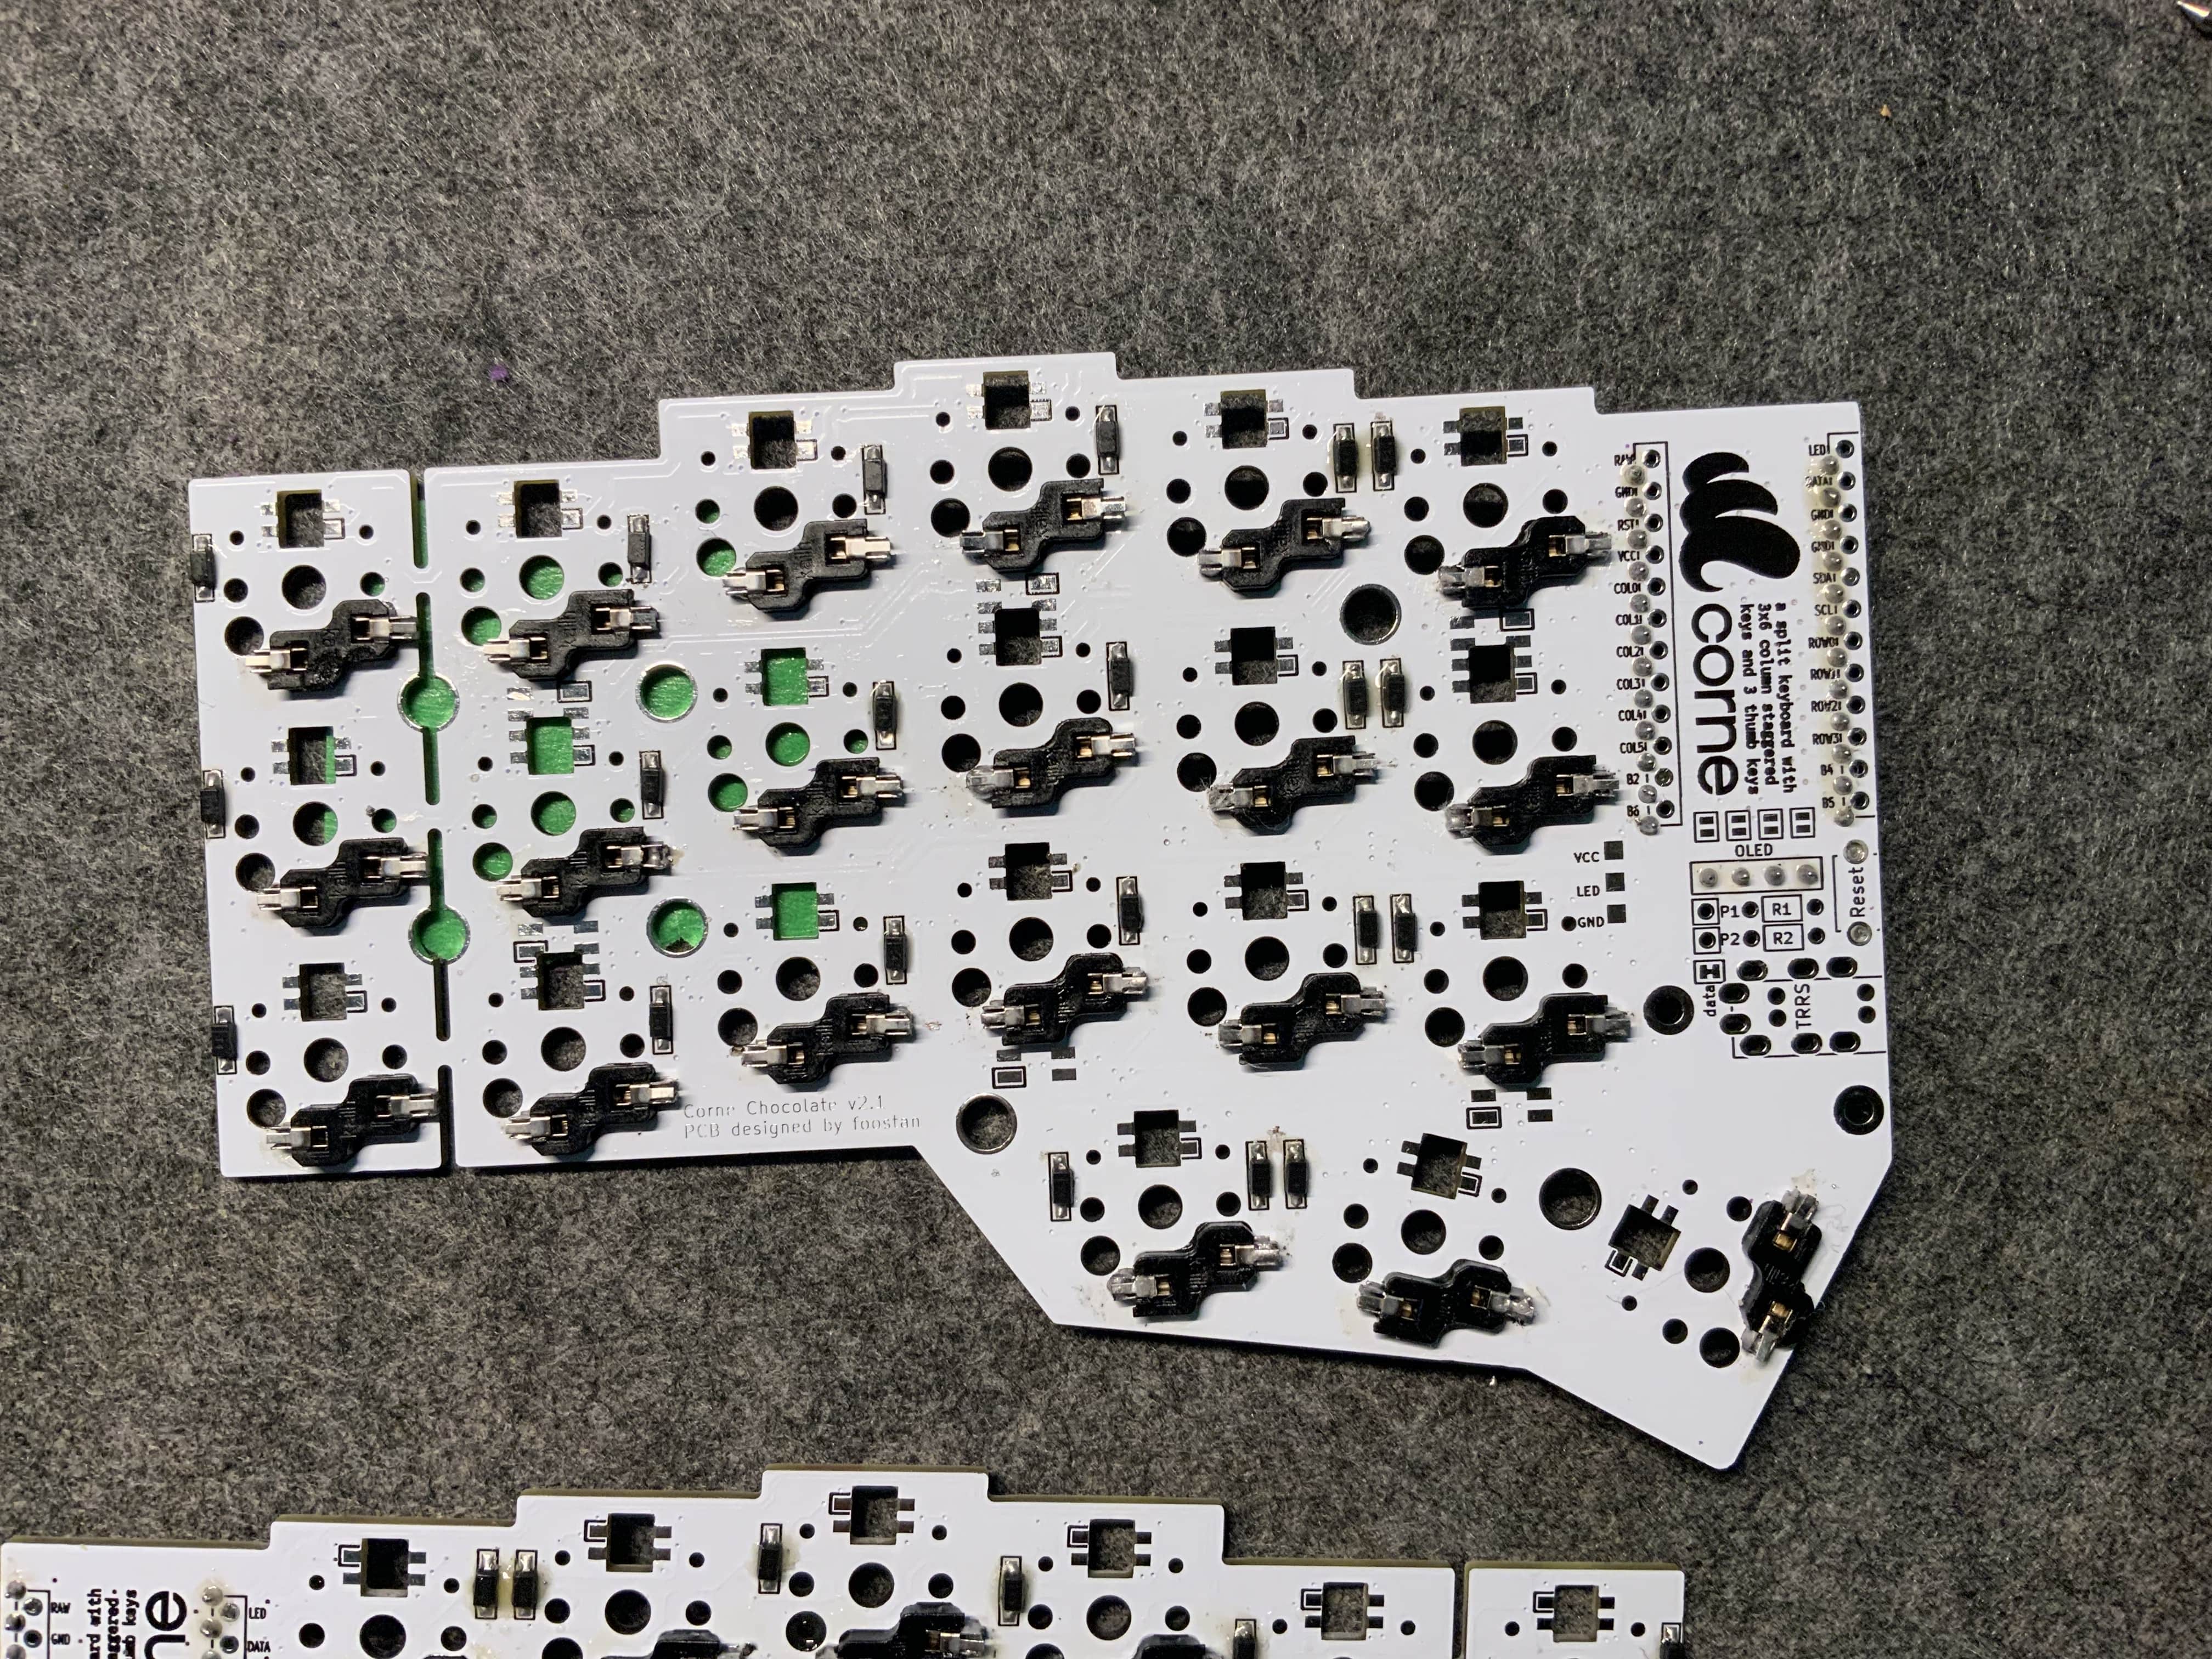
- 2 PCBs
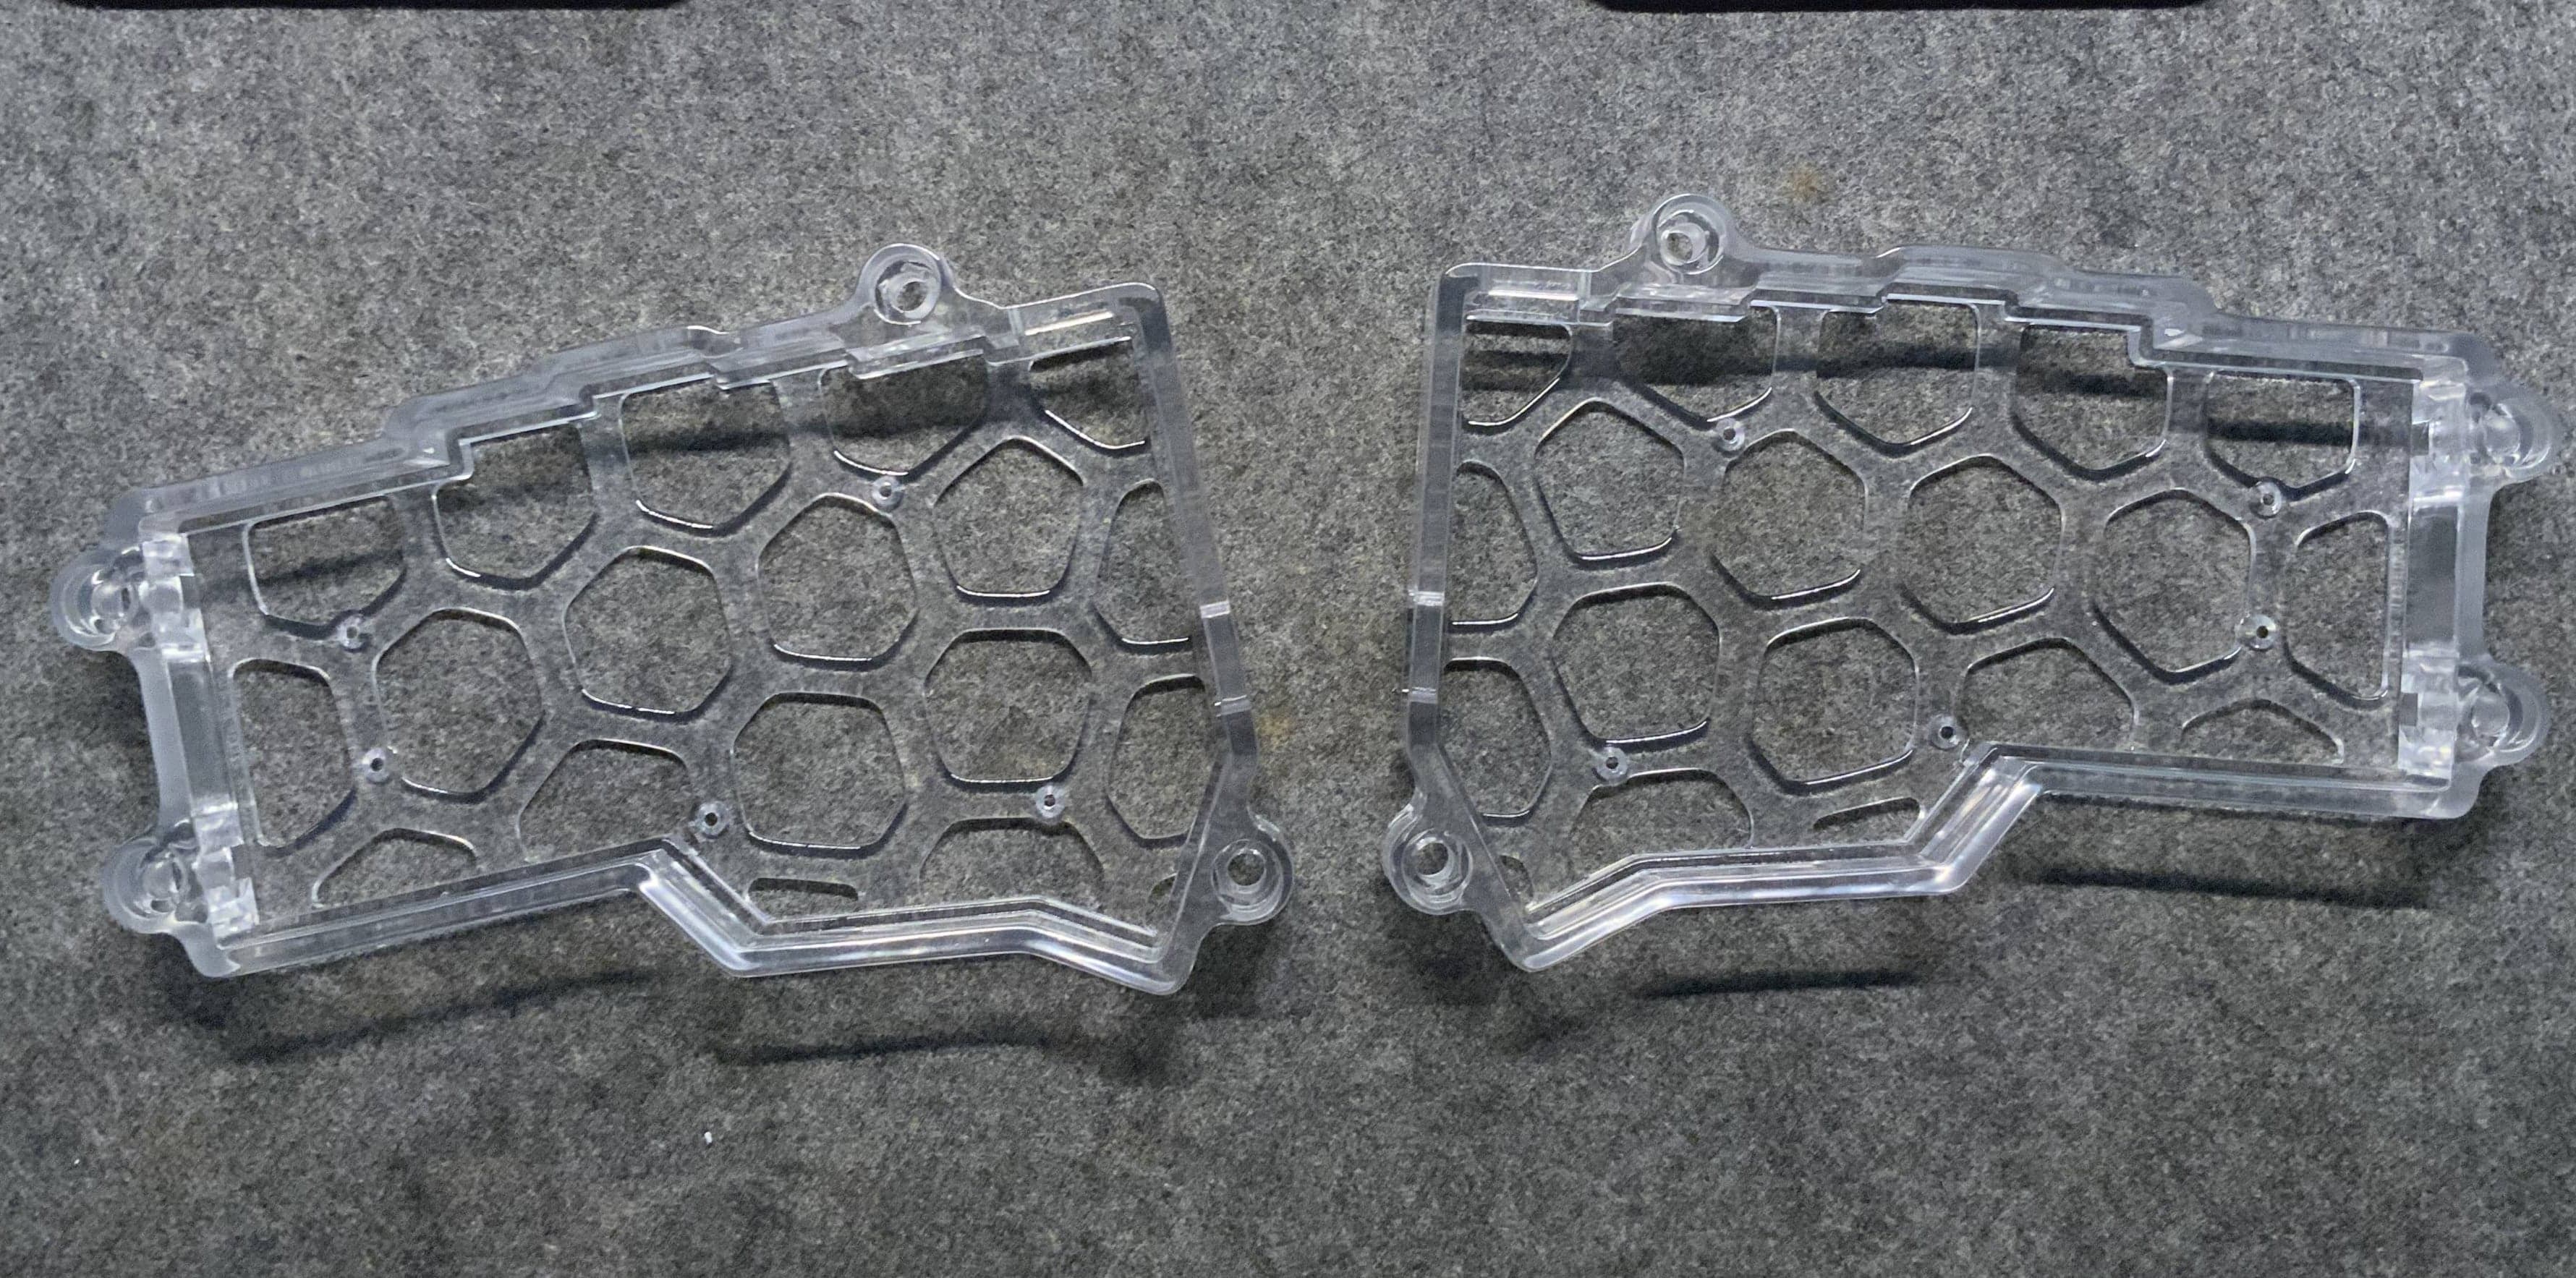
- 2 switch top plates
- Left and Right cases
- 42 Diodes
- 42 kailh choc sockets
- 42 Switches (Kailh choc v1 or v2)
- 42 Keycaps for choc v1 or v2
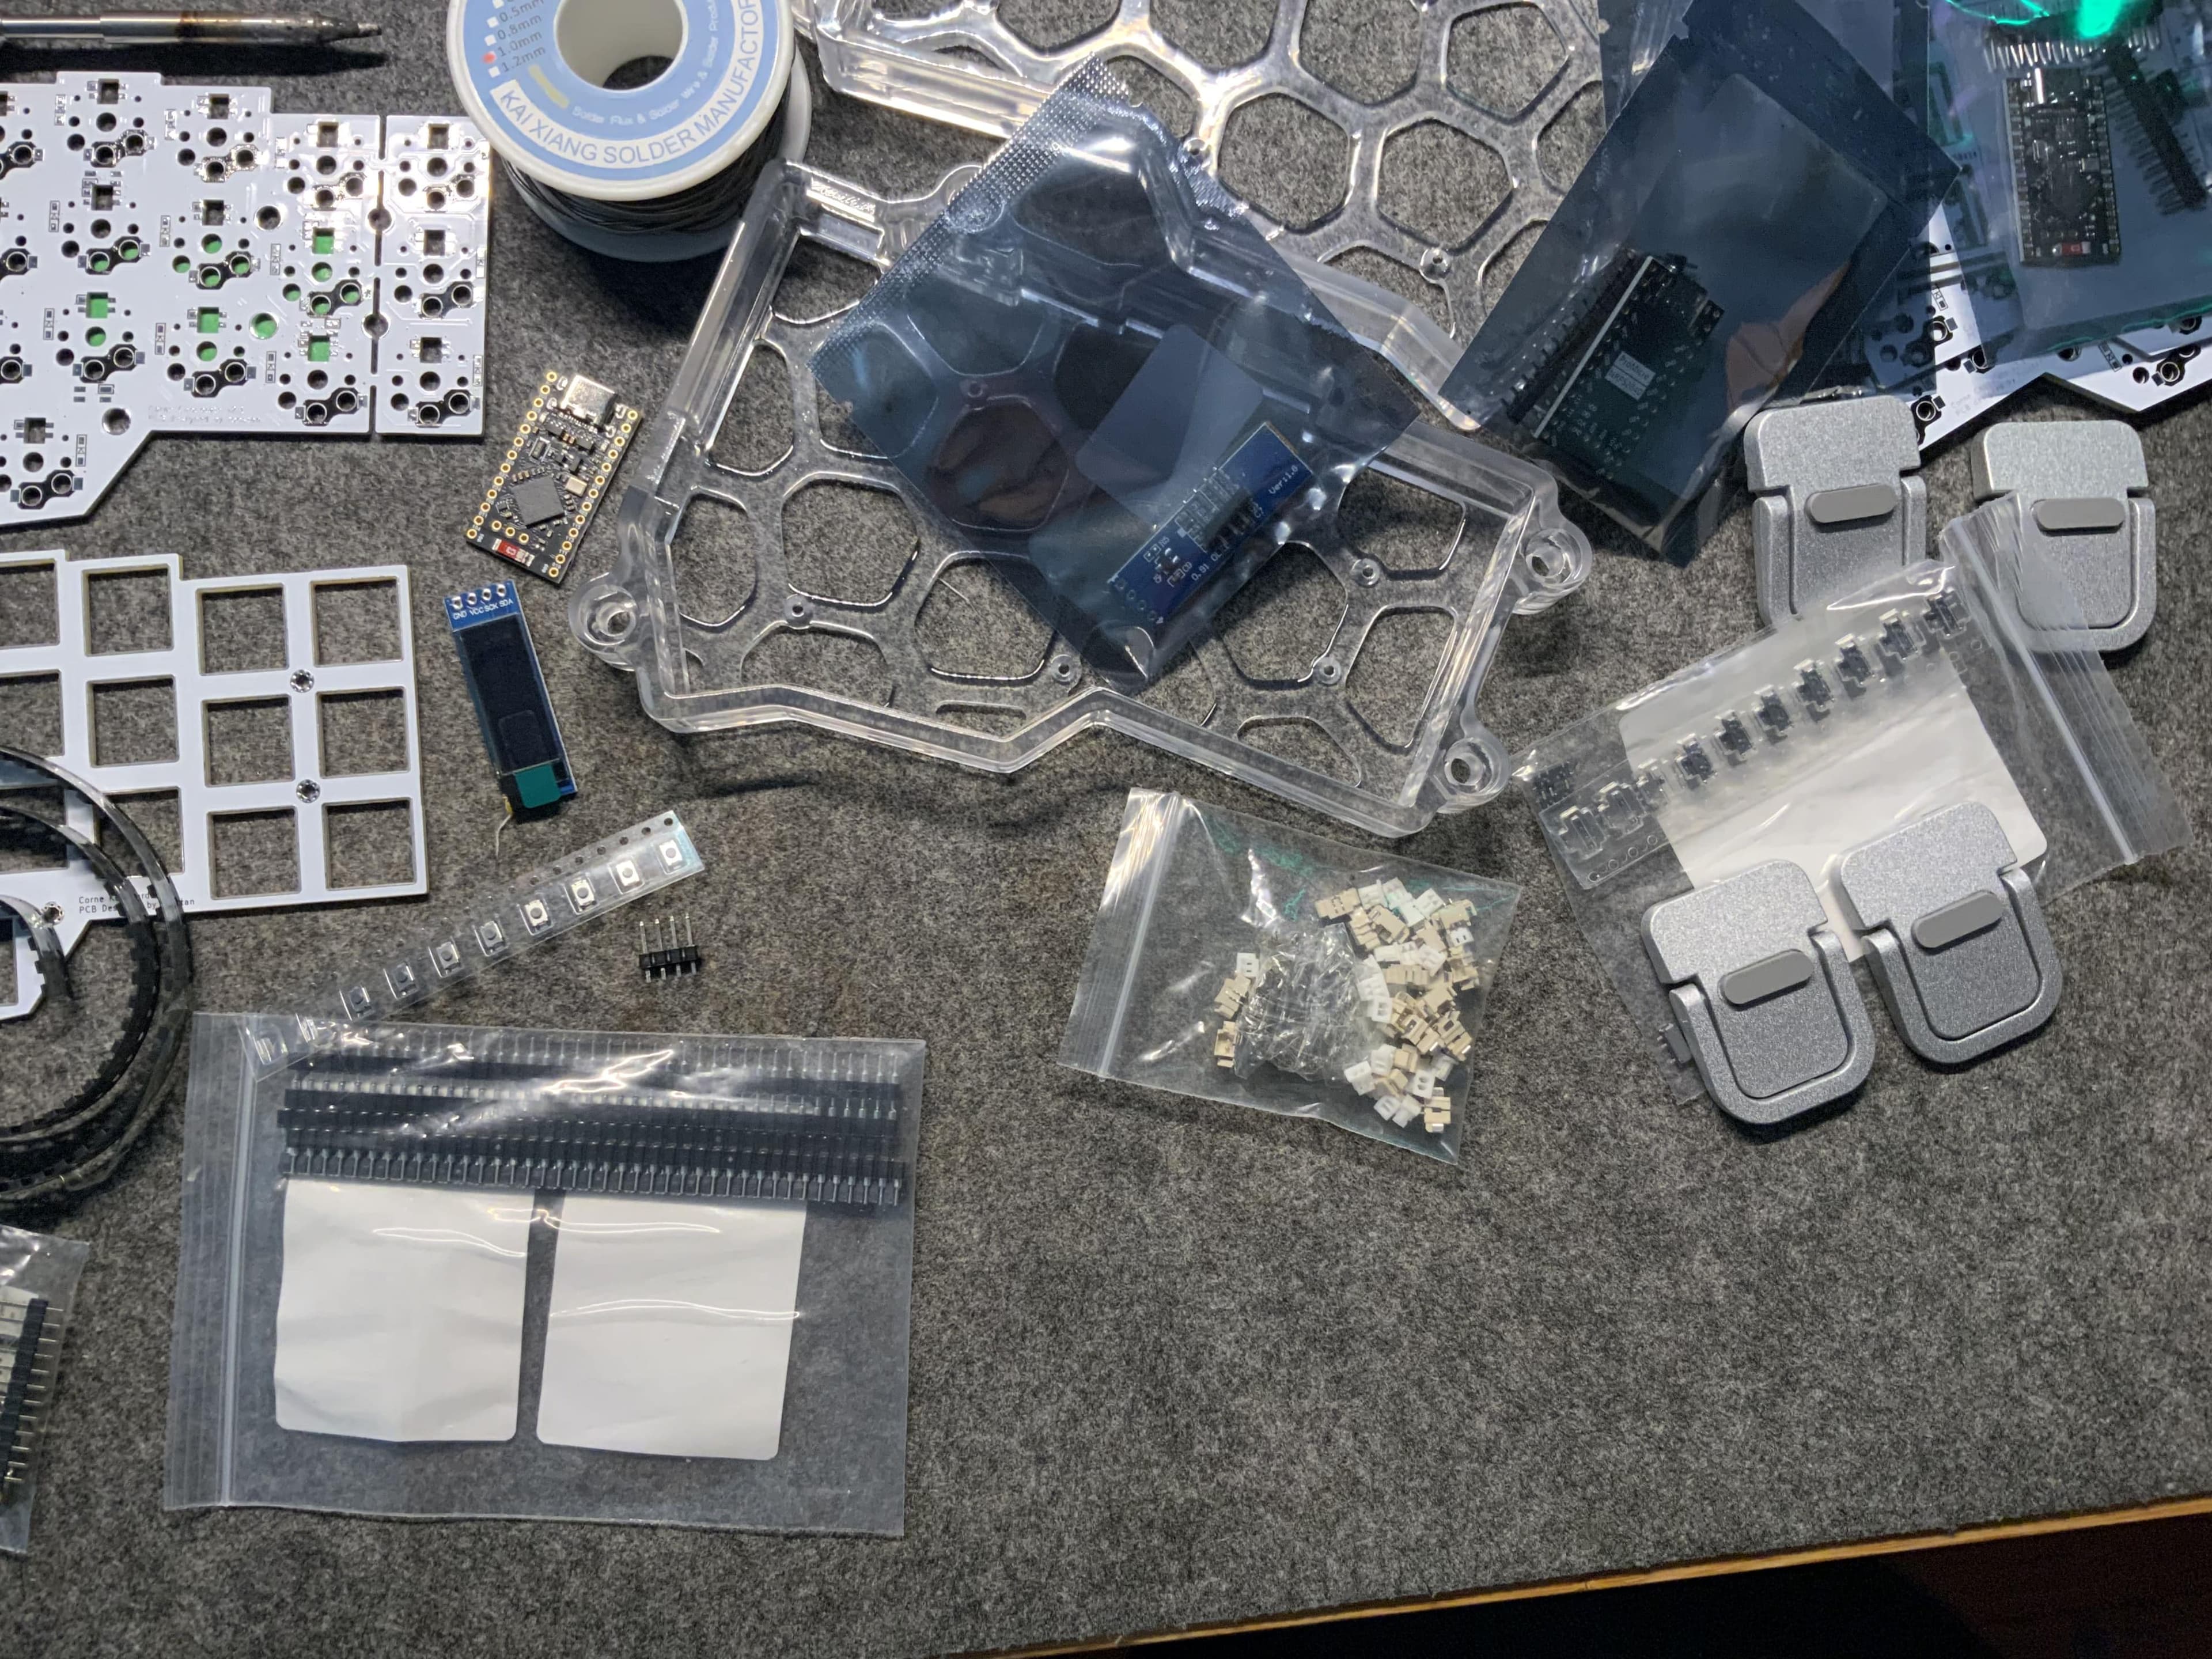
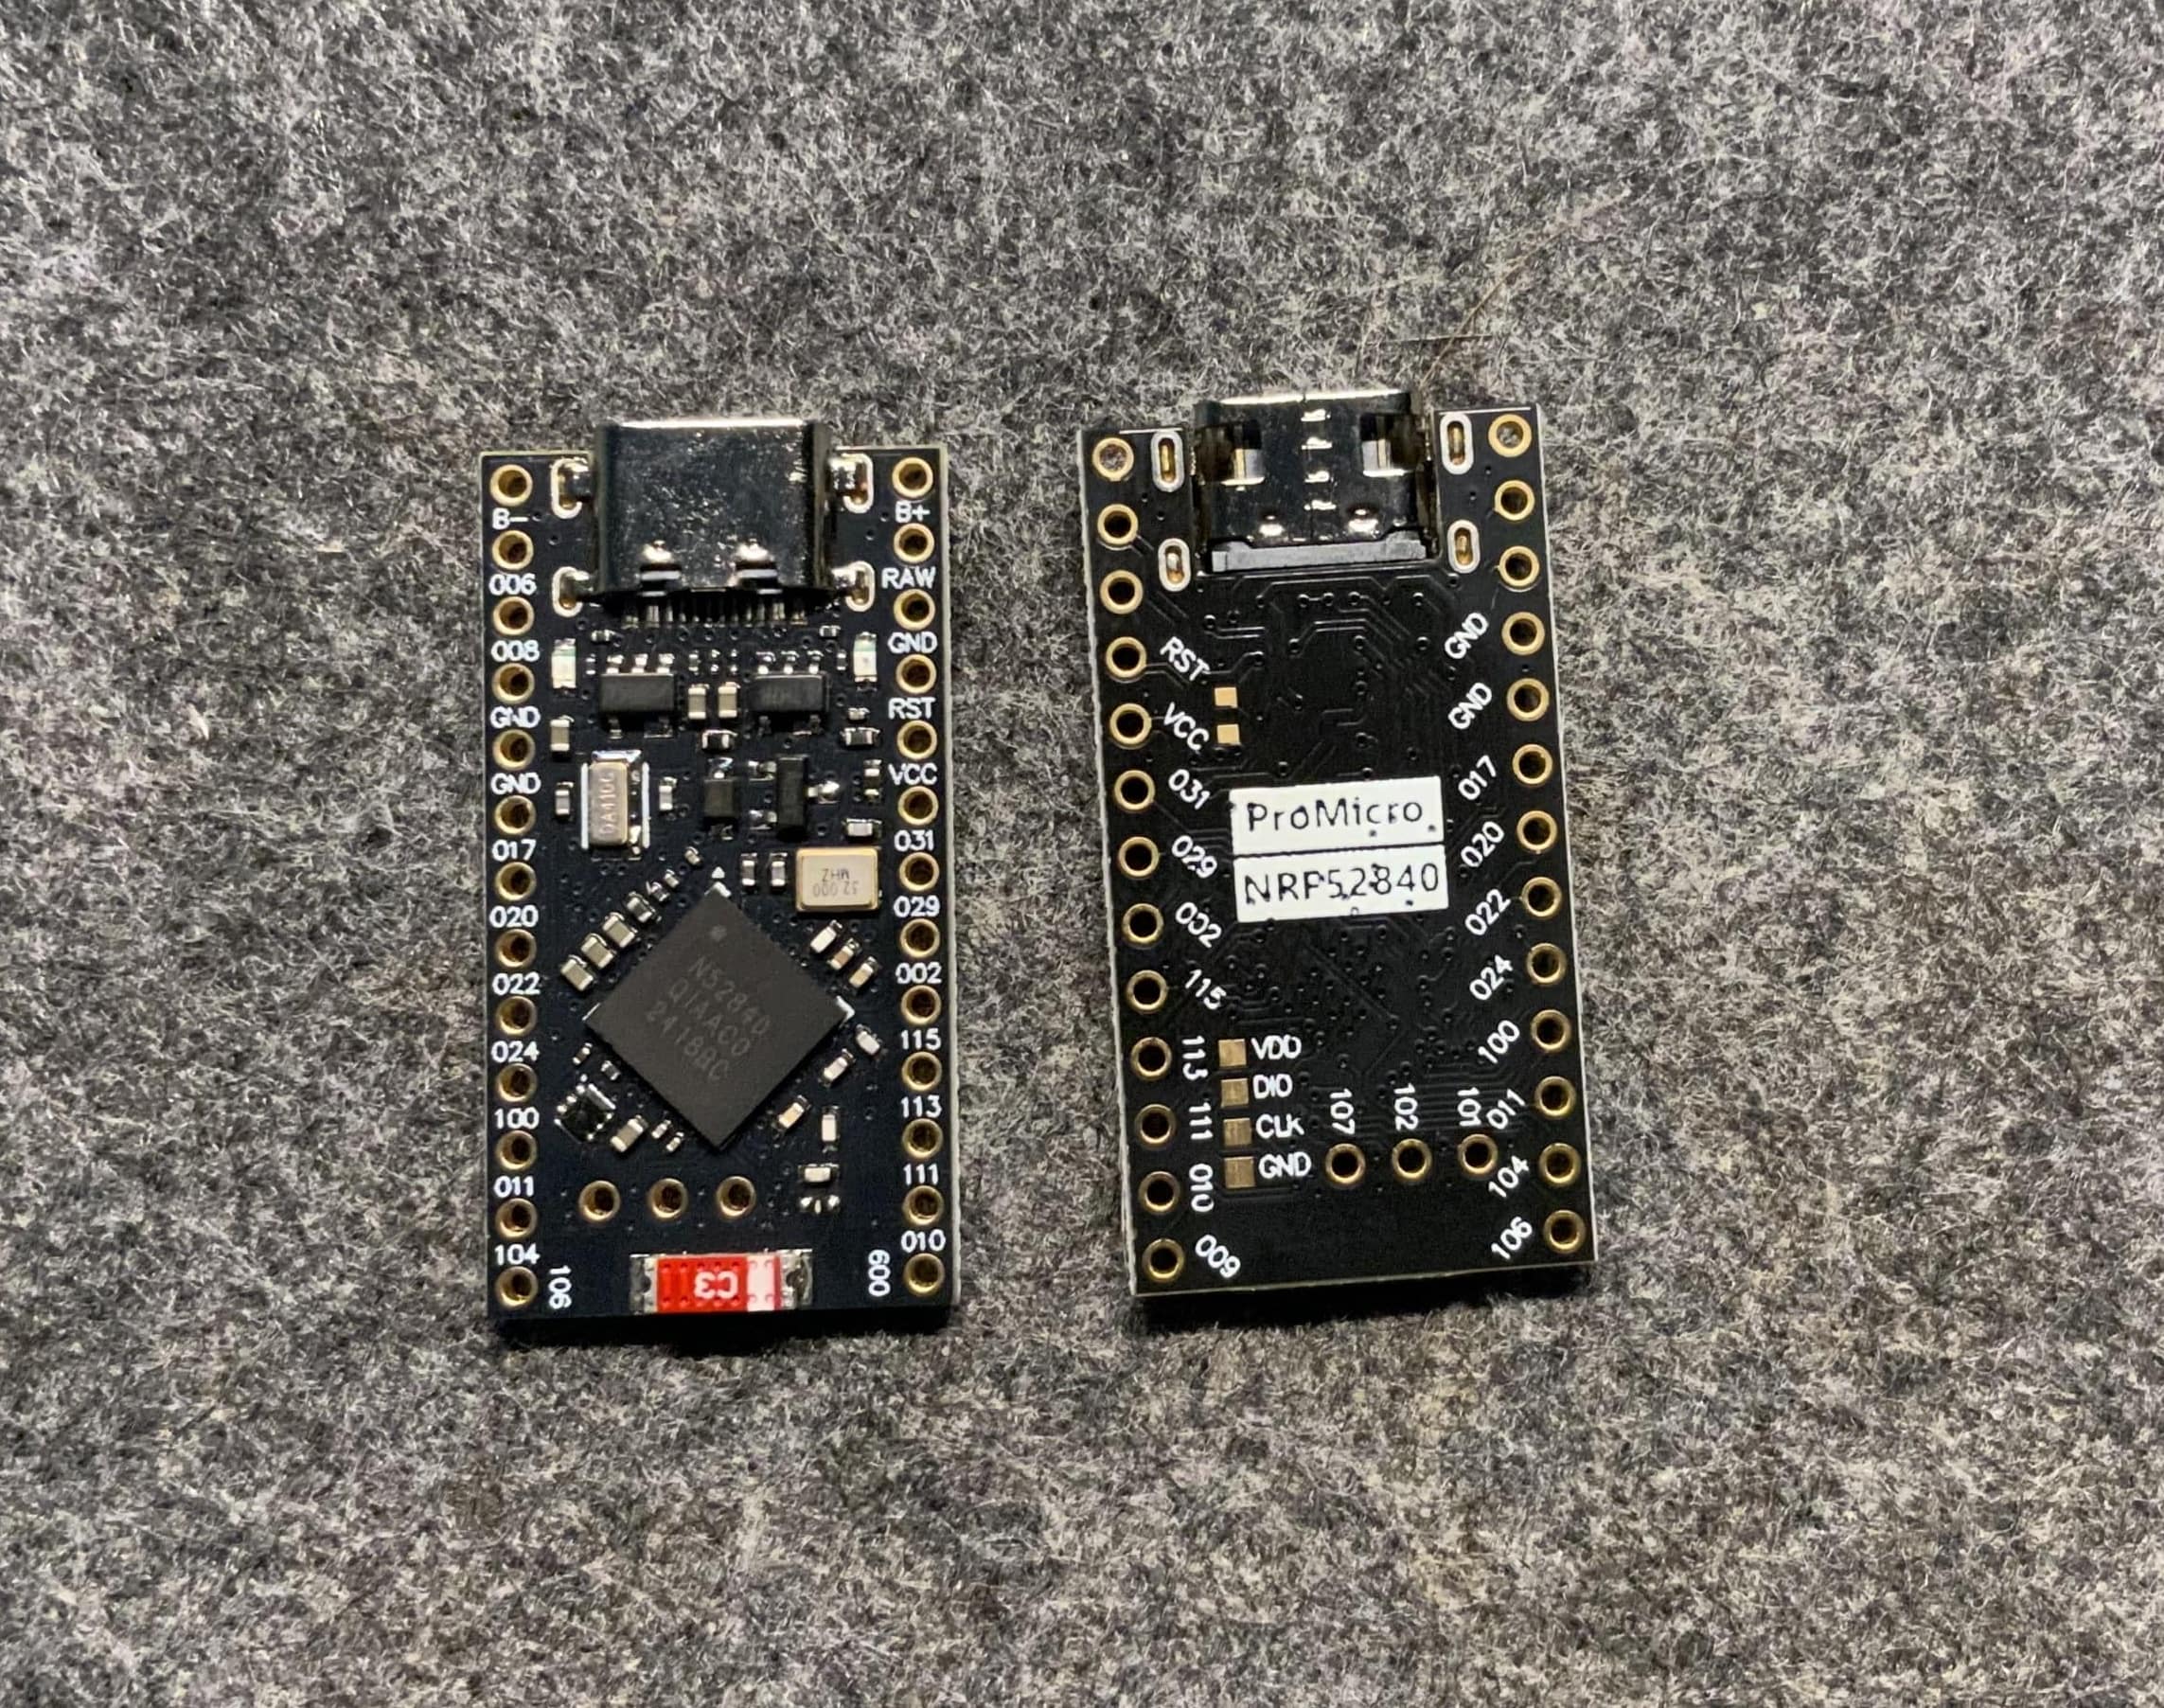
- 2 Microcontrollers (NiceNano for wireless)
- 2 OLED displays
- 2 SMD reset buttons
- 2 toggle switches
- 2 Batteries
- Pin headers for mictocontrollers and OLED screens
- 12 underglow LEDs
- 42 RGB key LEDs (I didn't use them)
- Soldering iron and solder wire
- Flux,
- Solder sucker (optional)
- Wire cutters
- Wire strippers
- Tweezers
- Screwdriver, risers, bolts and nuts
- USB-C cables
The build guide and Gerber files (for PCB manufacturing) are available in the official open-source repository: https://github.com/foostan/crkbd
I chose the low-profile version with Kailh Choc v1 switches, using this guide as my reference: https://github.com/foostan/crkbd/blob/main/docs/corne-chocolate/v2/buildguide_en.md
The 3D-printed case I used: https://www.printables.com/model/347524-corne-keyboard-case-5-and-6-columns
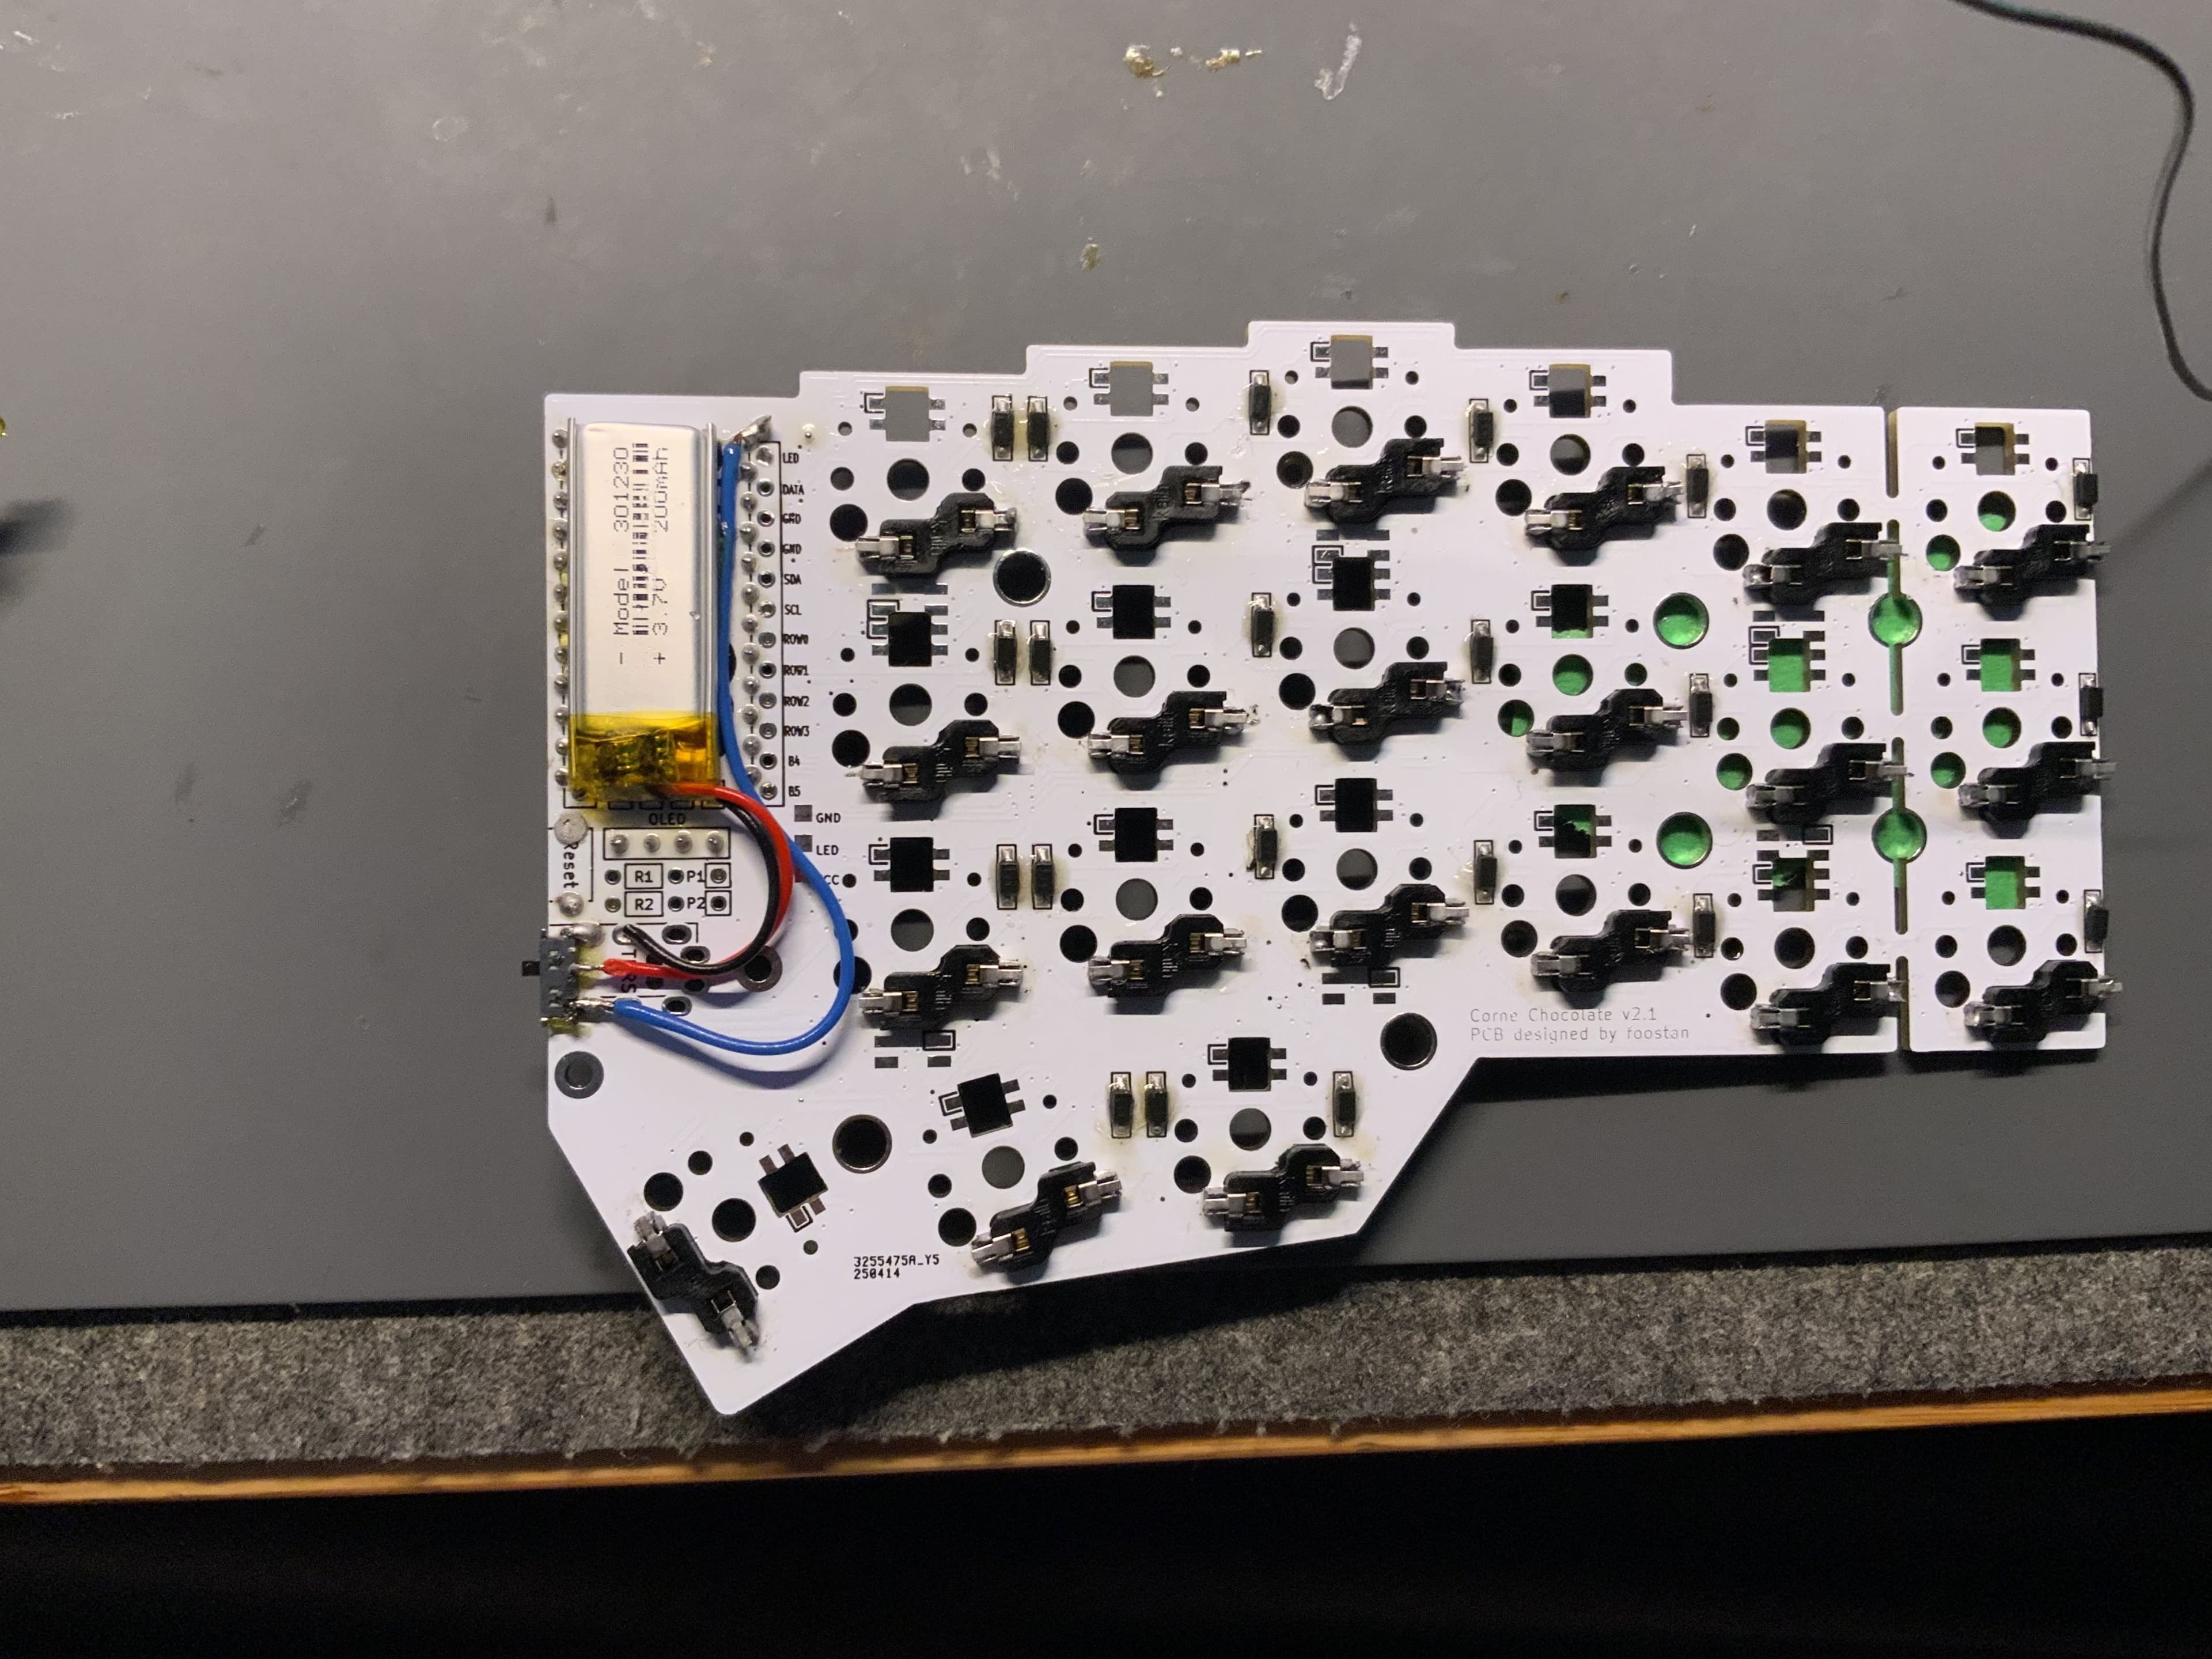
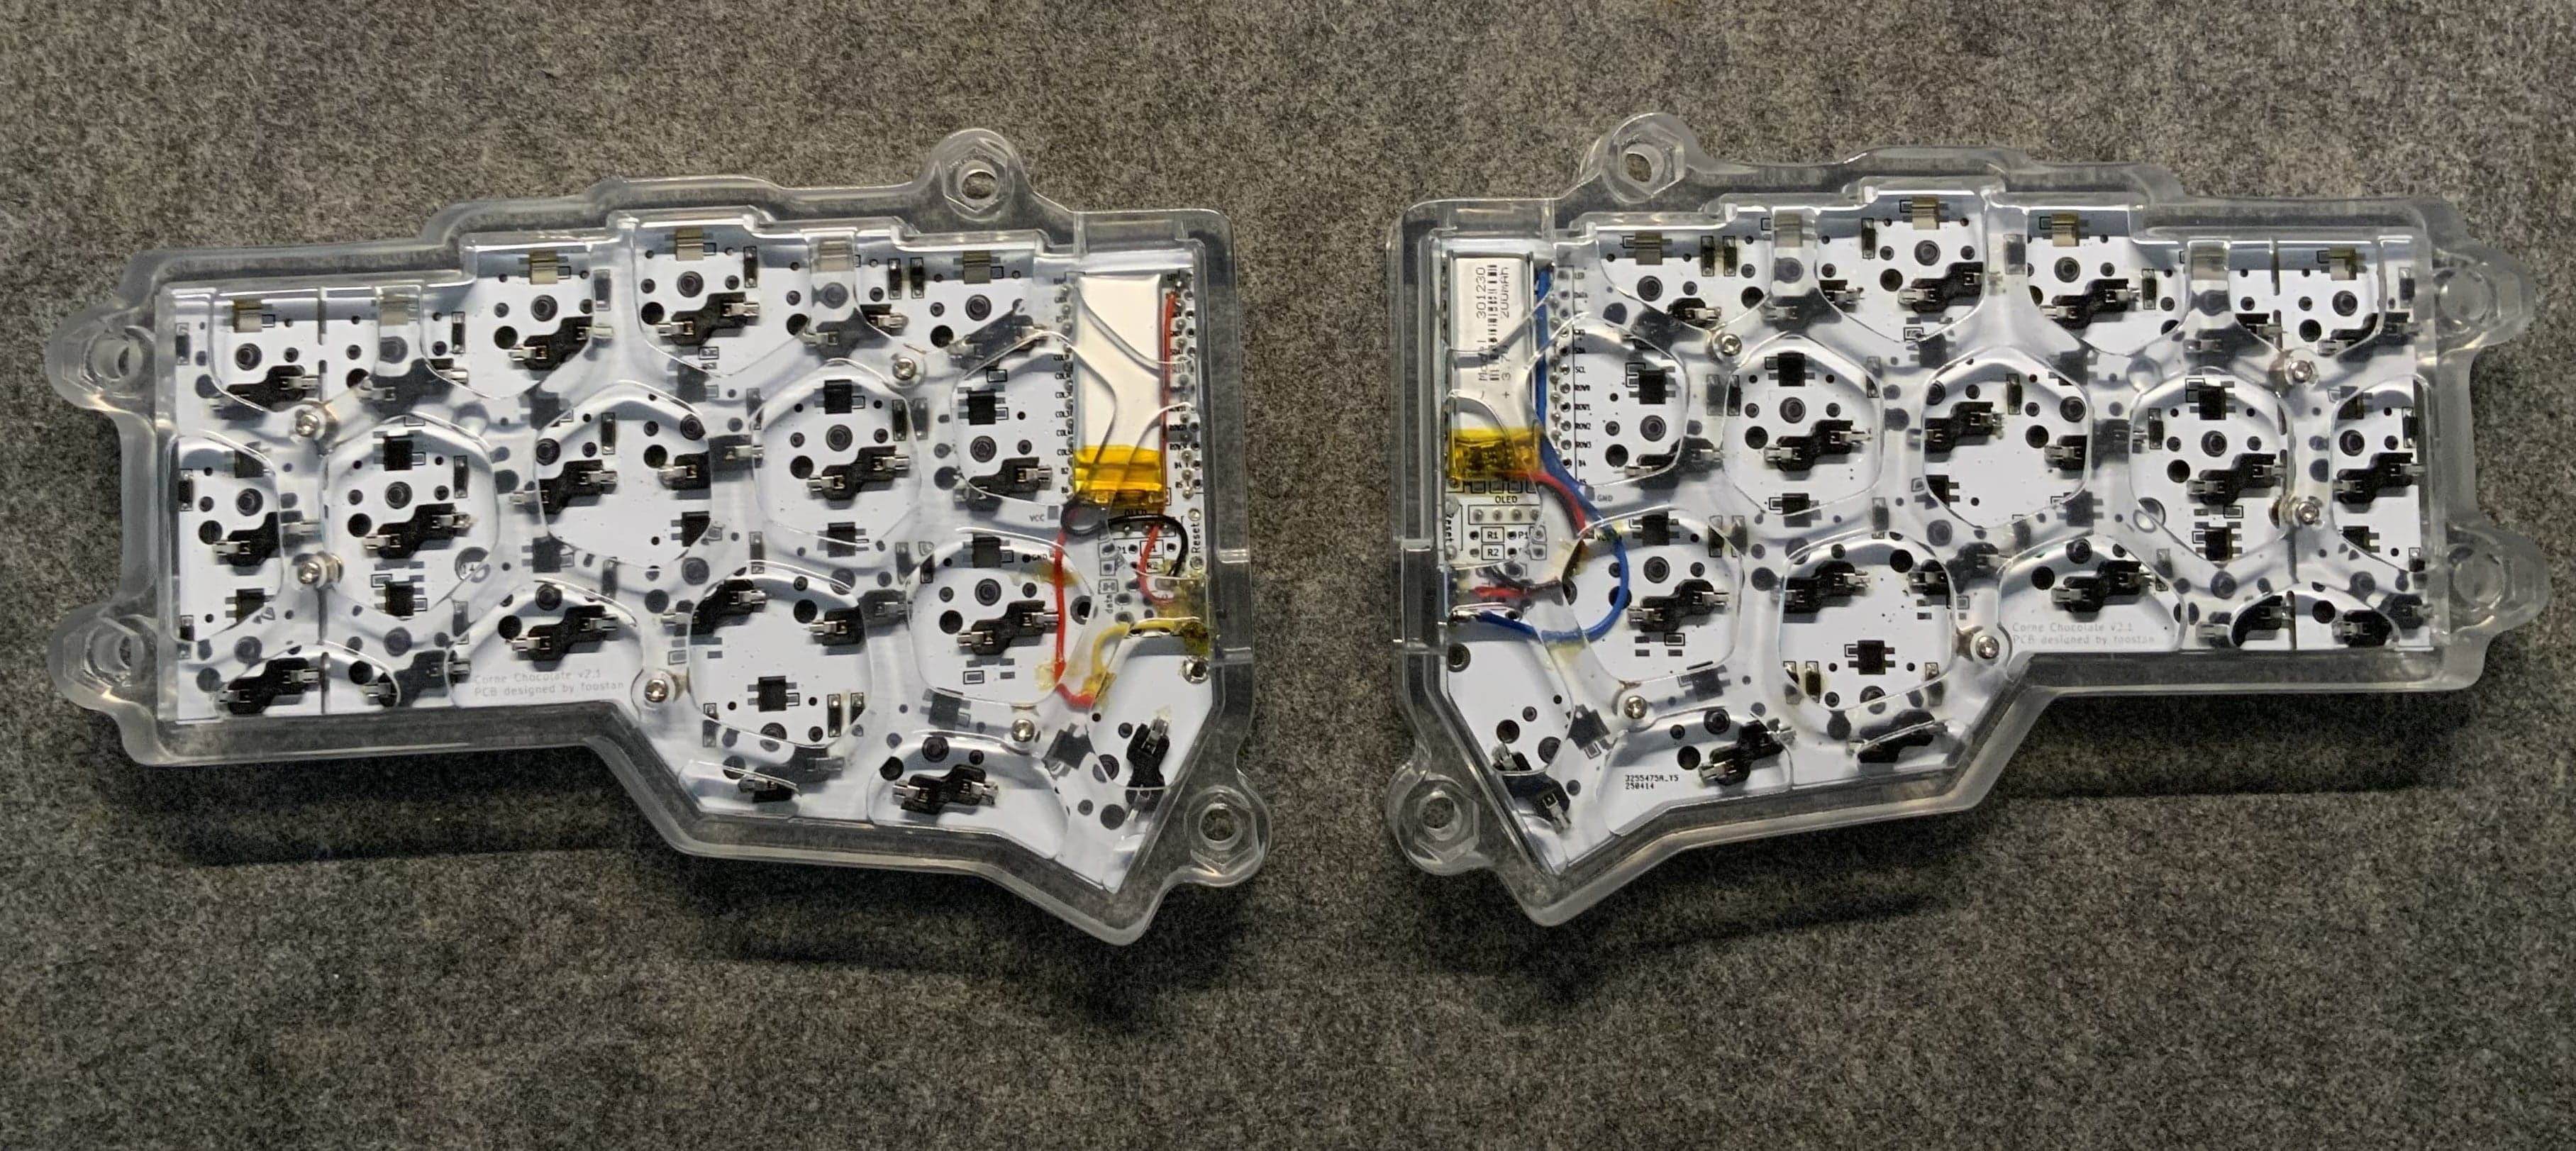
The PCB from the guide isn't designed for wireless use, so I had to modify it to support batteries and on/off switches instead of TRRS jacks.
Warning: there are some shocking photos of glue used in the ugliest way possible. Brace yourself!
I ordered the PCBs and 3D case from a Chinese manufacturer. The minimum PCB order was 5, so I ended up with enough plates for 2.5 keyboards. There's no minimum for 3D prints, so I just ordered one case to test. I'll share the total cost at the end.
I bought the other parts on AliExpress, and saved a lot on controllers. Instead of the $20 NiceNano, I got ProMicro clones for $3 each, and they work just as well.
Assembly
I spent the next 5 hours soldering diodes, pin headers, switch sockets, and buttons onto 4 plates (enough for 2 keyboards). Since the minimum PCB order was 5 and the components from AliExpress came in bulk (100 diodes, 100 sockets, 90 switches, etc.), I had enough for two builds, so I assembled both in parallel.
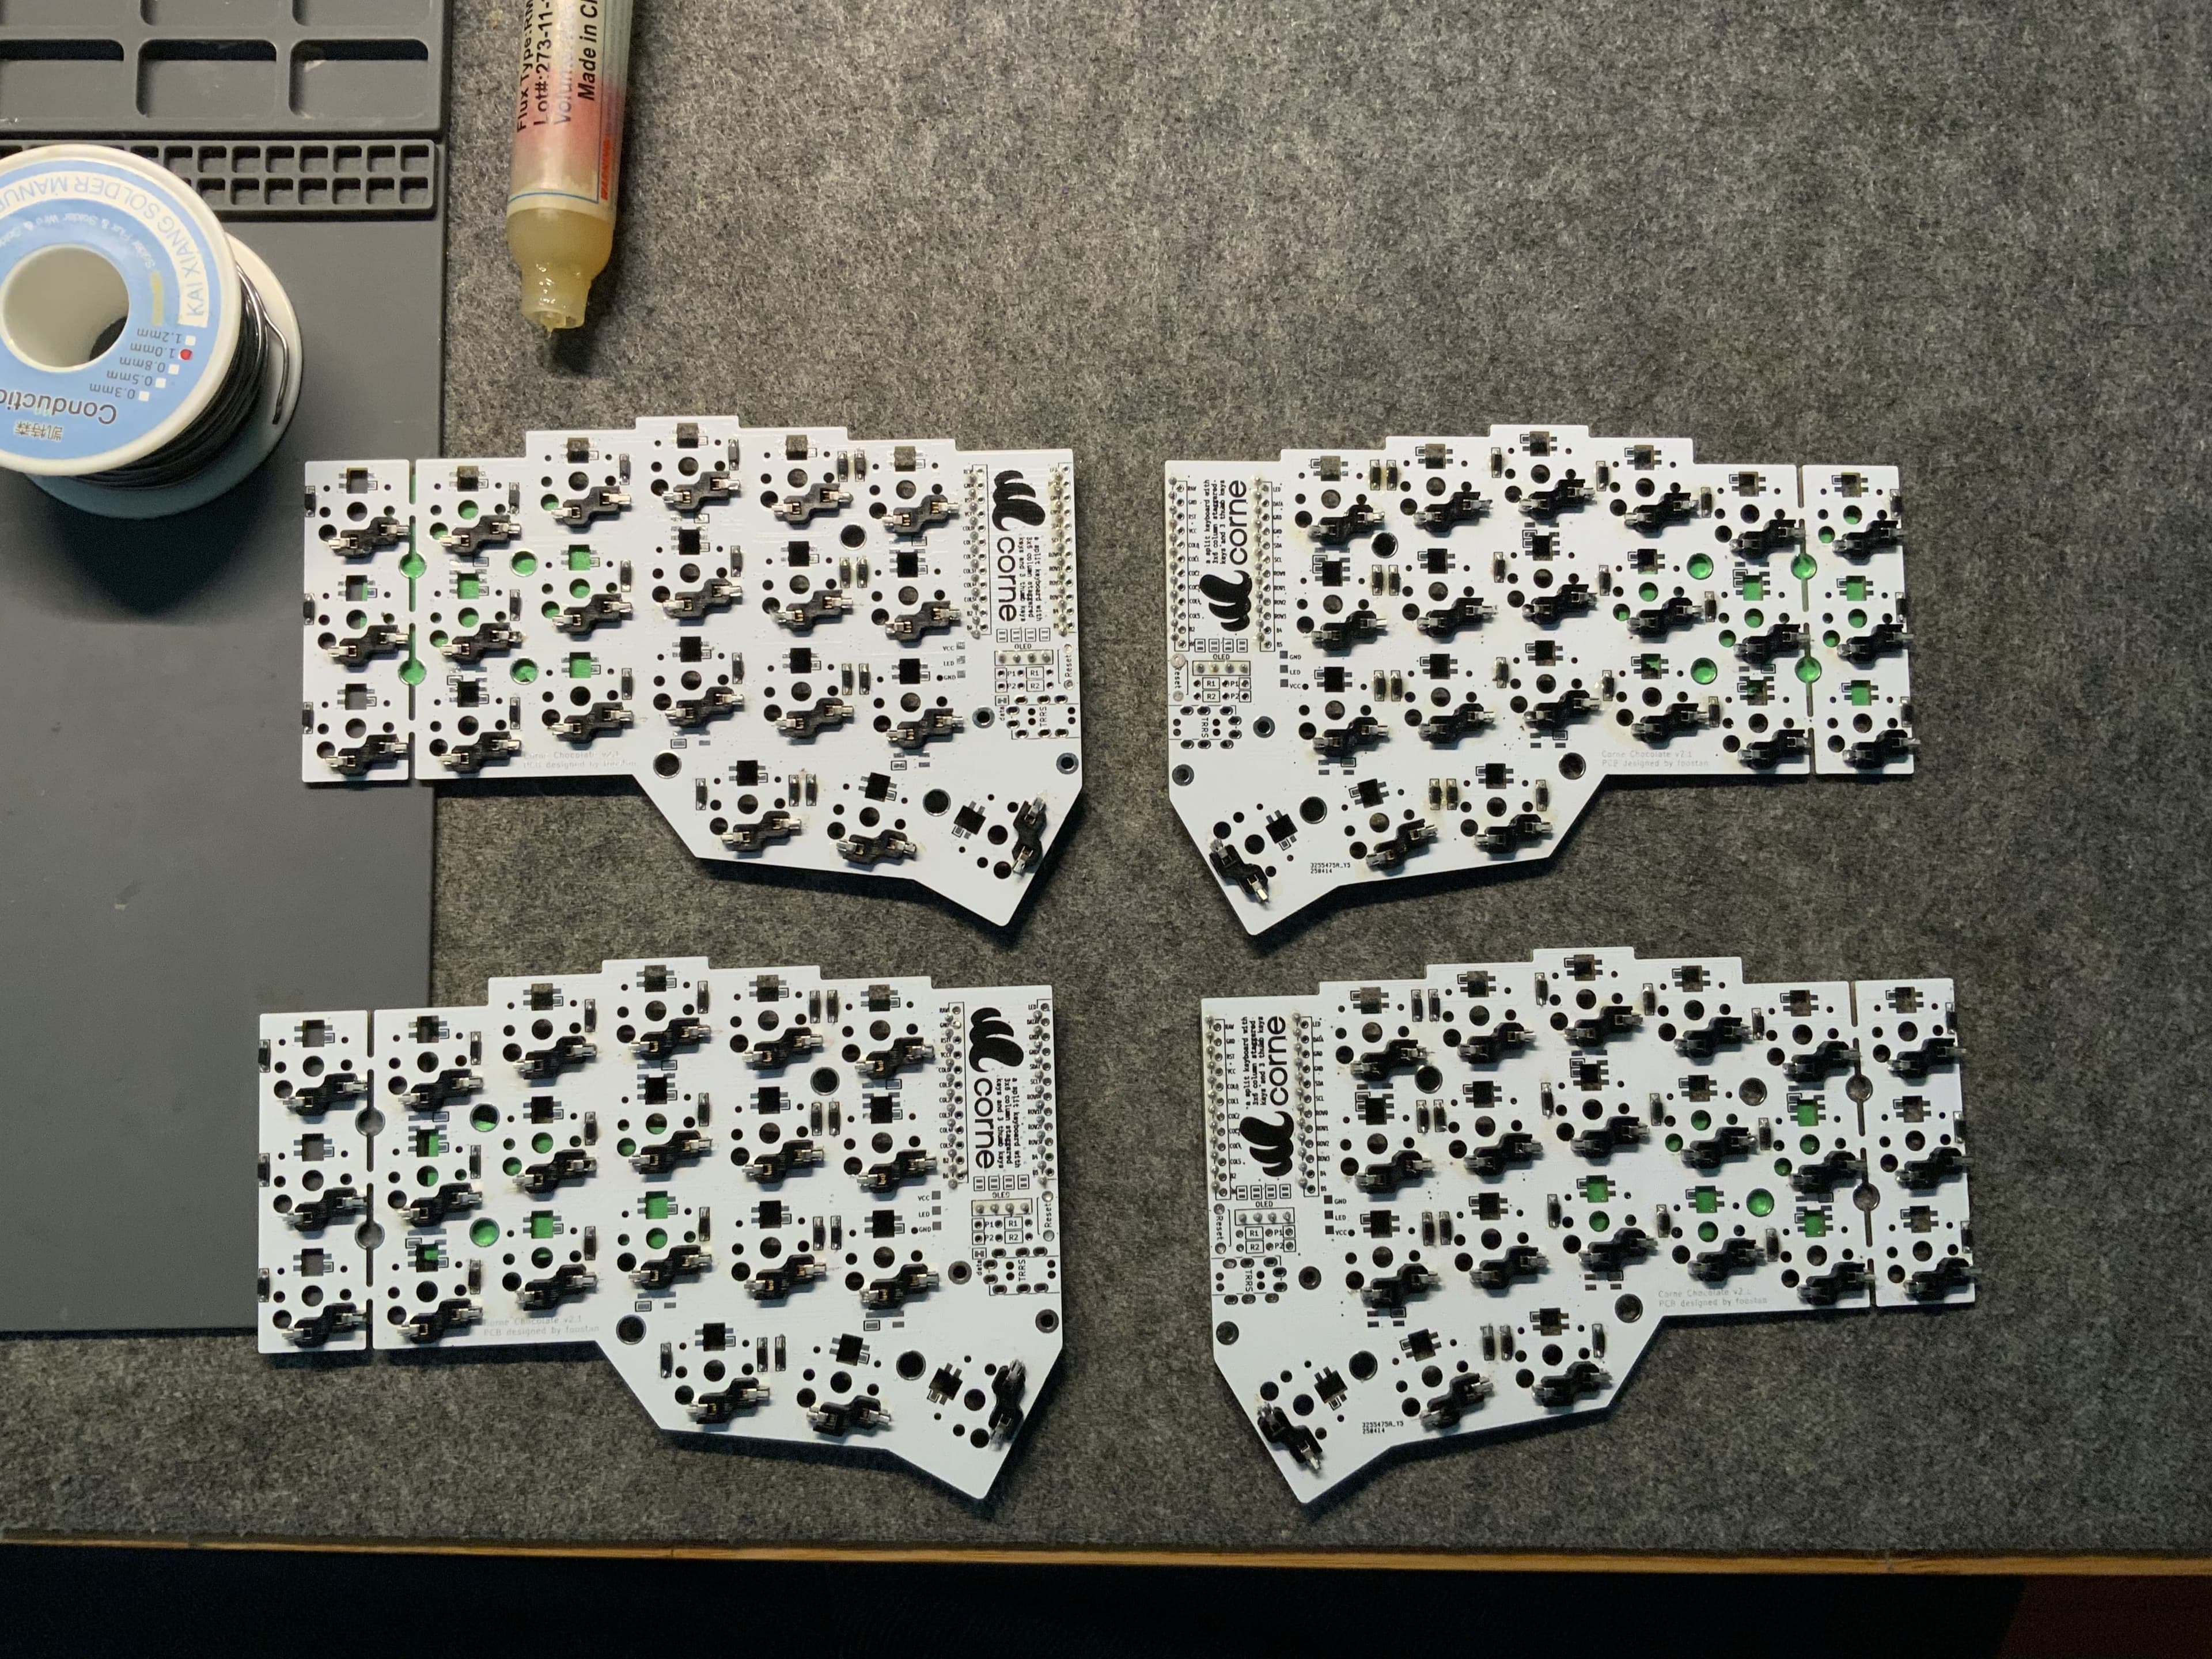
However, I only ordered 2 OLED displays, one case, and 2 batteries, so the second keyboard is soldered but not fully assembled yet. I will need additional CAD $50-$60 to finish the second one including 3D printed keycaps this time.
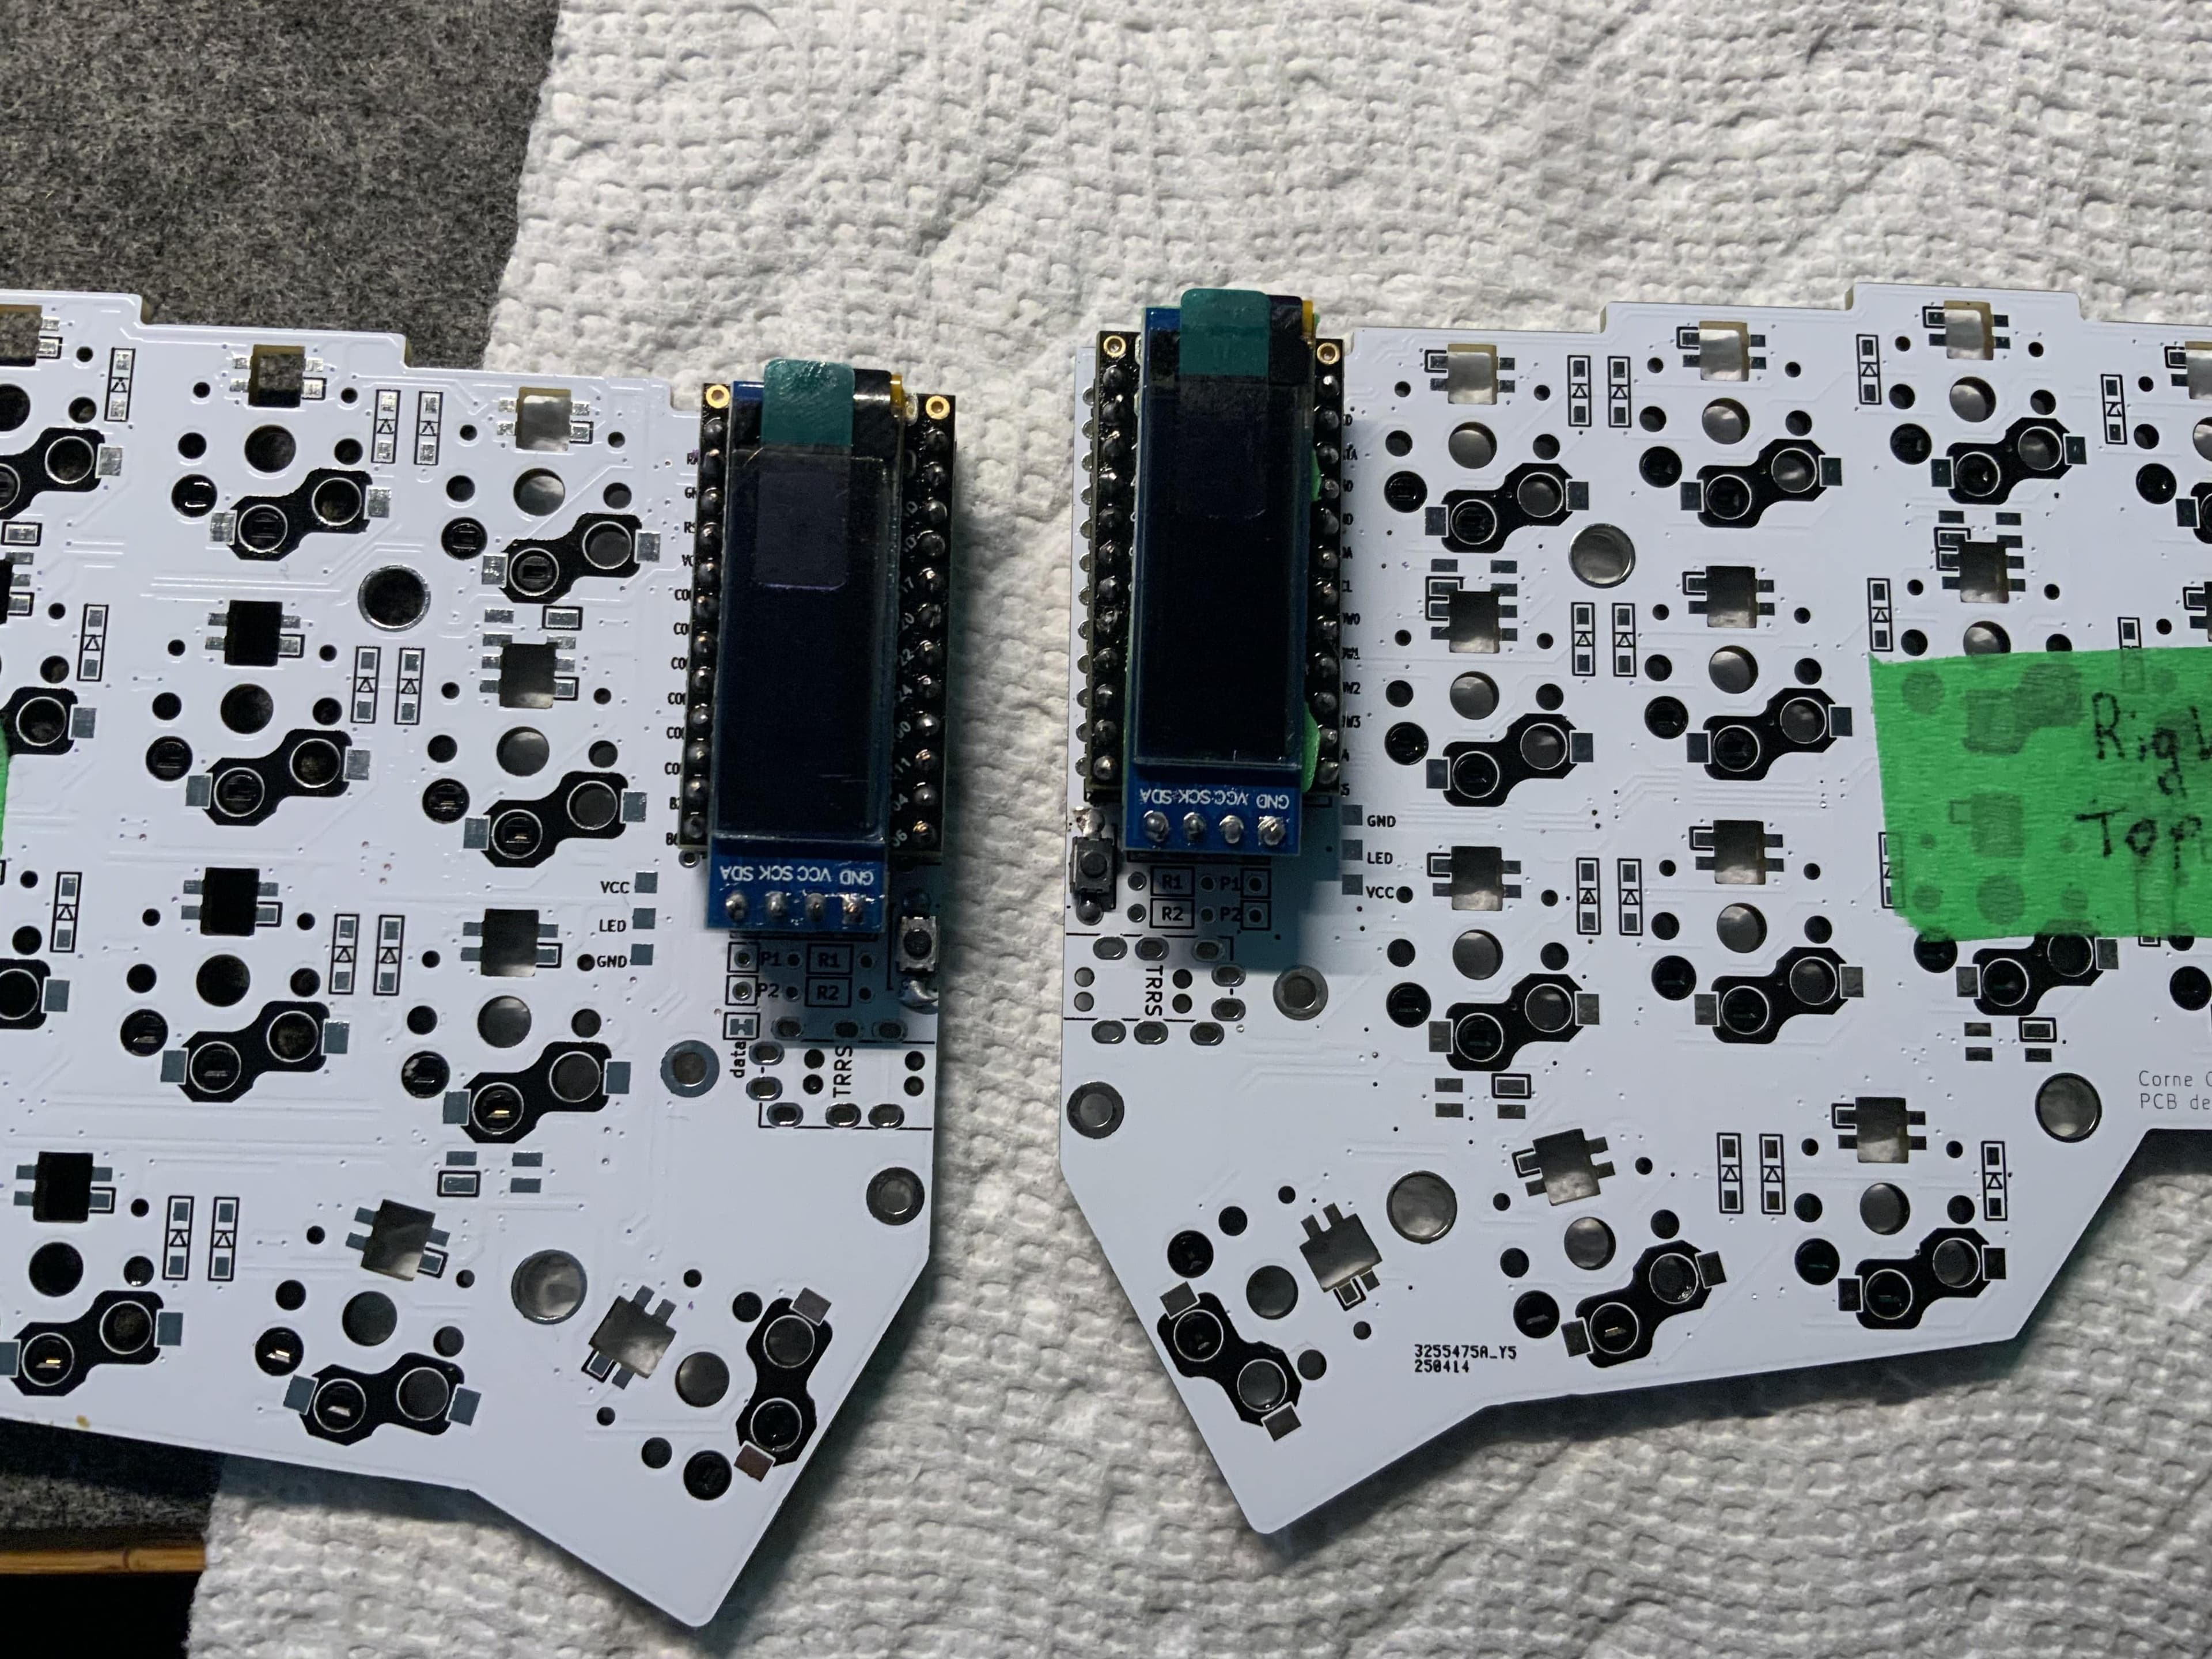
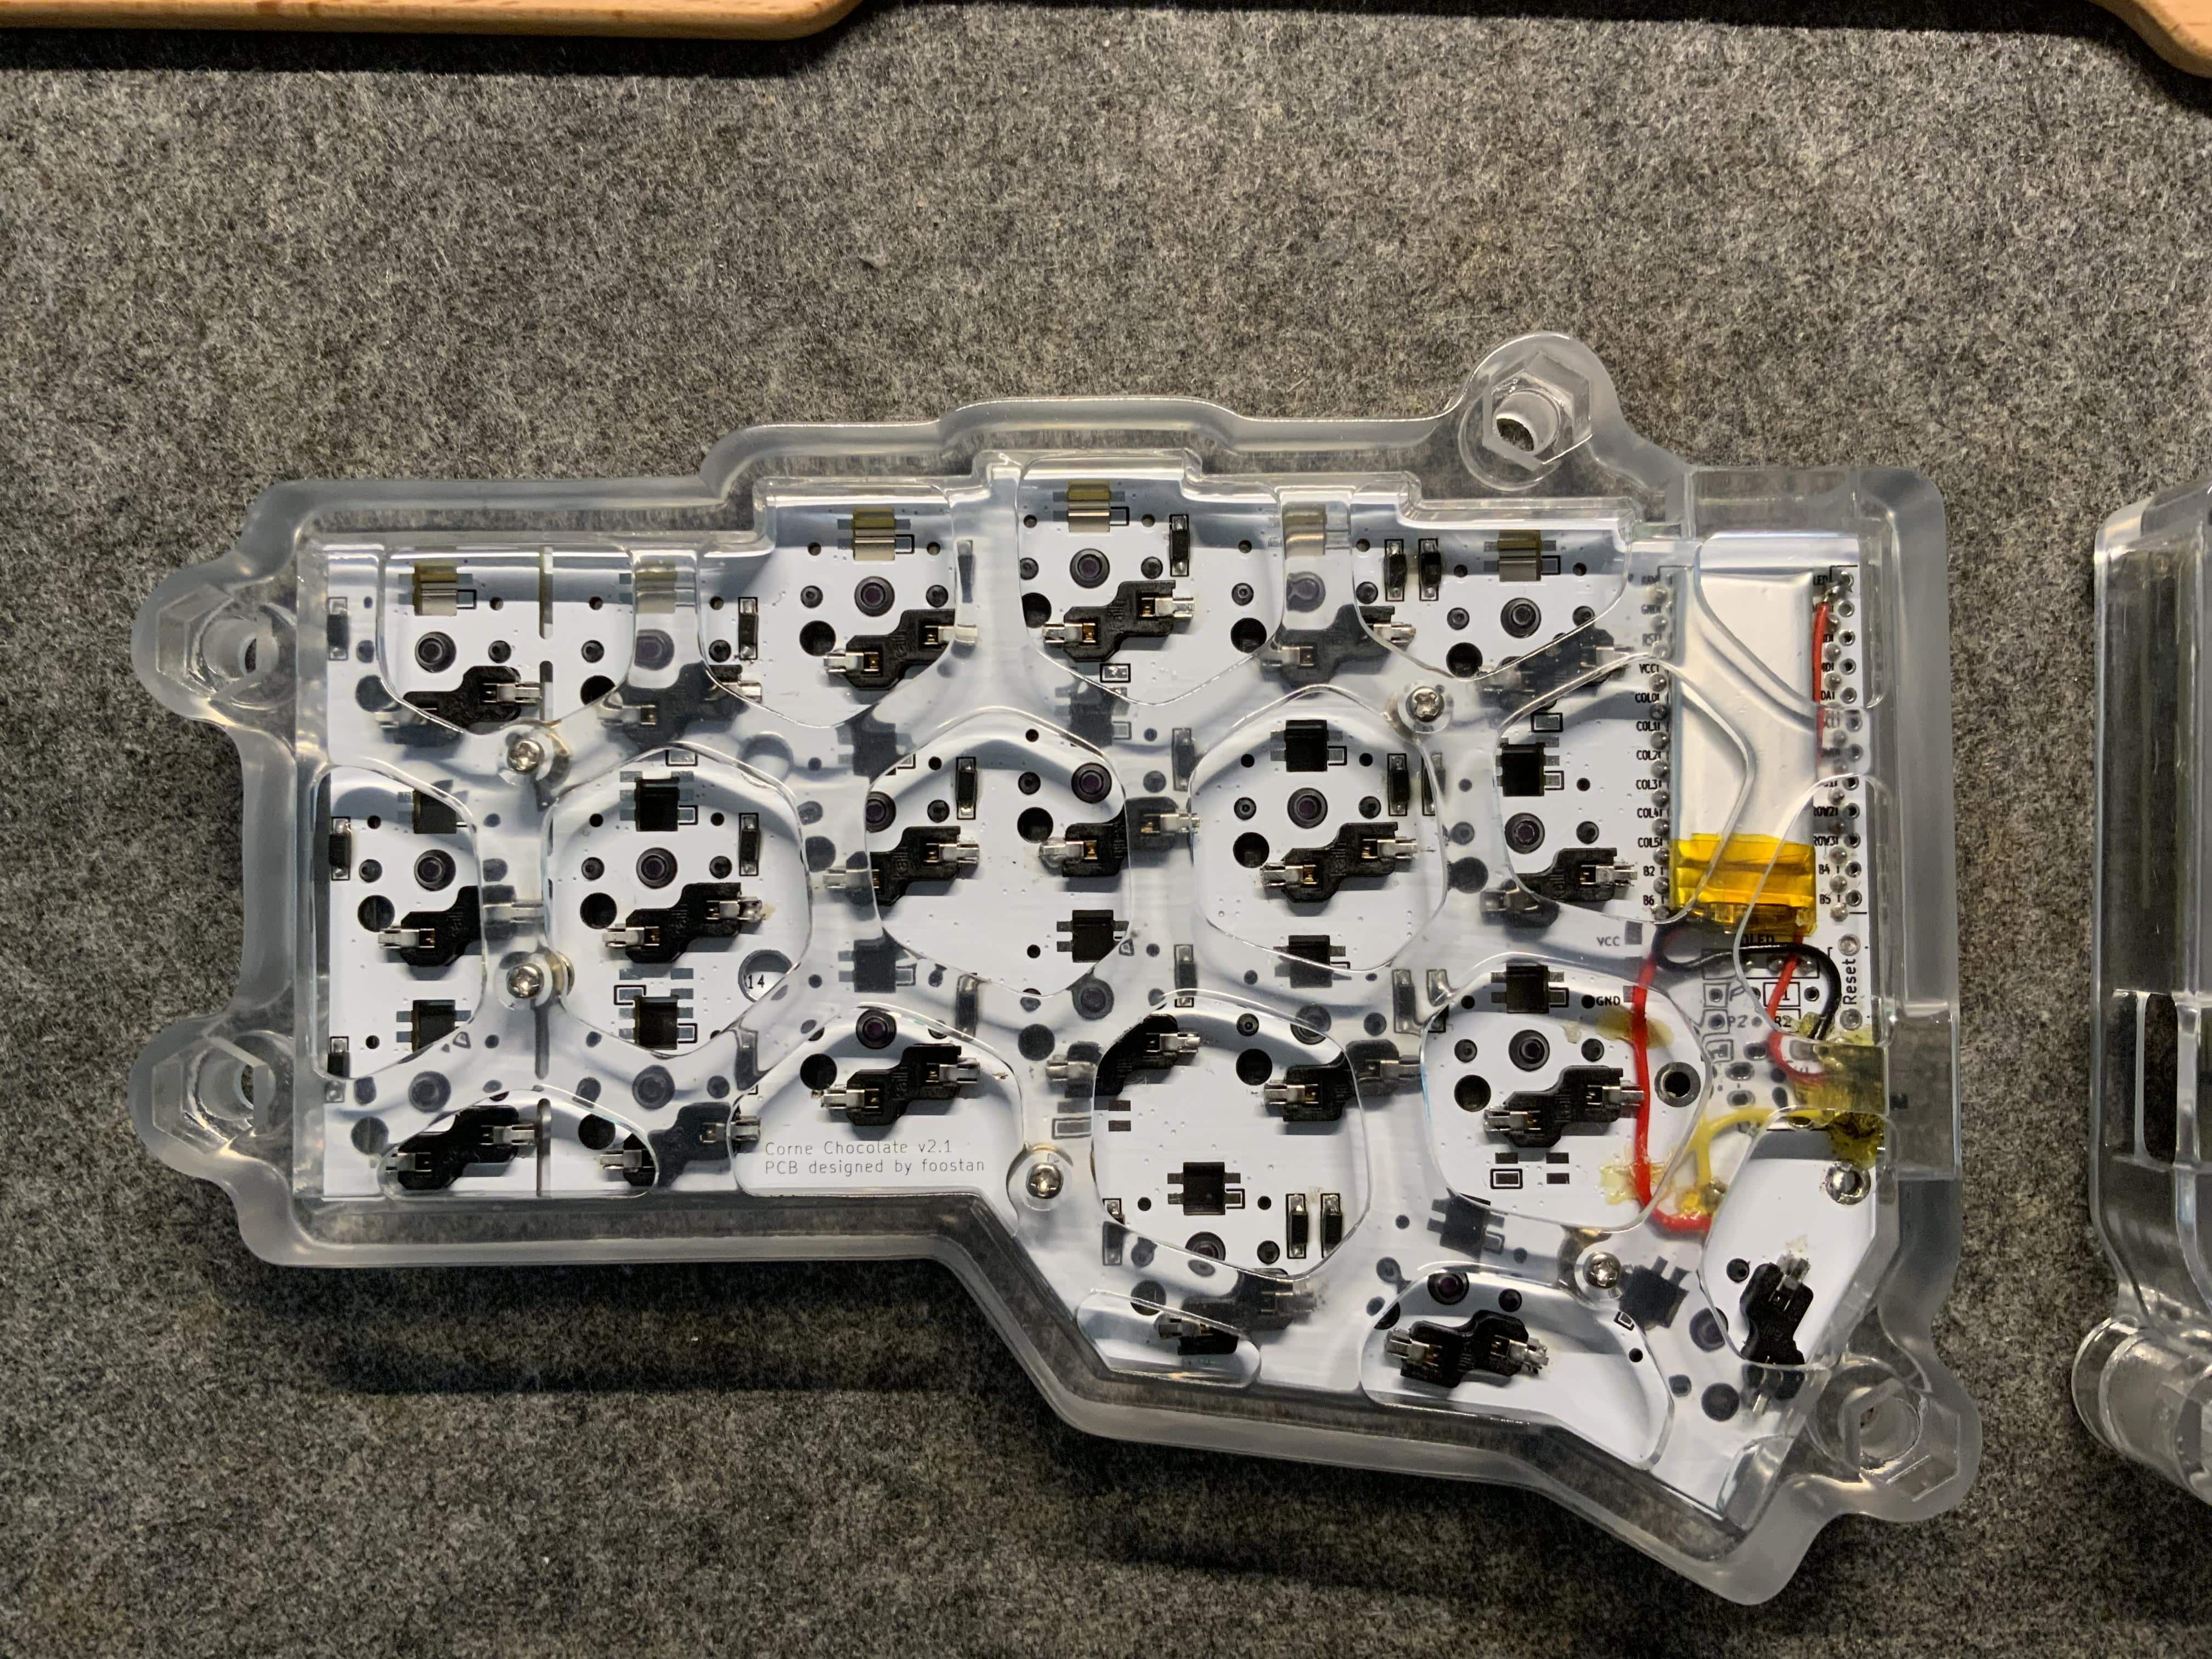
The PCB didn't have pads for on/off switches or batteries, since it was designed for wired use with a TRRS cable. I had to improvise, using B7000 glue to attach the on/off switches. It looks ugly, but it works!
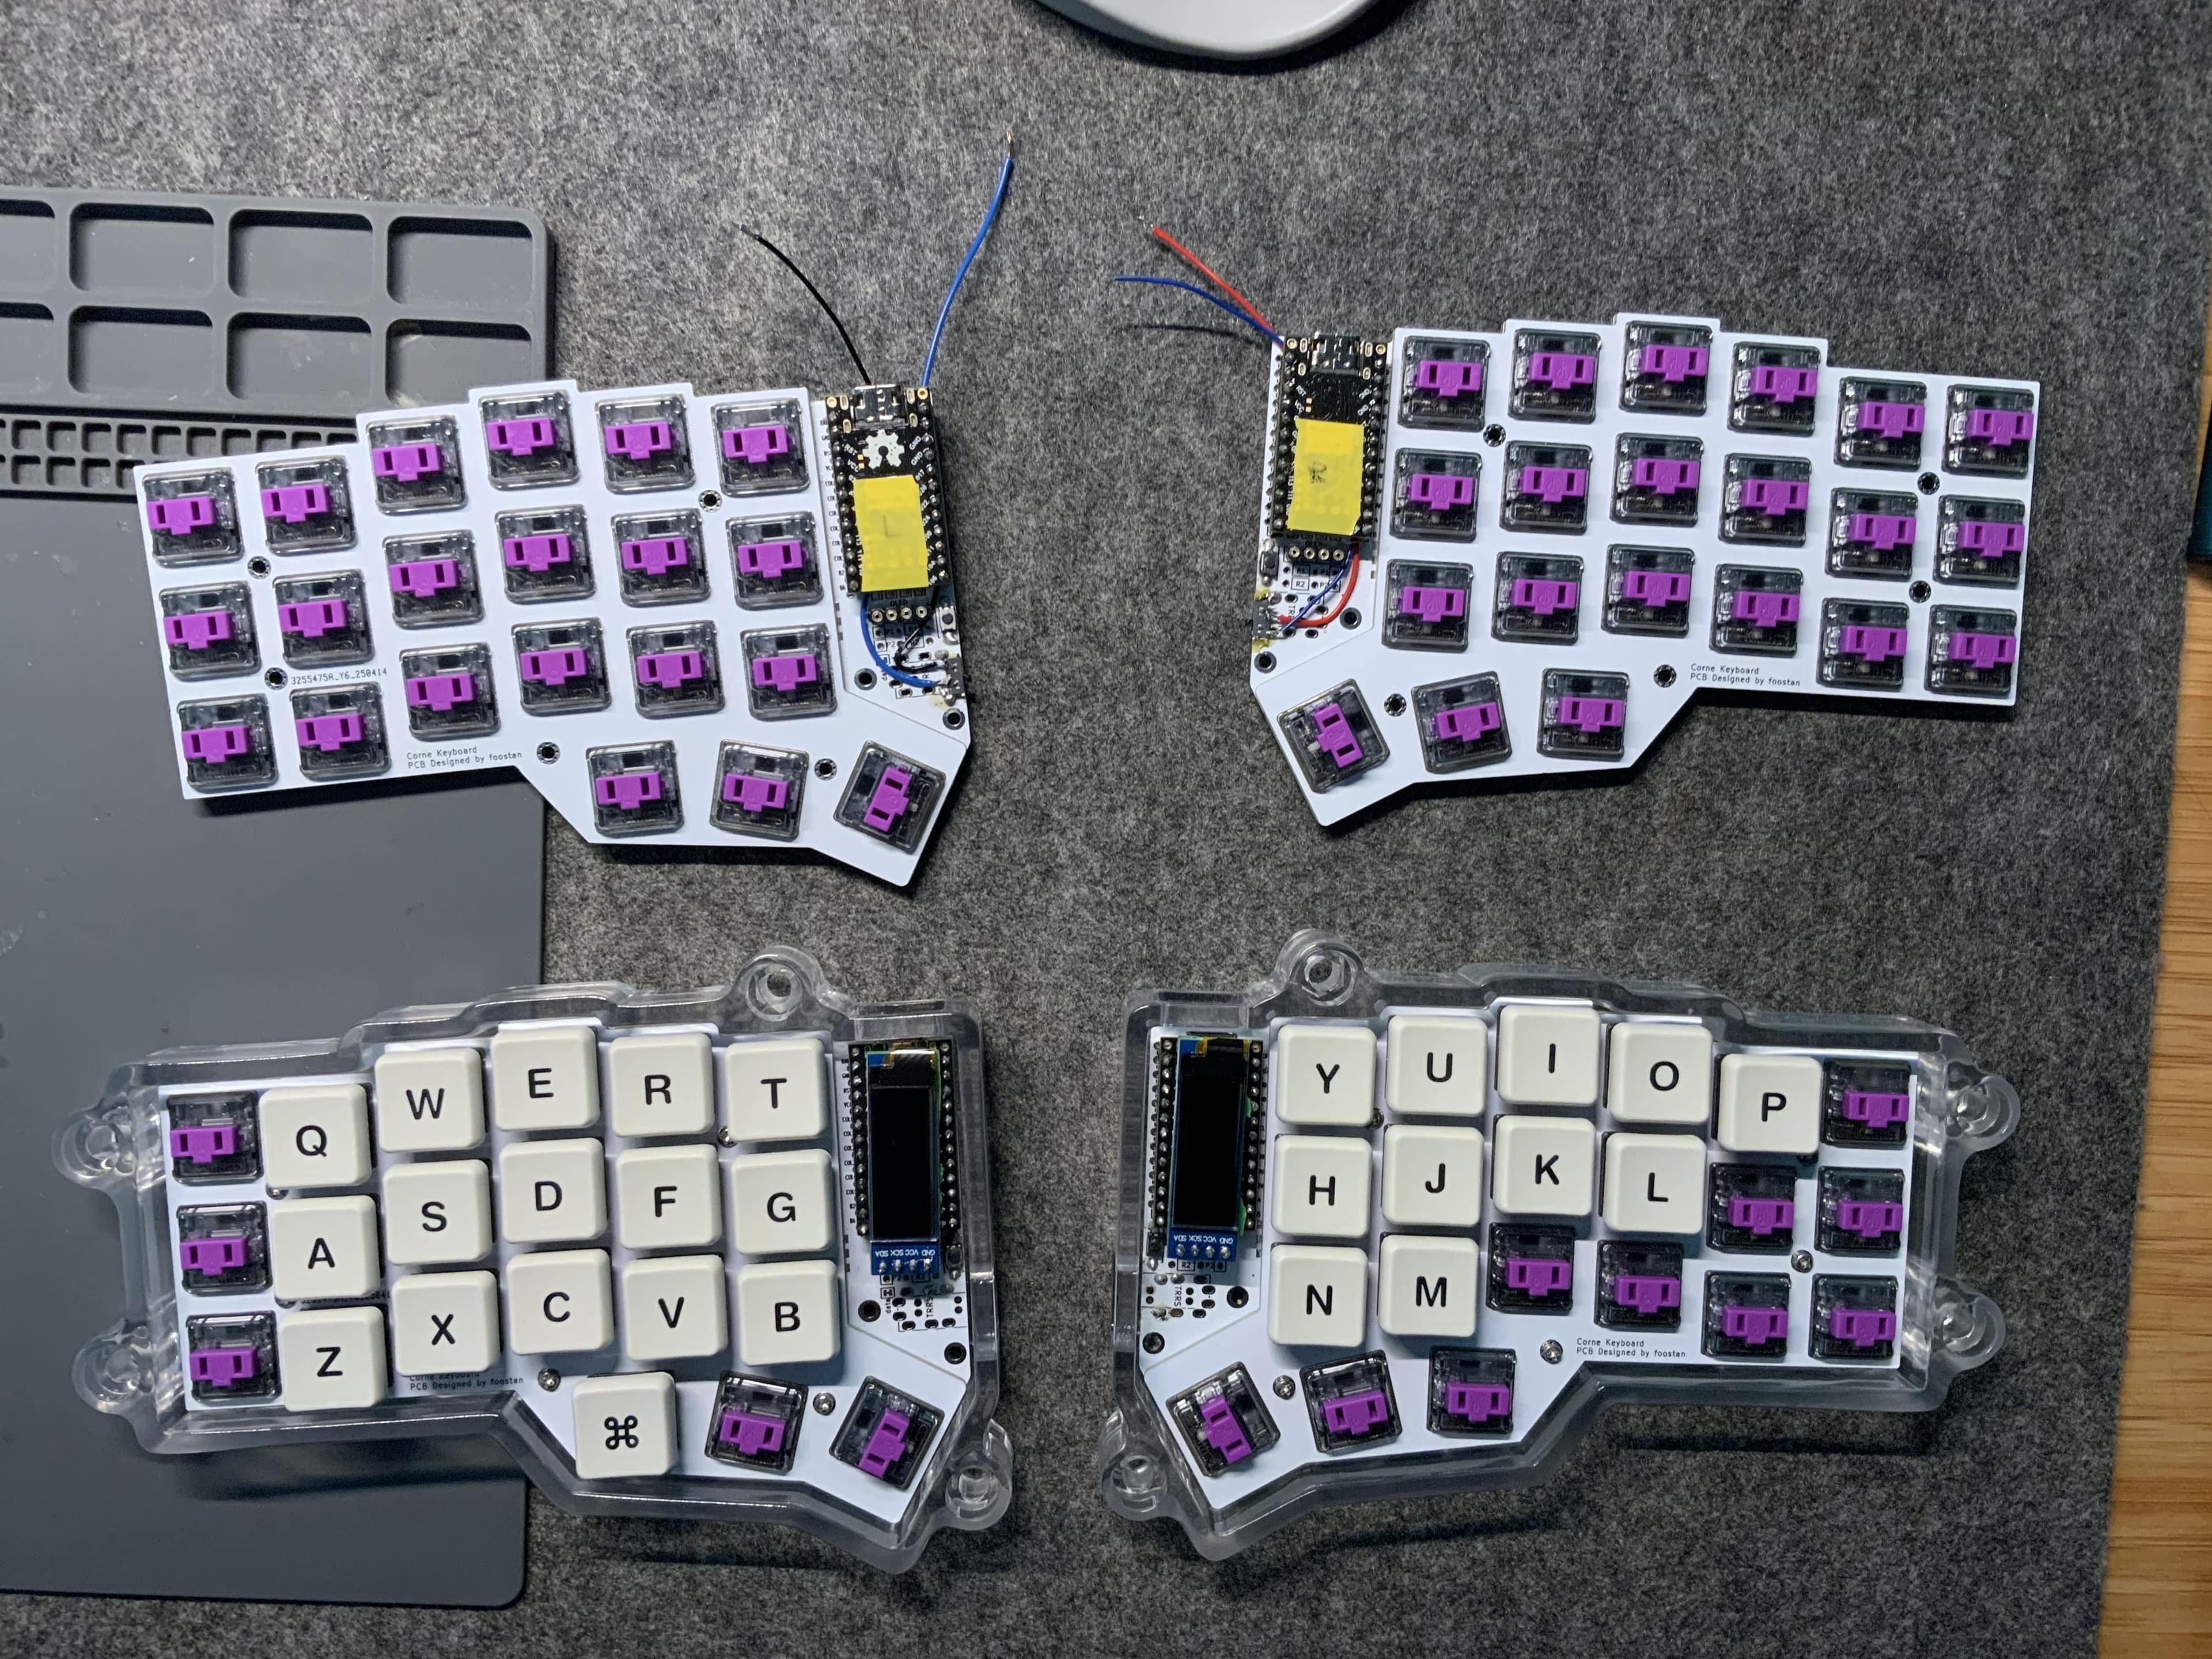
I haven't received the underglow LEDs yet, so there's no RGB lighting for now. I'll solder them in as soon as they arrive.
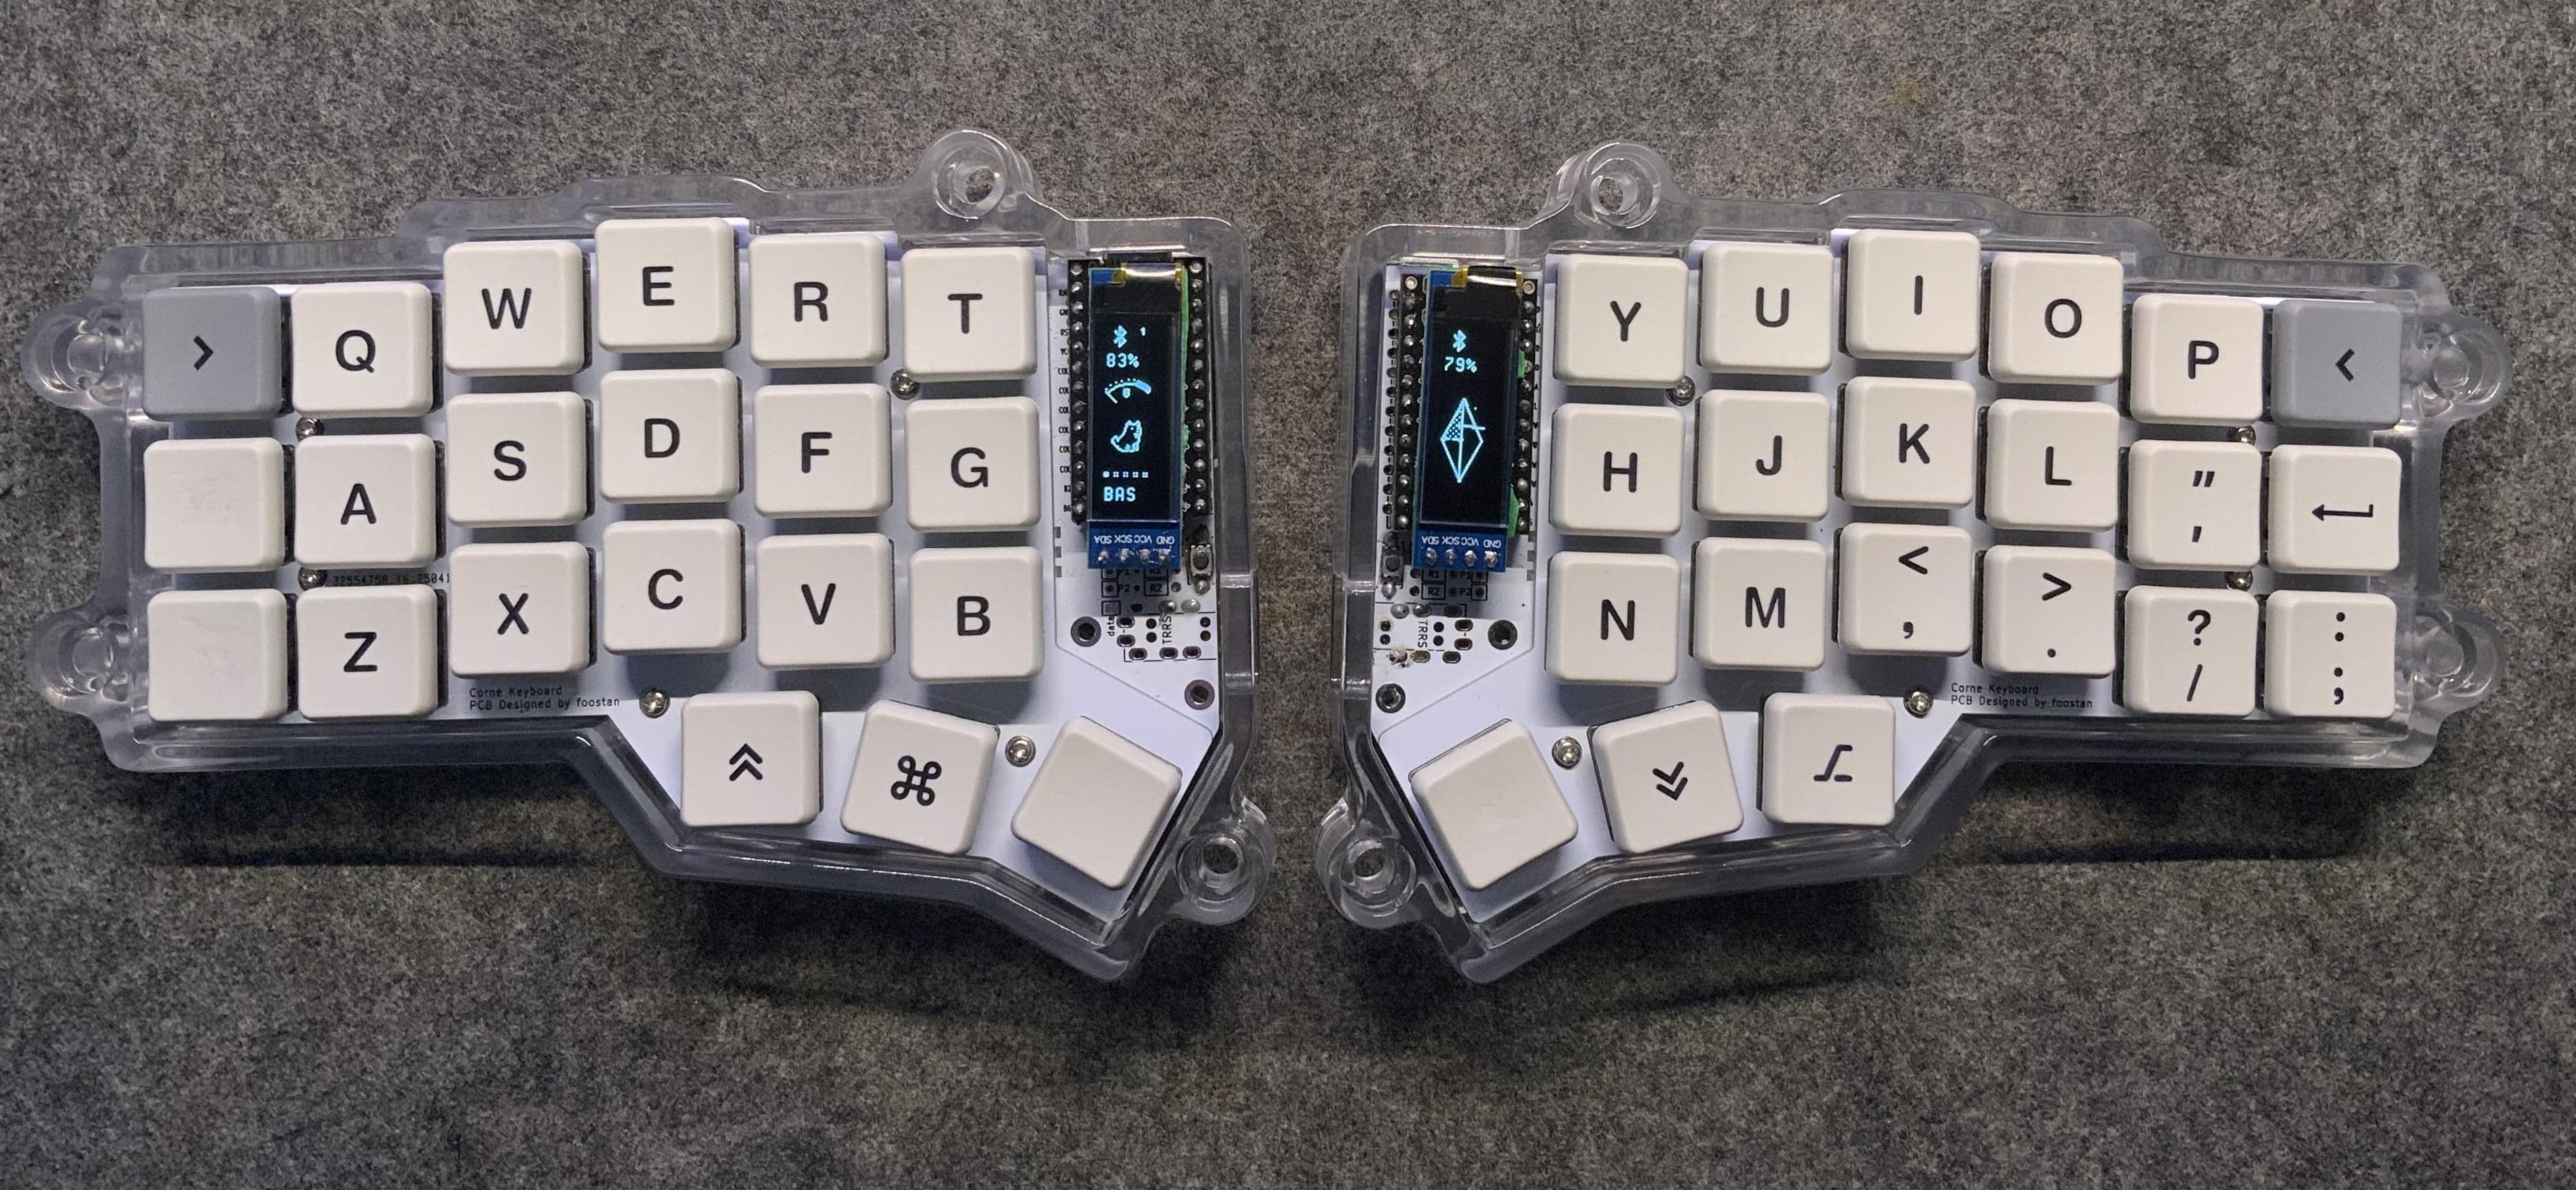
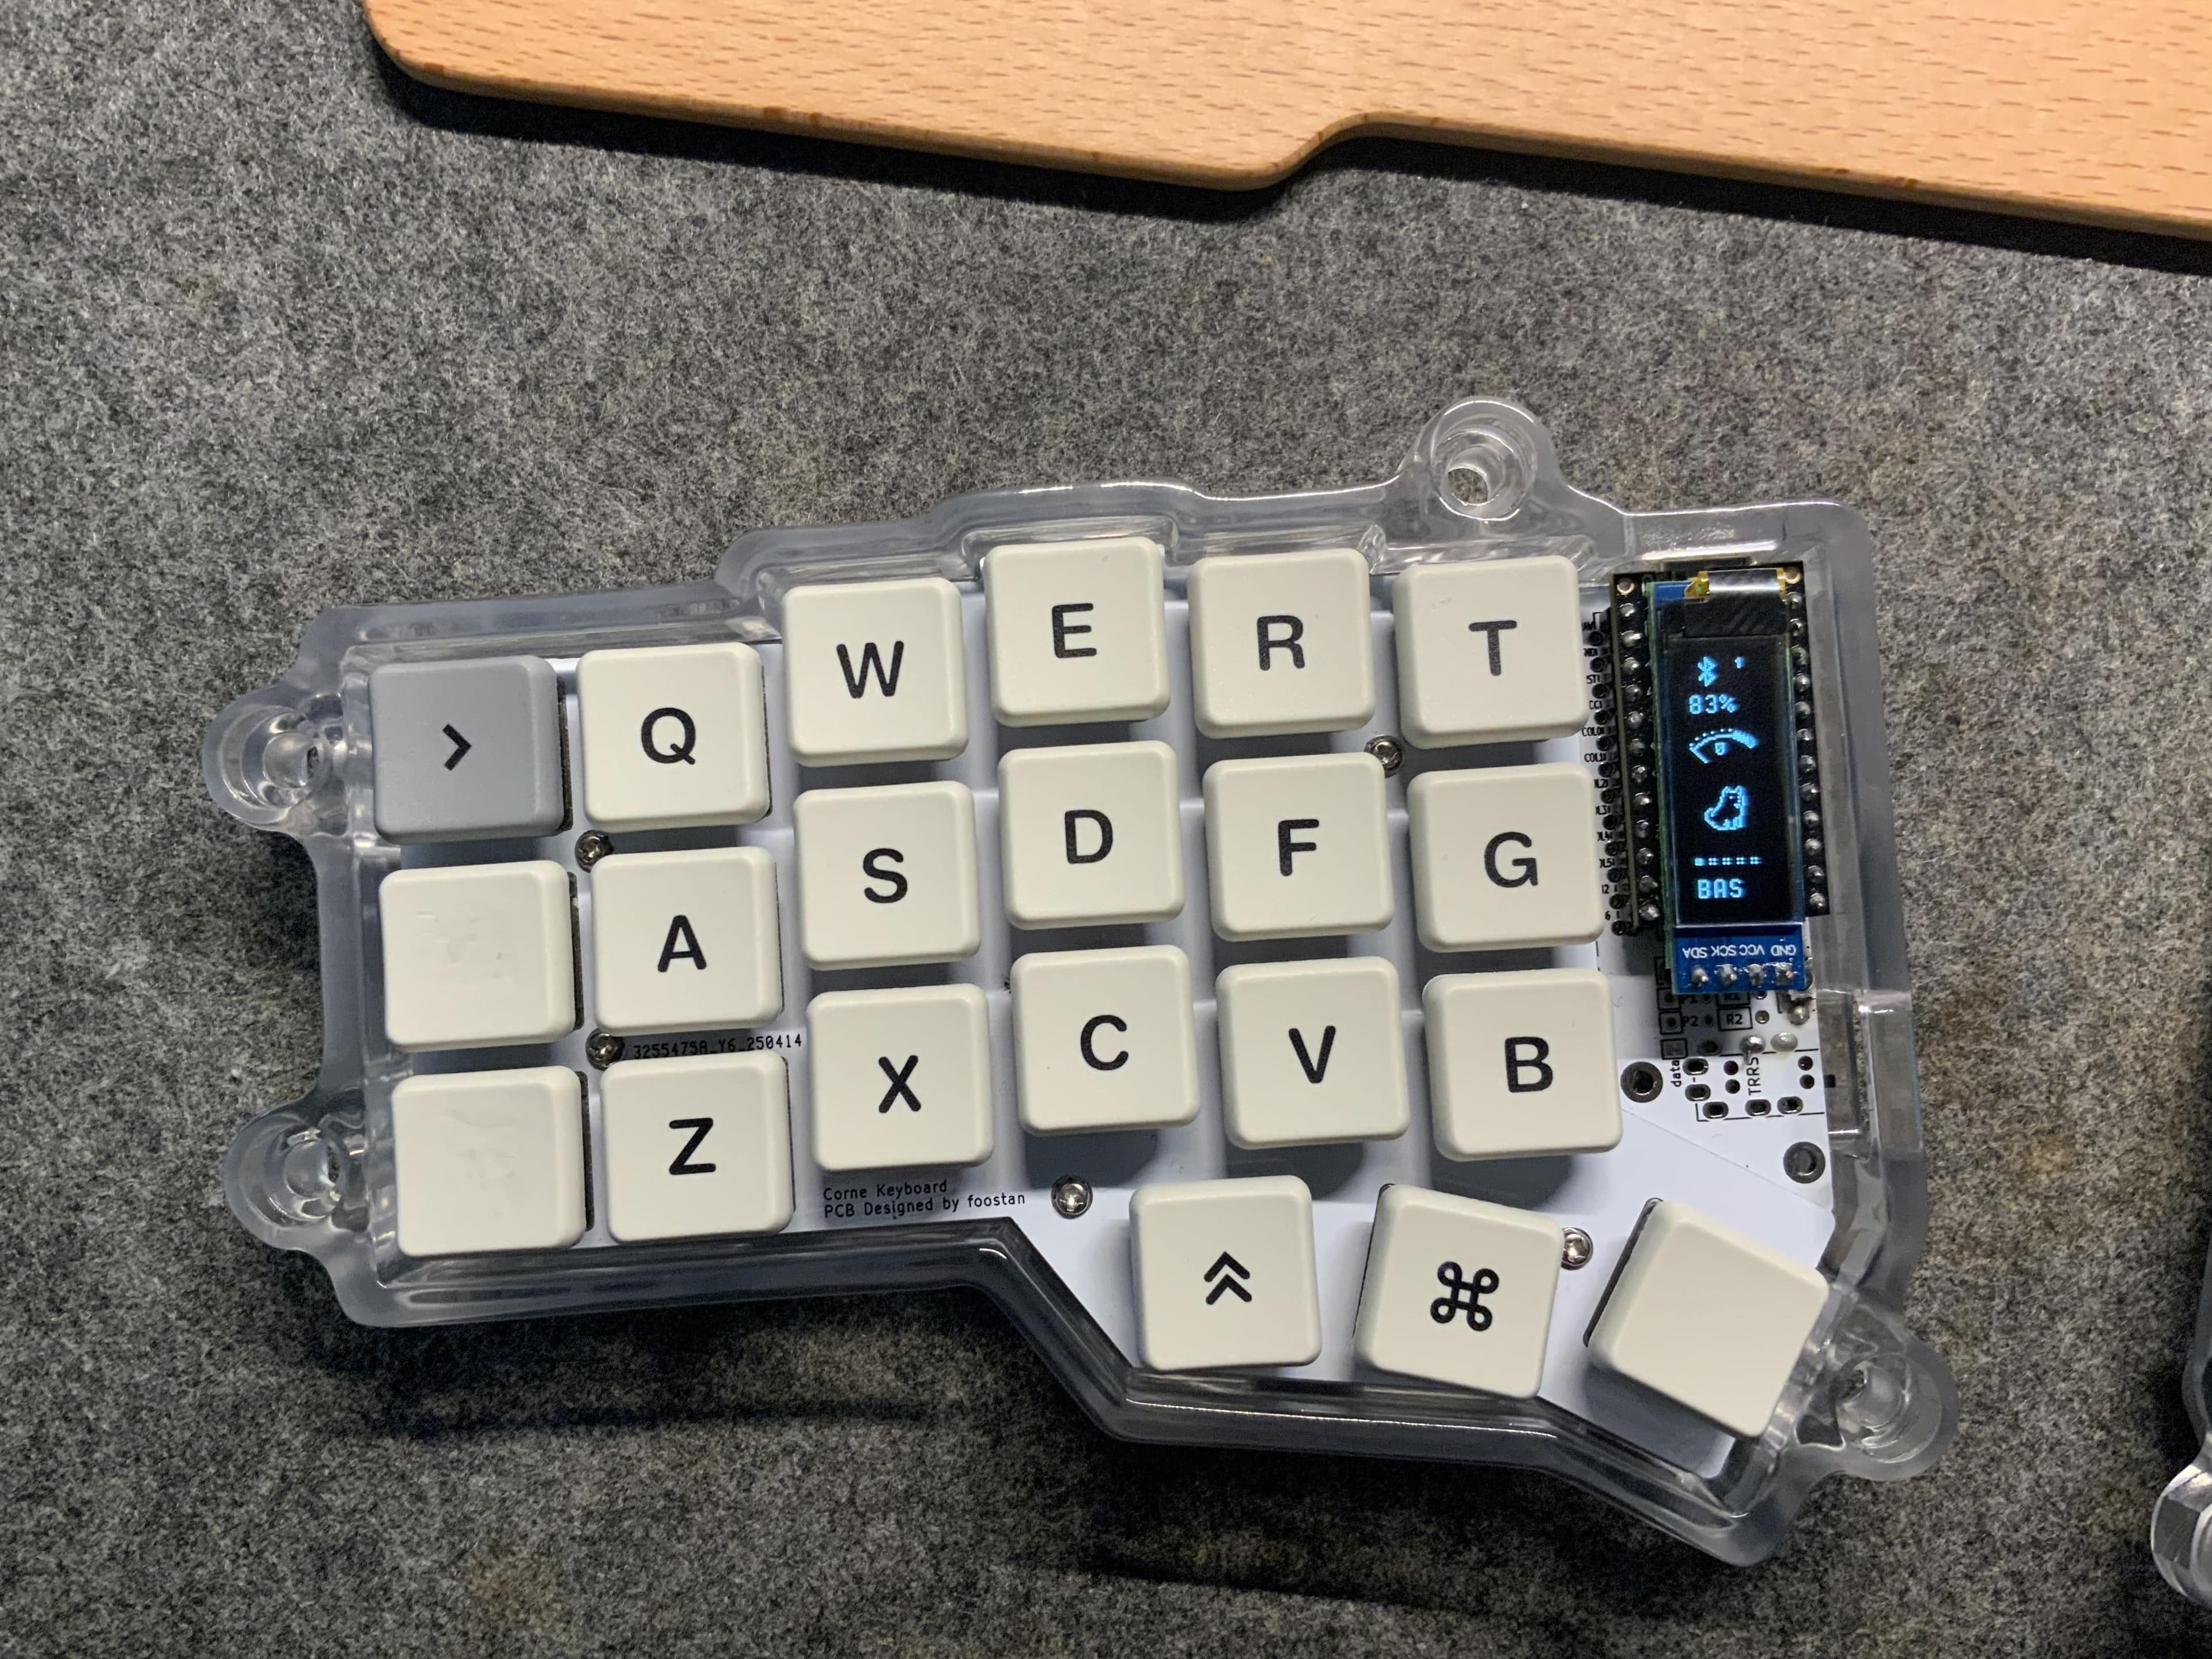
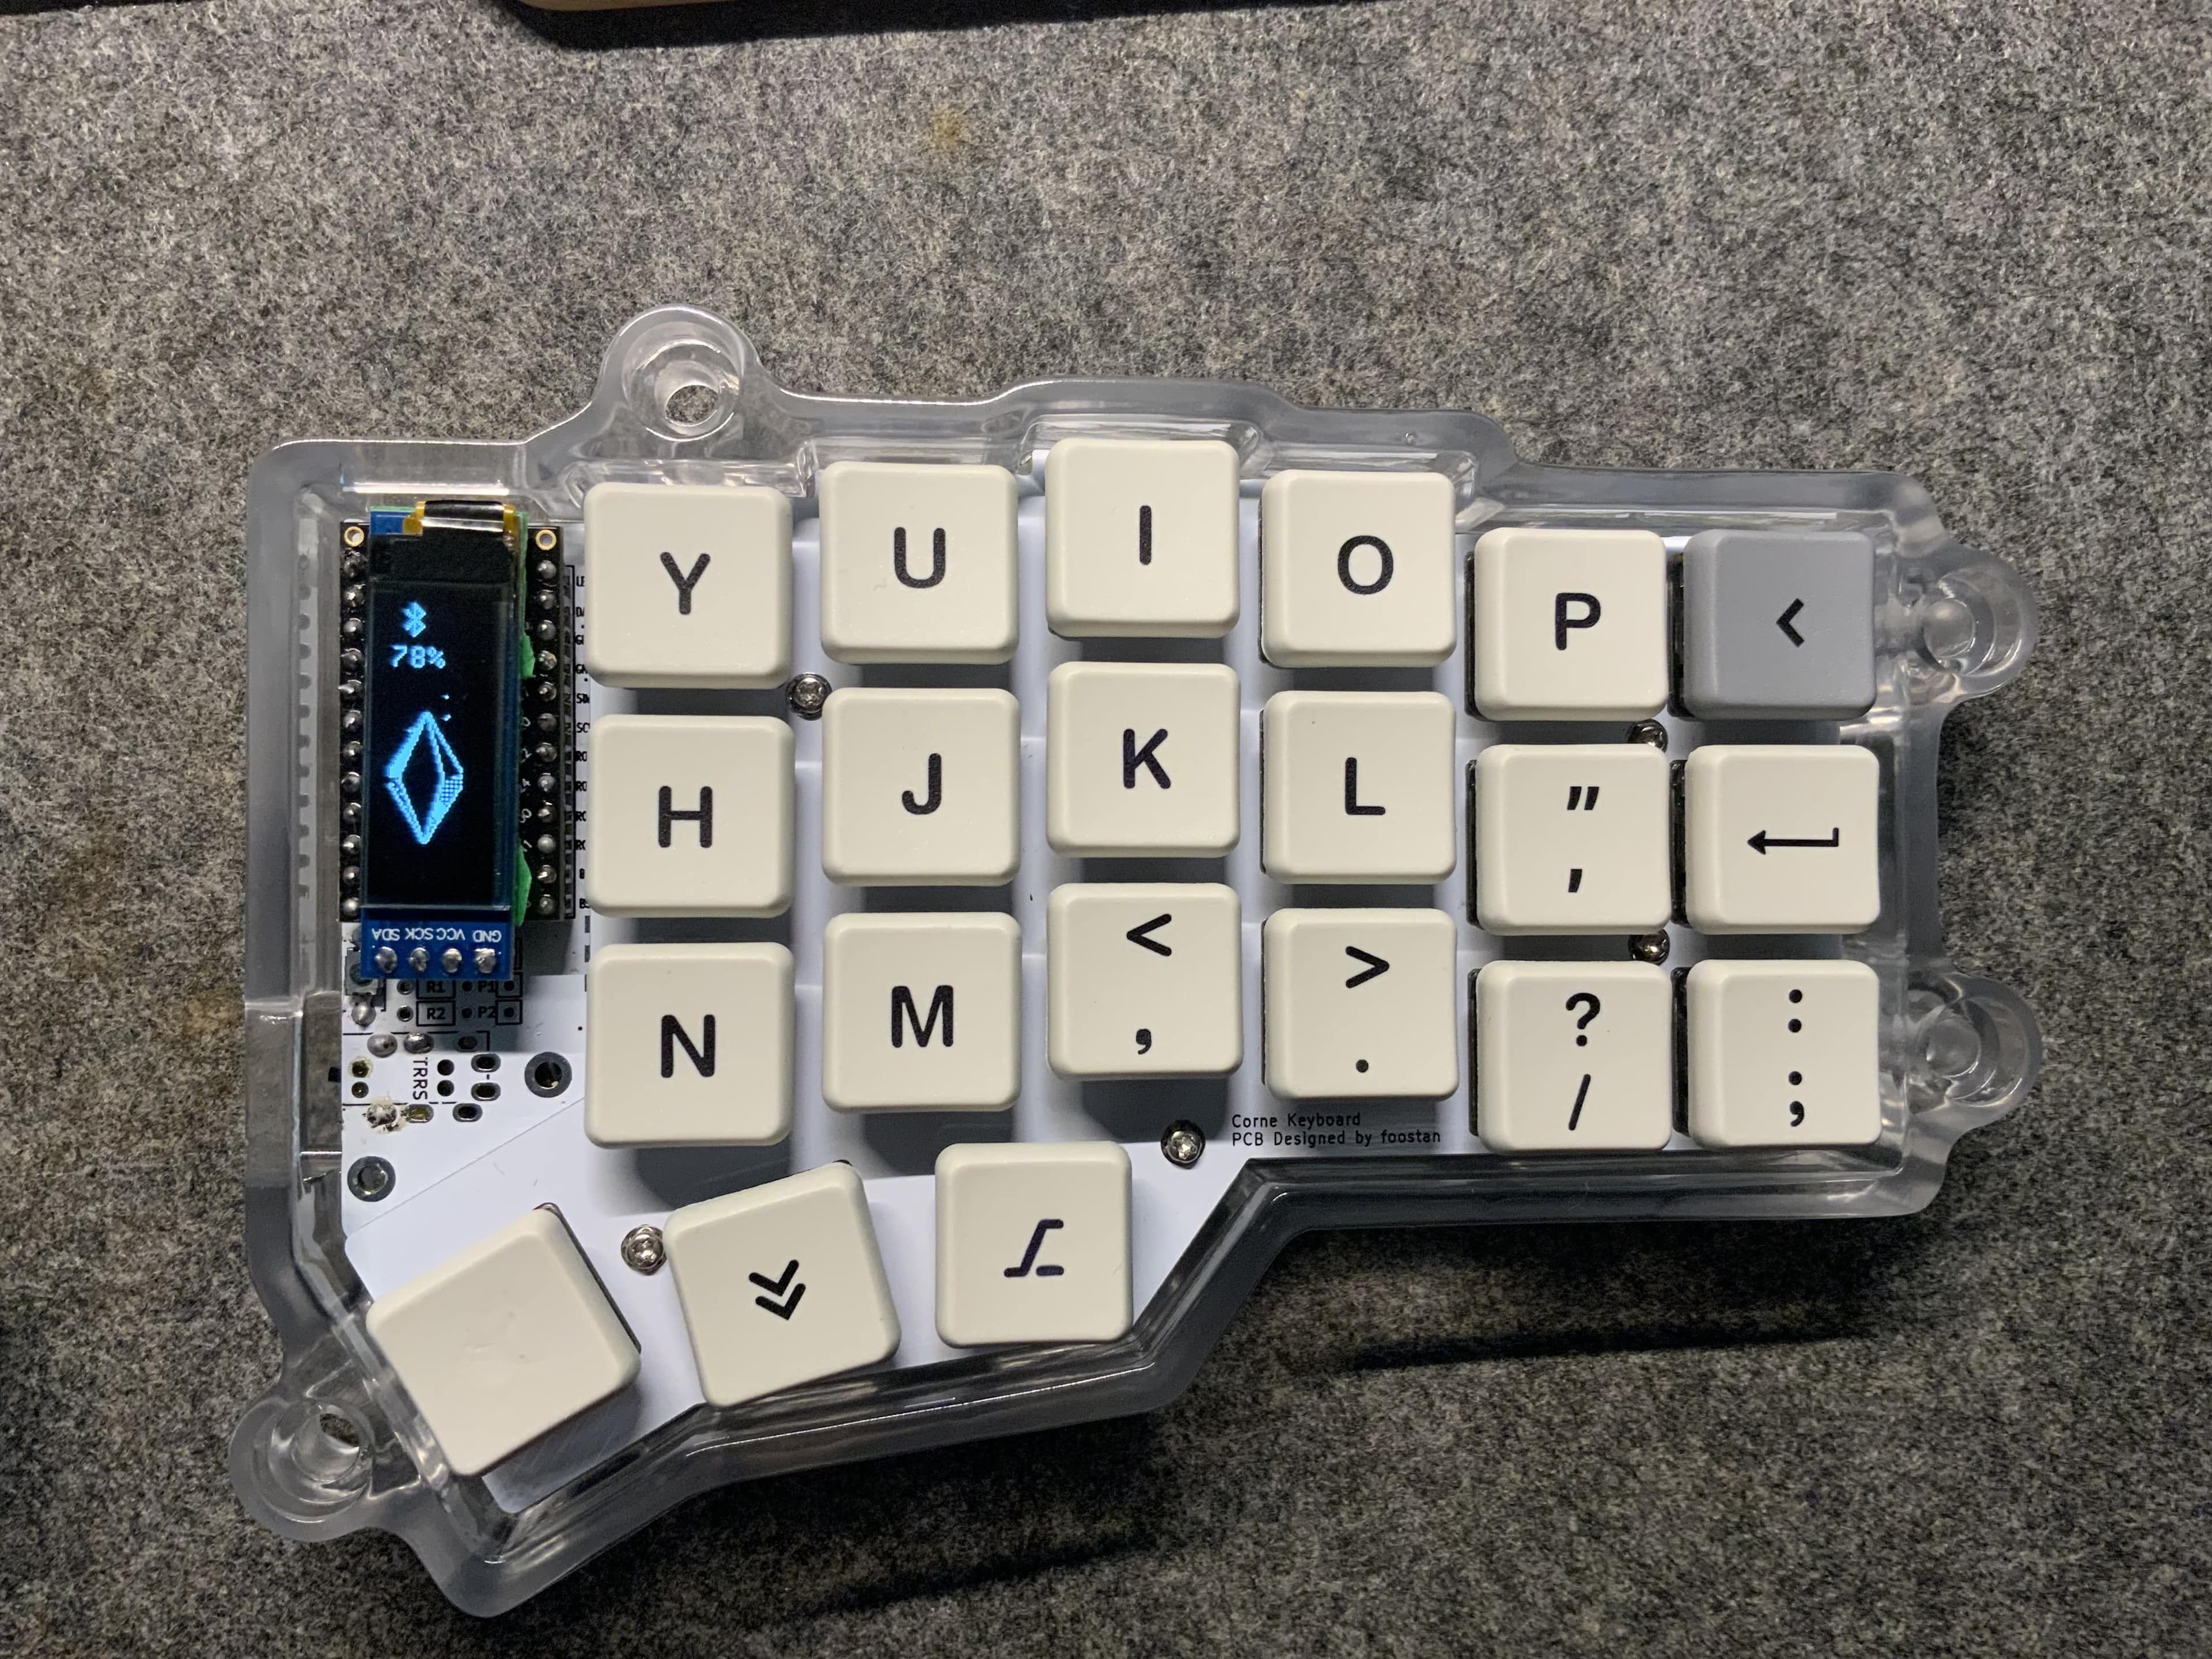
Overall, I'm really happy with how the keyboard looks and works.
Cost
- CAD $12 - PCB 5pc
- CAD $12 - PCB top plates 5pc
- CAD $38 - PCB manufactory delivery
- CAD $15.33 - Manufactory 3D case left
- CAD $15.33 - Manufactory 3D case right
- CAD $21.07 - UPS charges for delivery
- CAD $5.18 - OLED 2pc
- CAD $18.76 - Controllers 4pc
- CAD $3 - Reset Buttons 100pc
- CAD $5 - Standoffs, screws, nuts
- CAD $7.99 - RGB underglow LEDs 20pc
- CAD $2.18 - Diodes 1N4148 SOD-123 100pc
- CAD $3.55 - Pin headers 5pc
- CAD $3.41 - SMD on/off toggle switches 20pc
- CAD $11.09 - Batteries 200mah 2pc
- CAD $14.79 - Choc hotswap sockets 100pc
- CAD $71.99 - Kailh choc switches 90pc
- CAD $35.99 - Keycaps 60pc
The total cost was CAD $296.66, which covered almost everything for two keyboards (except batteries, OLEDs, case, and keycaps for the second one). I will have to spend CAD $50-$60 more to finish the second one if I want that. The total cost for one keyboard is about CAD $180.
You could buy a ready-made Corne for about the same price, but I think building it myself was absolutely worth it. I could have saved more by choosing Choc v2 switches and cheaper keycaps, but since I used hotswap sockets, I can always upgrade to Choc v2 switches later.
Flashing ZMK
Let's assume you're already familiar with QMK/ZMK and understand how layers, combos, macros, and behaviors work. If not, I recommend checking out some YouTube tutorials first.
Now for the fun part — firmware! One of the main reasons to build a custom keyboard is to use custom firmware: QMK for wired or ZMK for wireless setups.
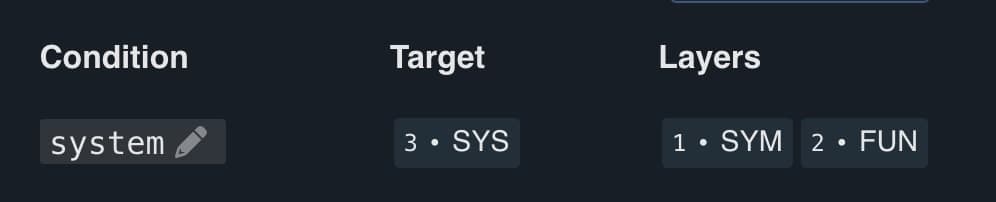
I use 4 layers. The default configuration has 3, so to add an extra layer, I used ZMK's conditional layer feature: when I activate both layer 1 and layer 2 at the same time, it triggers layer 3.
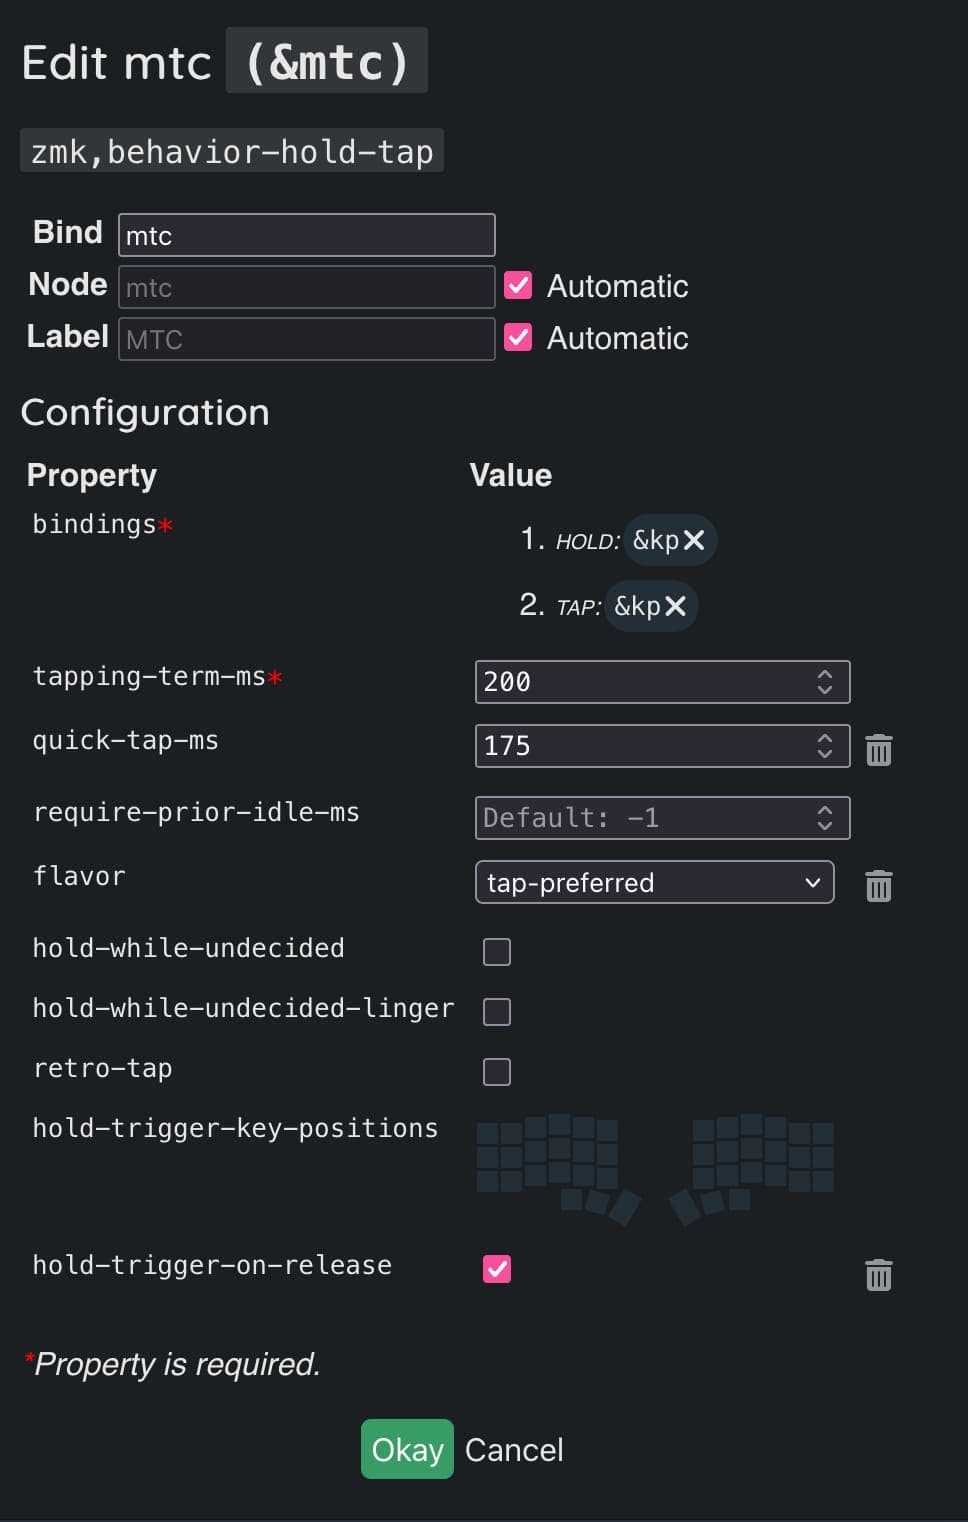
I also created a custom behavior, a bit different from the default mod/tap. This lets me use a key in two ways: if I press and release it within 175ms, it acts as a normal key; if I hold it longer, it acts differently. For example, tapping CAPS changes the input source on my laptop, but holding it acts as Shift.
I've set up a few macros that I can trigger with a single key. The three macros below are for window management tools like Rectangle or Raycast. They're pretty specific to my setup, so I won't go into detail here.
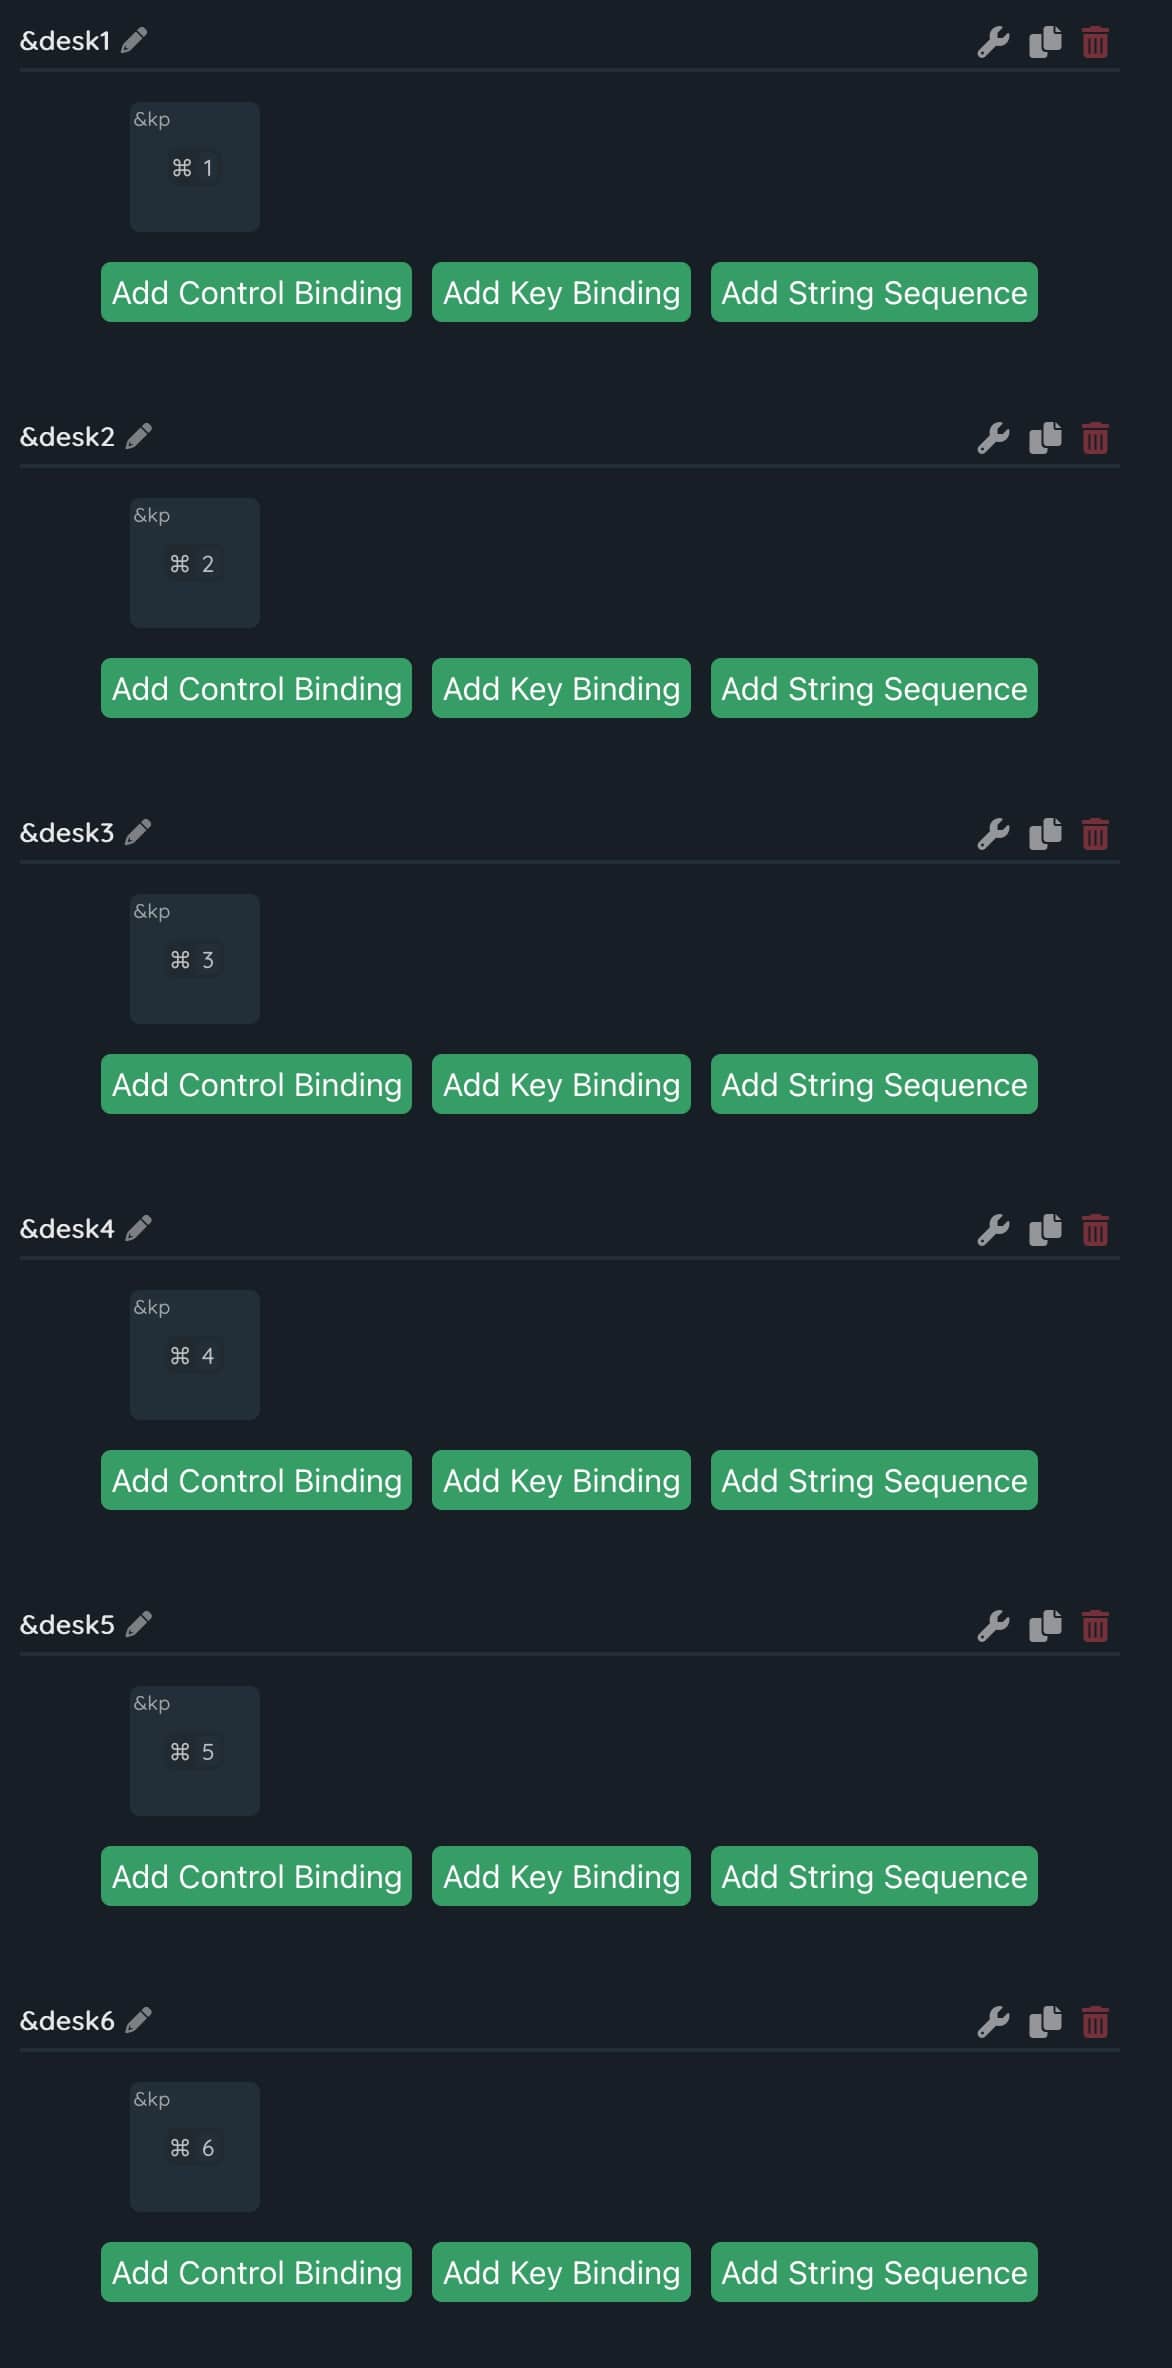
These macros switch workspaces on my Mac.
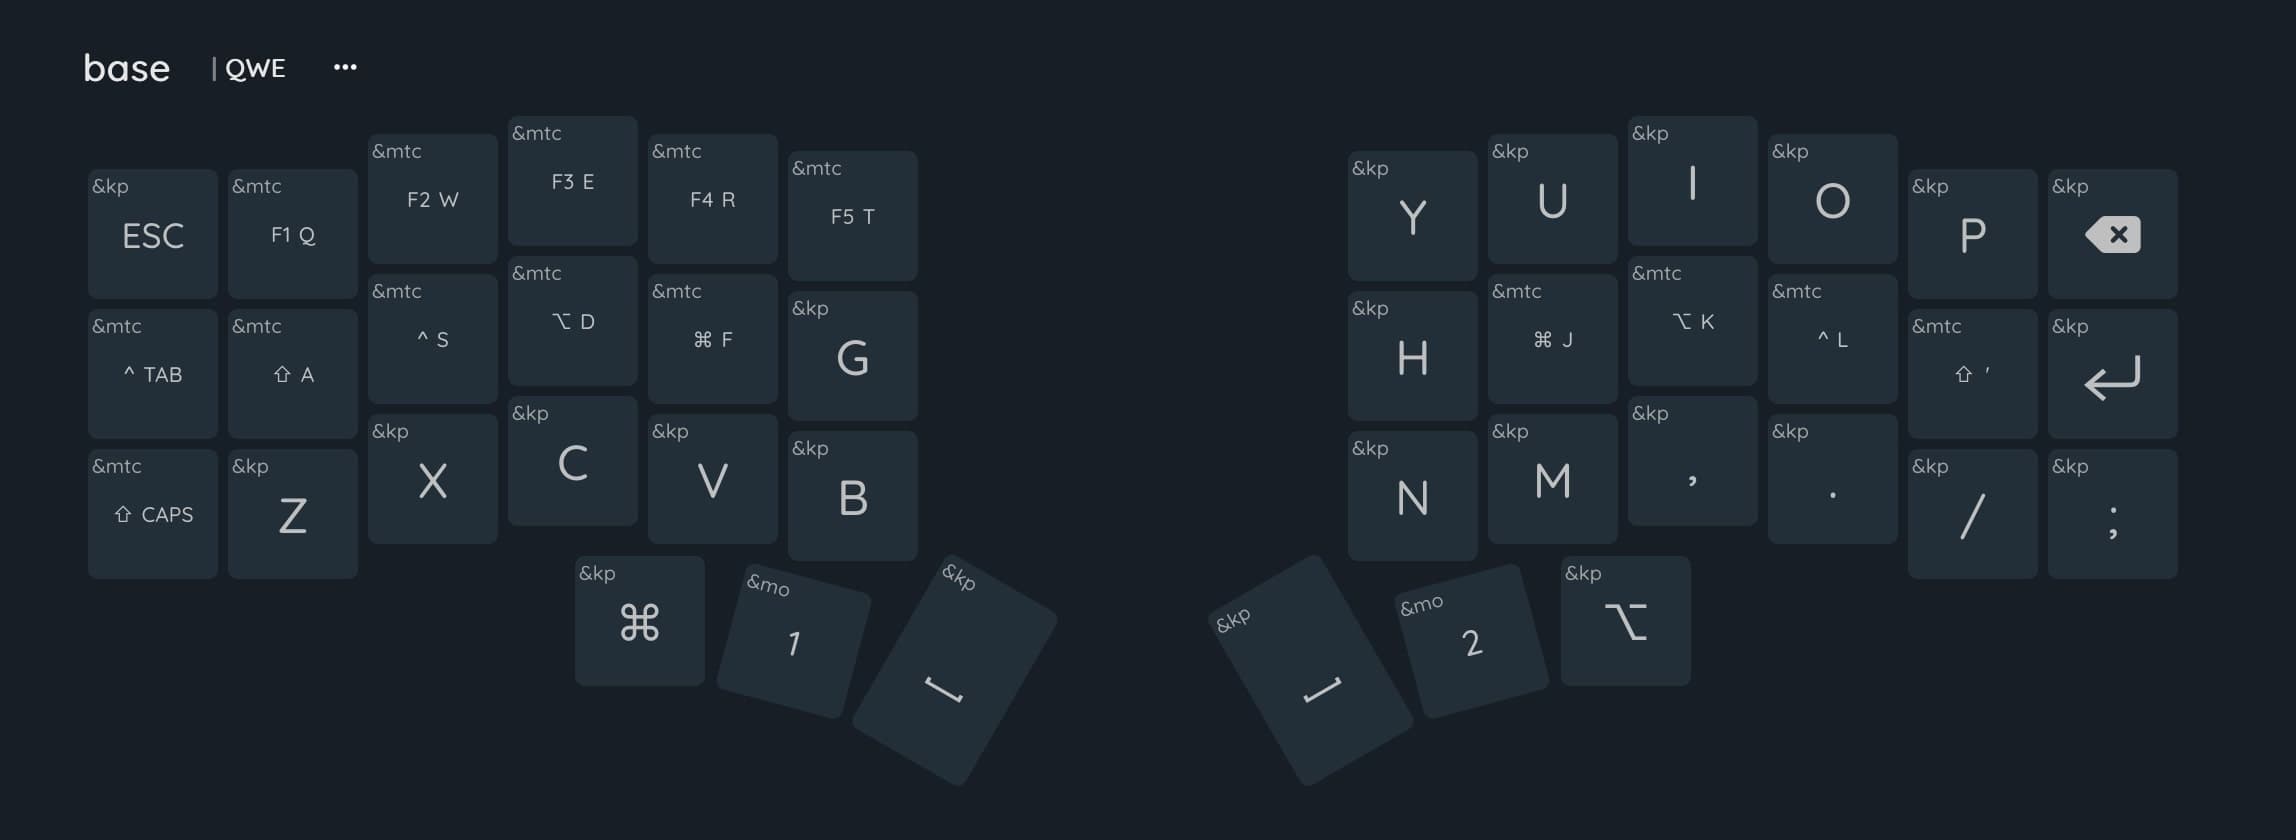
Now, about the layers: the base layer has letters, along with some frequently used modifiers and special keys.
For the keys Q, W, E, R, T, Tab and CAPS, I use the custom &mtc behavior I mentioned earlier. This lets each key act differently depending on whether I tap or hold it.
TAP: Q - HOLD: F1
TAP: W - HOLD: F2
TAP: E - HOLD: F3
TAP: R - HOLD: F4
TAP: T - HOLD: F5
TAP: Tab - HOLD: CTRL
TAP: CAPS - HOLD: SHIFT
I've also been experimenting with a technique called “home row mods.” Here's a great article explaining it: https://precondition.github.io/home-row-mods#what-are-home-row-mods
I use the &mtc behavior for the home row keys: A, S, D, F and J, K, L, ;. When held, they act as SHIFT, CTRL, OPTION and SUPER. I'm still getting used to it and not sure if I'll stick with it, but it's fun to try. The 1 and 2 keys activate the upper and lower layers, respectively.
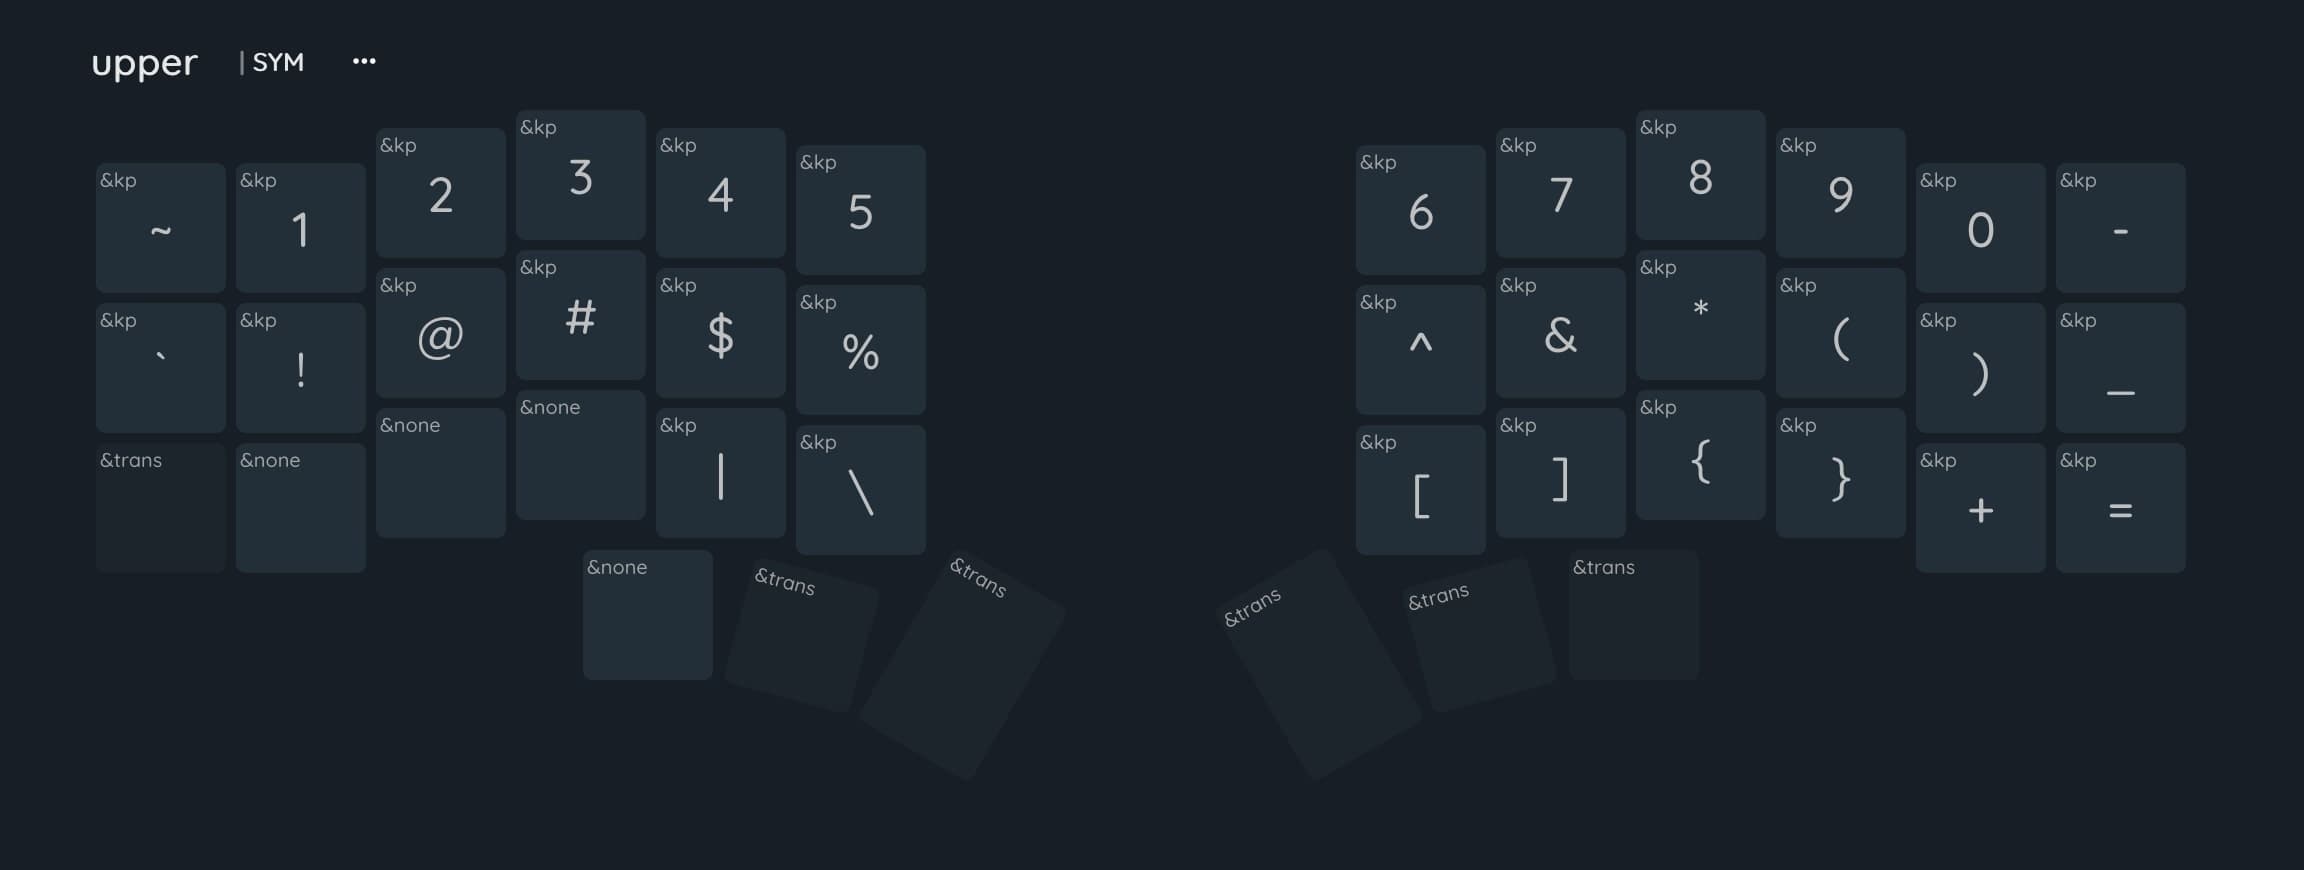
The upper layer is for special characters and numbers. It activates when I hold the 1 key on the left side of the keyboard (see the base layer for reference). It also supports SHIFT, so I can type an exclamation mark by pressing 1 + A, or 1 + SHIFT + Q. The same logic applies to other characters.
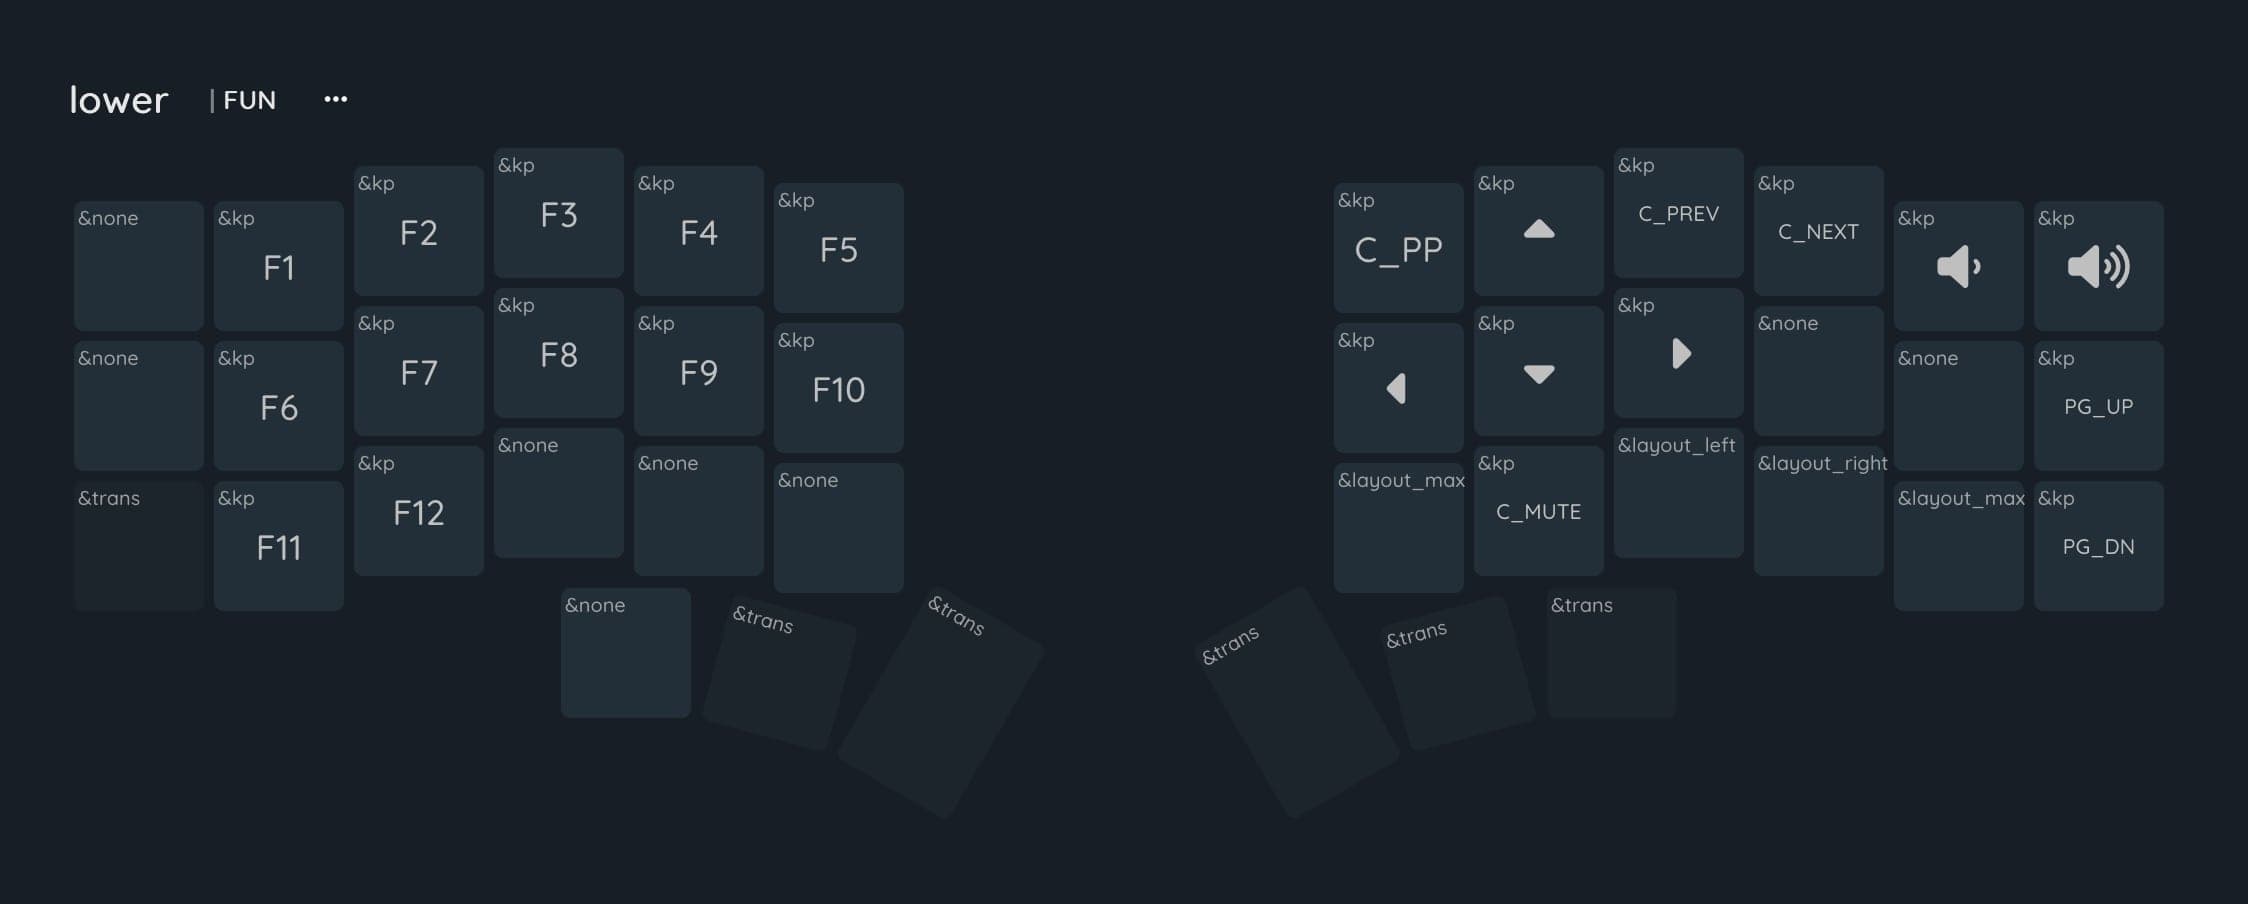
The lower layer is for function keys, arrow keys, and some macros. It activates when I hold the 2 key on the right side of the keyboard (again, see the base layer for reference).
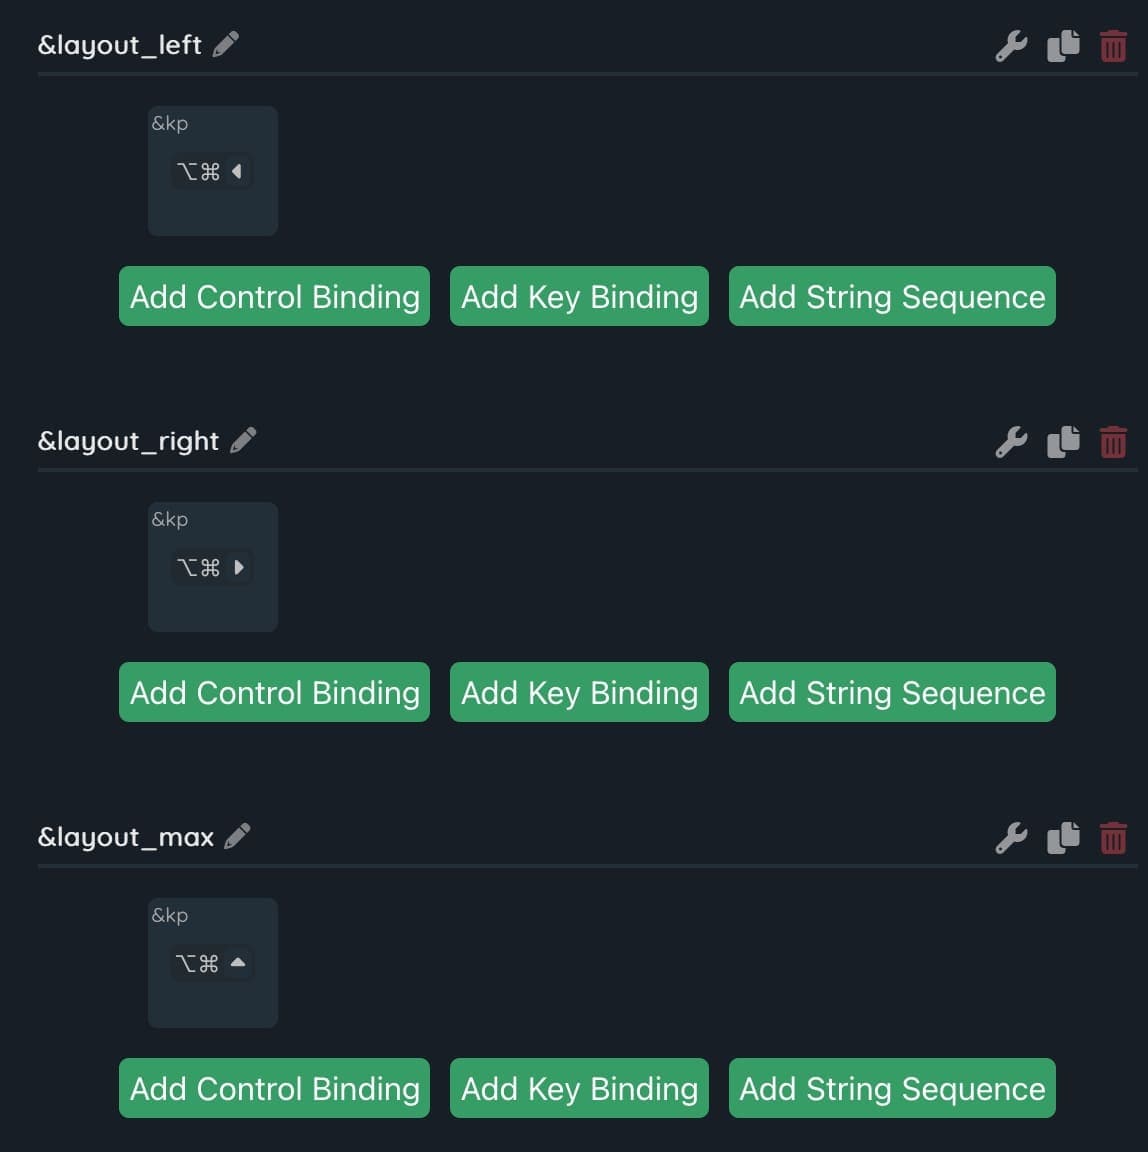
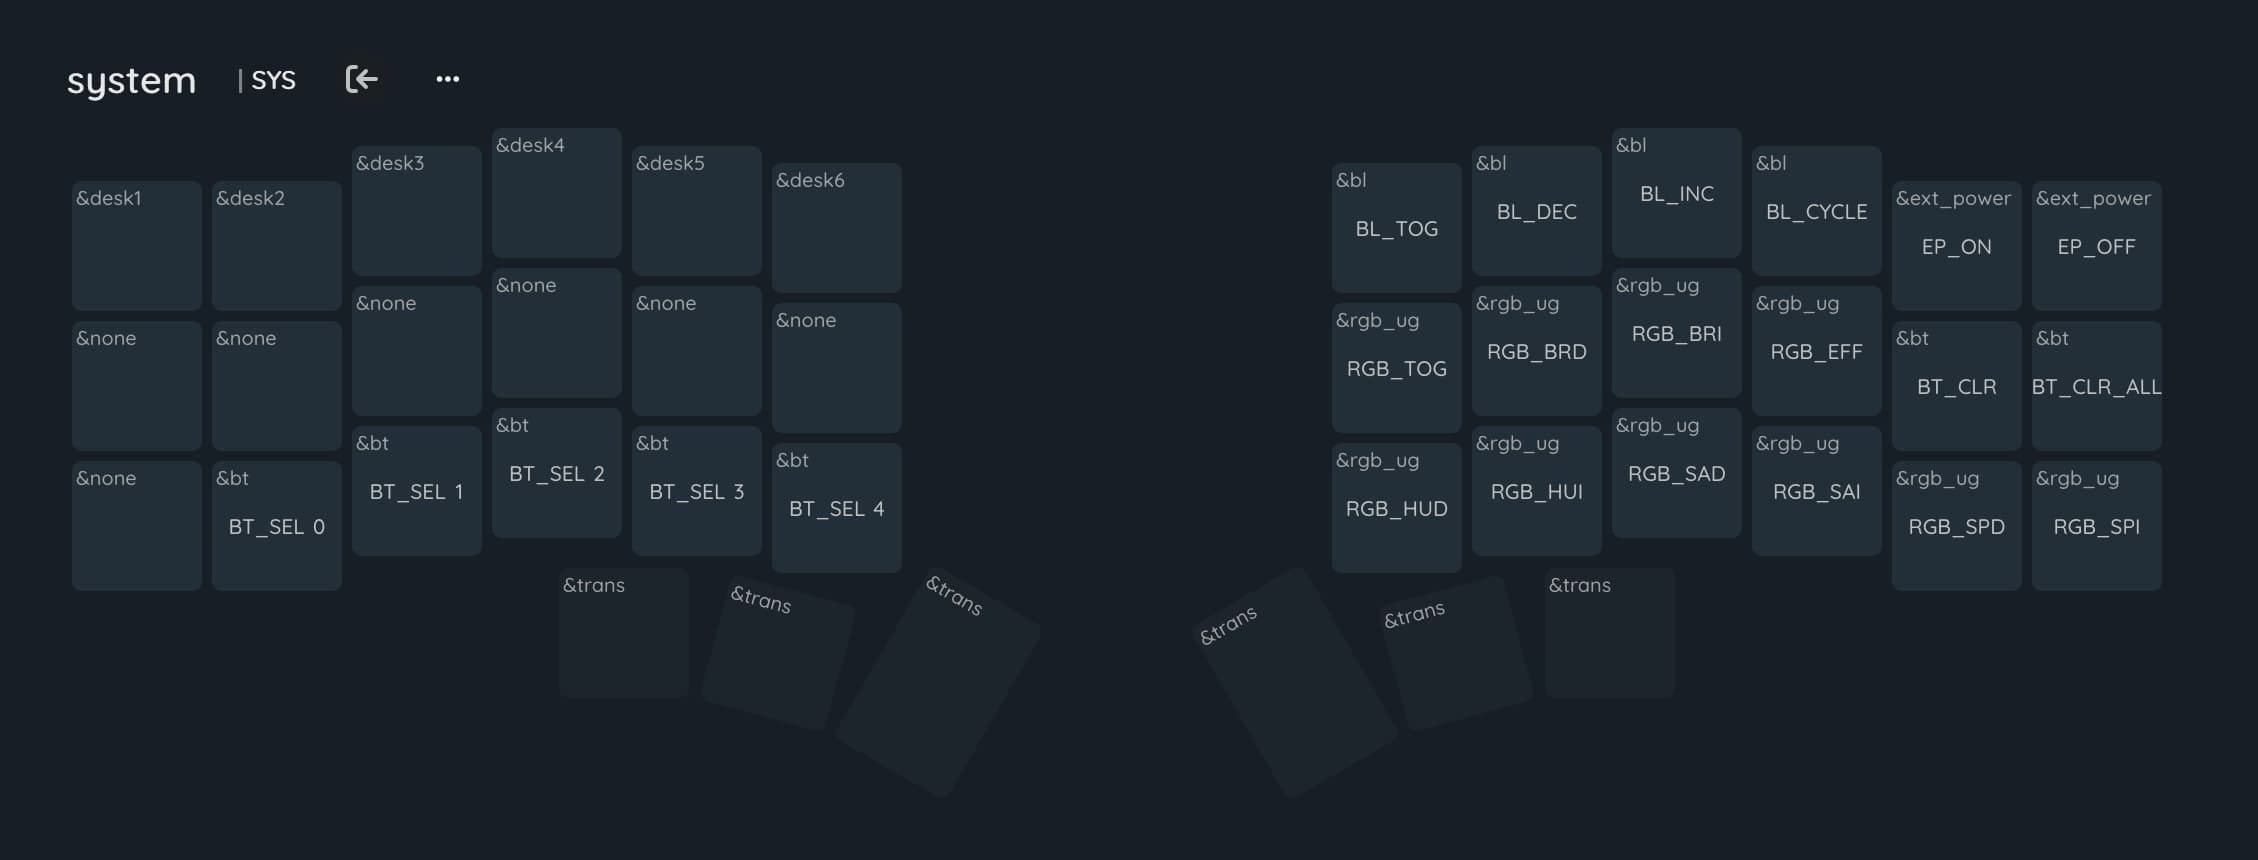
The system layer is for managing keyboard hardware — things like Bluetooth, switching channels for different devices, RGB settings, and more. I also use it for workspace-switching macros. For example, 1 + 2 + ESC jumps to the first workspace, and 1 + 2 + W jumps to the third.
I'm pretty happy with the setup so far, but I still need to get used to the new layout. I'm experimenting a lot, and my typing speed is still pretty low, but I knew it would take time to adjust.
OLED
As for the OLED displays. By default they look ugly tho quite functional.
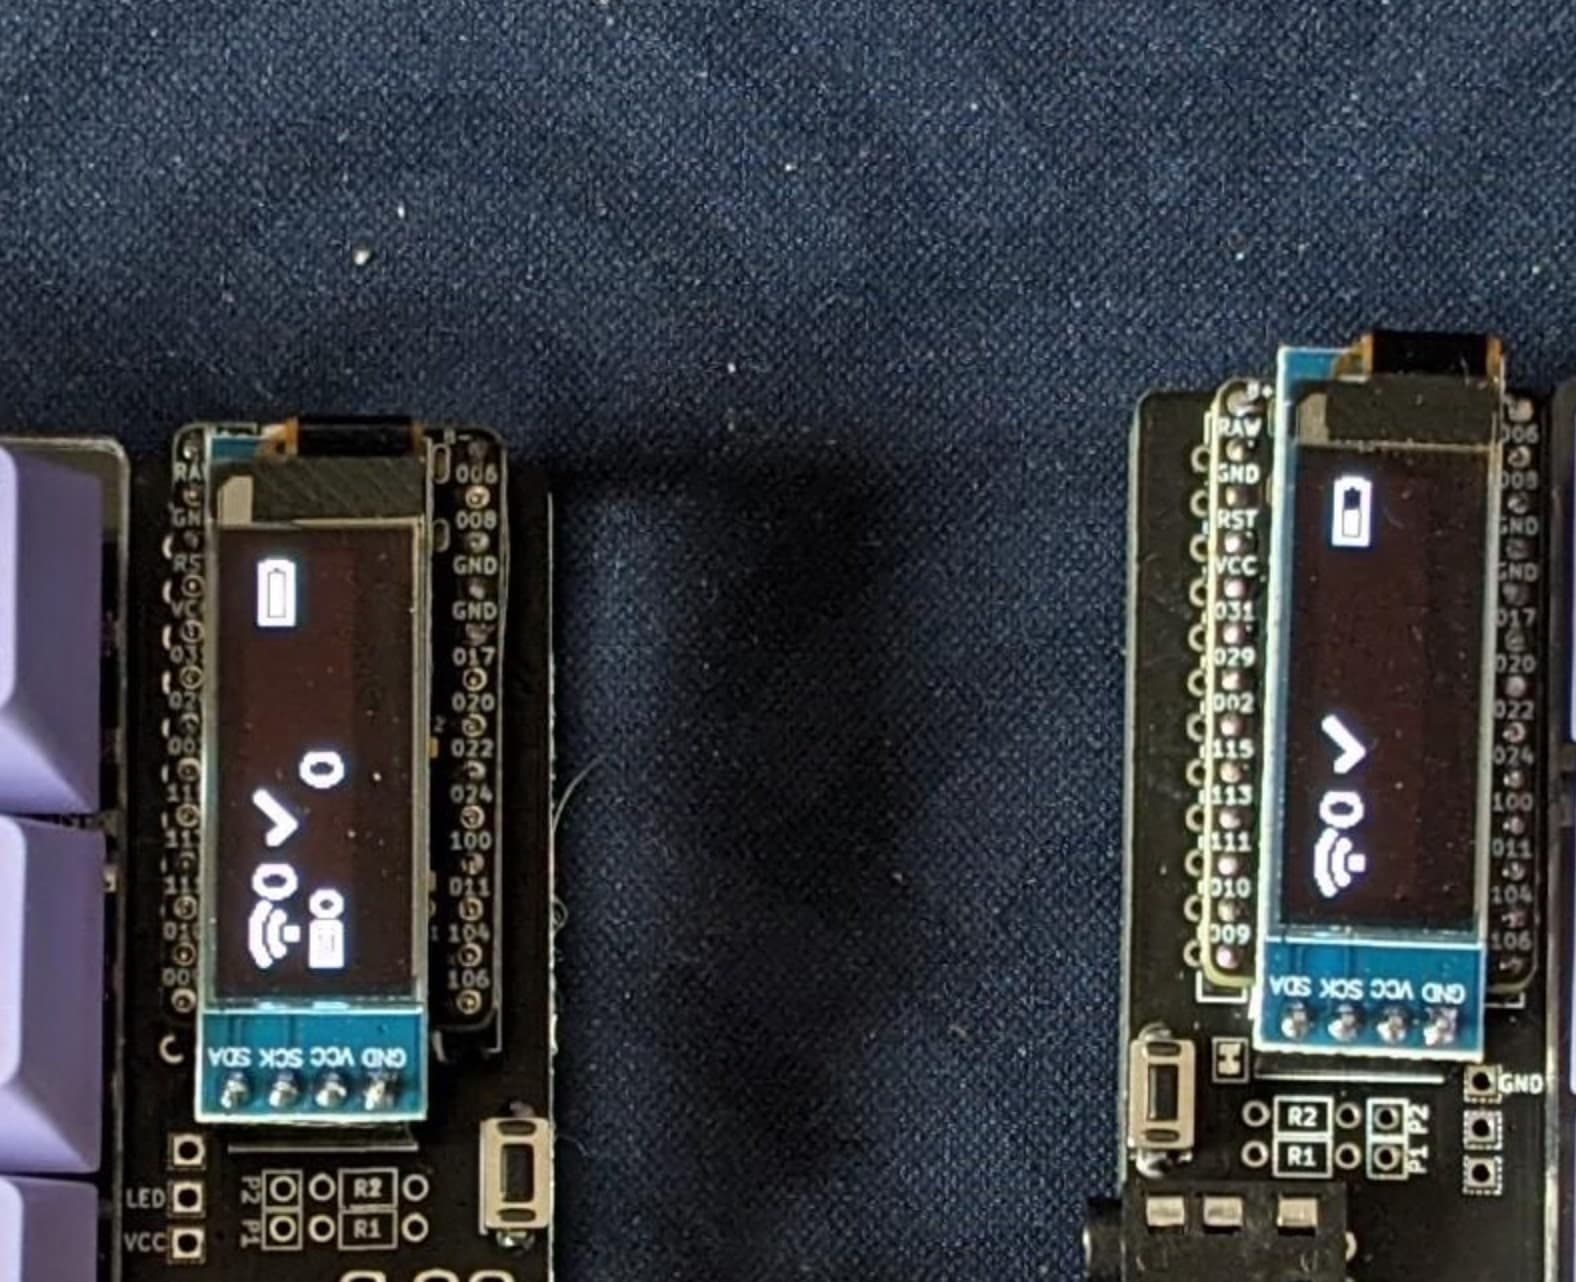
But I found a repo that turn OLEDs into something really cool with quite nice widgets. It' already integrated into my firmware, but here is the link to the project for reference: https://github.com/mctechnology17/zmk-nice-oled

Anyway, here's my ZMK config for reference: https://github.com/4ban/zmk-config-corne
I'm still experimenting, so the configuration in the repo might look quite different from what you see in the screenshots here.